
Add an Email Subscription Field to your website to allow your visitors to subscribe and receive emails from you.
To use the mailing list tool:
In the Website Editor, add an Email Subscription Field to your Footer, your Homepage Call-to-Action, or your Promo Page.
Go to your website Dashboard.
Under Activities, click Mailing List.
Click Send New Message to create a new mailing message
Follow the steps to set your template, content, and email settings
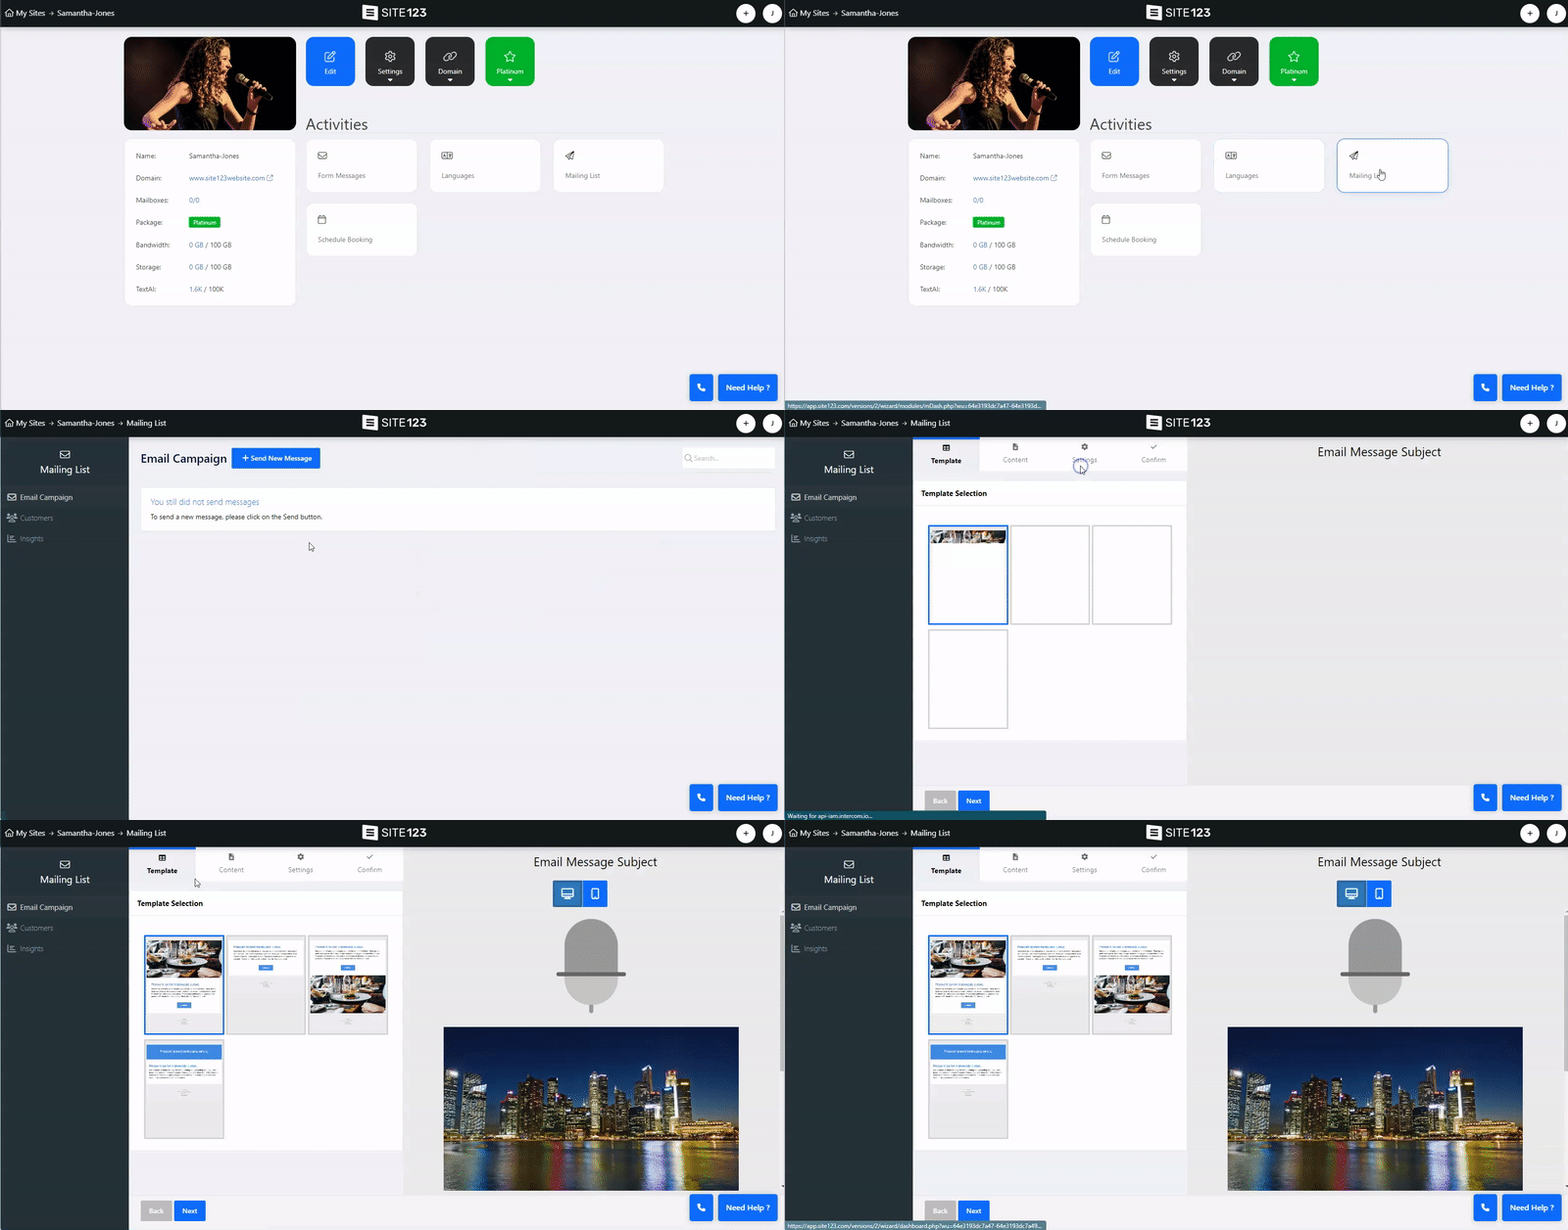
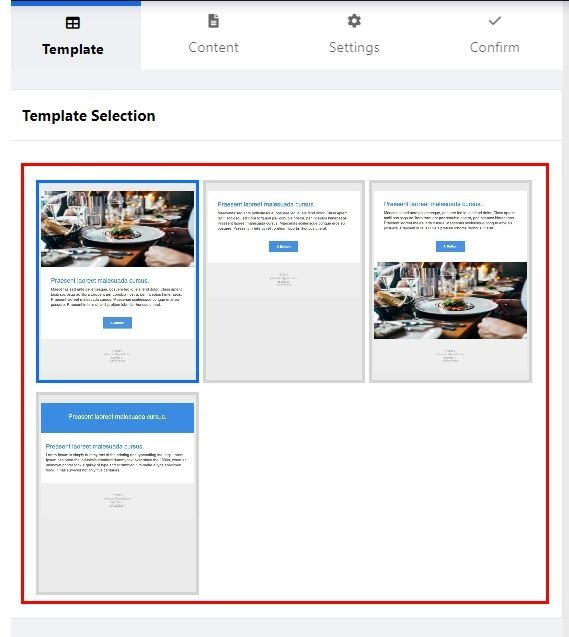
Choose from two mailing list templates from Template Selection and click Next.
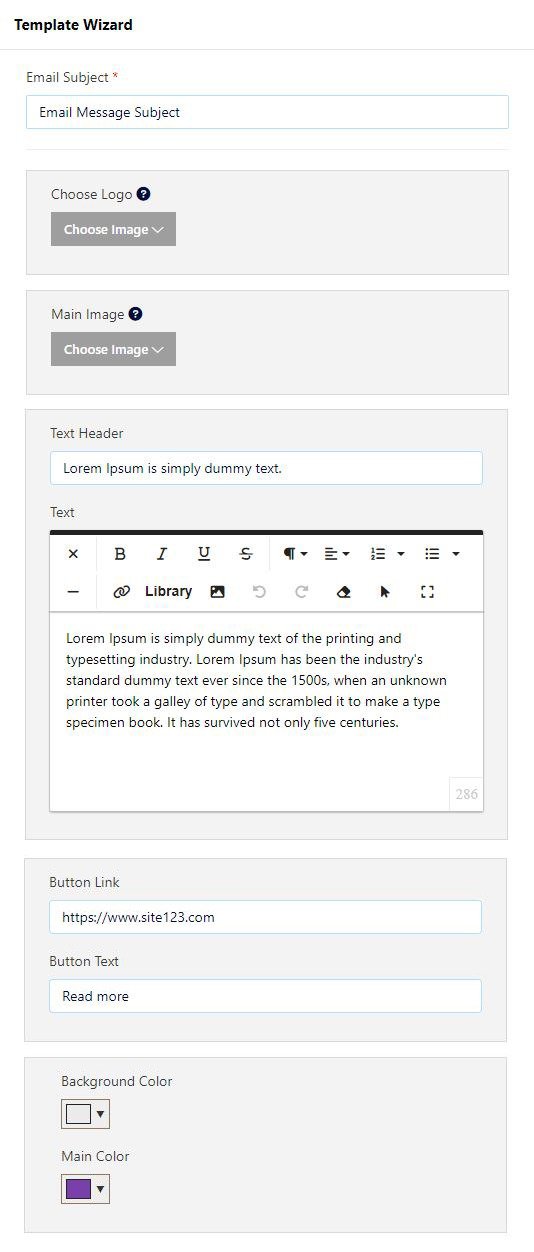
Enter the Email Subject - The subject will be the Email title when arriving at your subscriber's email address.
Choose Logo and Main Image - upload a Logo or an Image or use the Image Library. You can also use images from external sources such as Facebook, Google Drive, and more.
Text Header - Set the text Title
Text - Add your Text Content (read about the Text Editor Tool)
Button Link - Add a link to the Email Campaign button. Use this option to direct your subscribers to your website or to a specific section in it.
Button Text - Set the Button Text' for example, Ream More
Background Color - Set the email background color.
Main Color - Set the color of your content title and button
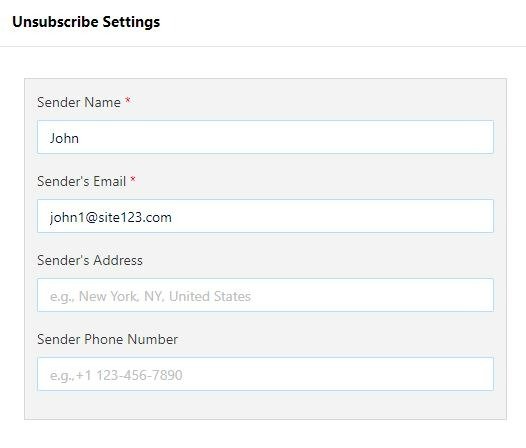
Sender Name
Sender's Email
Sender's Address
Sender Phone Number
Once done editing these settings, Click Next.
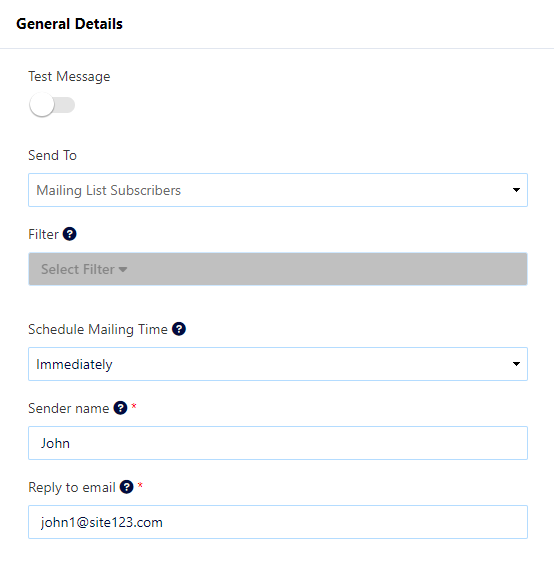
Set your message to be sent as a test
Schedule the send time
Set the sender's name
Reply to the email.
In your Customer Tab, you can view all of your subscribed customers. You can Manage customer information, add new customers, and more. Read more about the Customer Tab.
Monitor and analyze your mailing list activity and filter the data by periods.