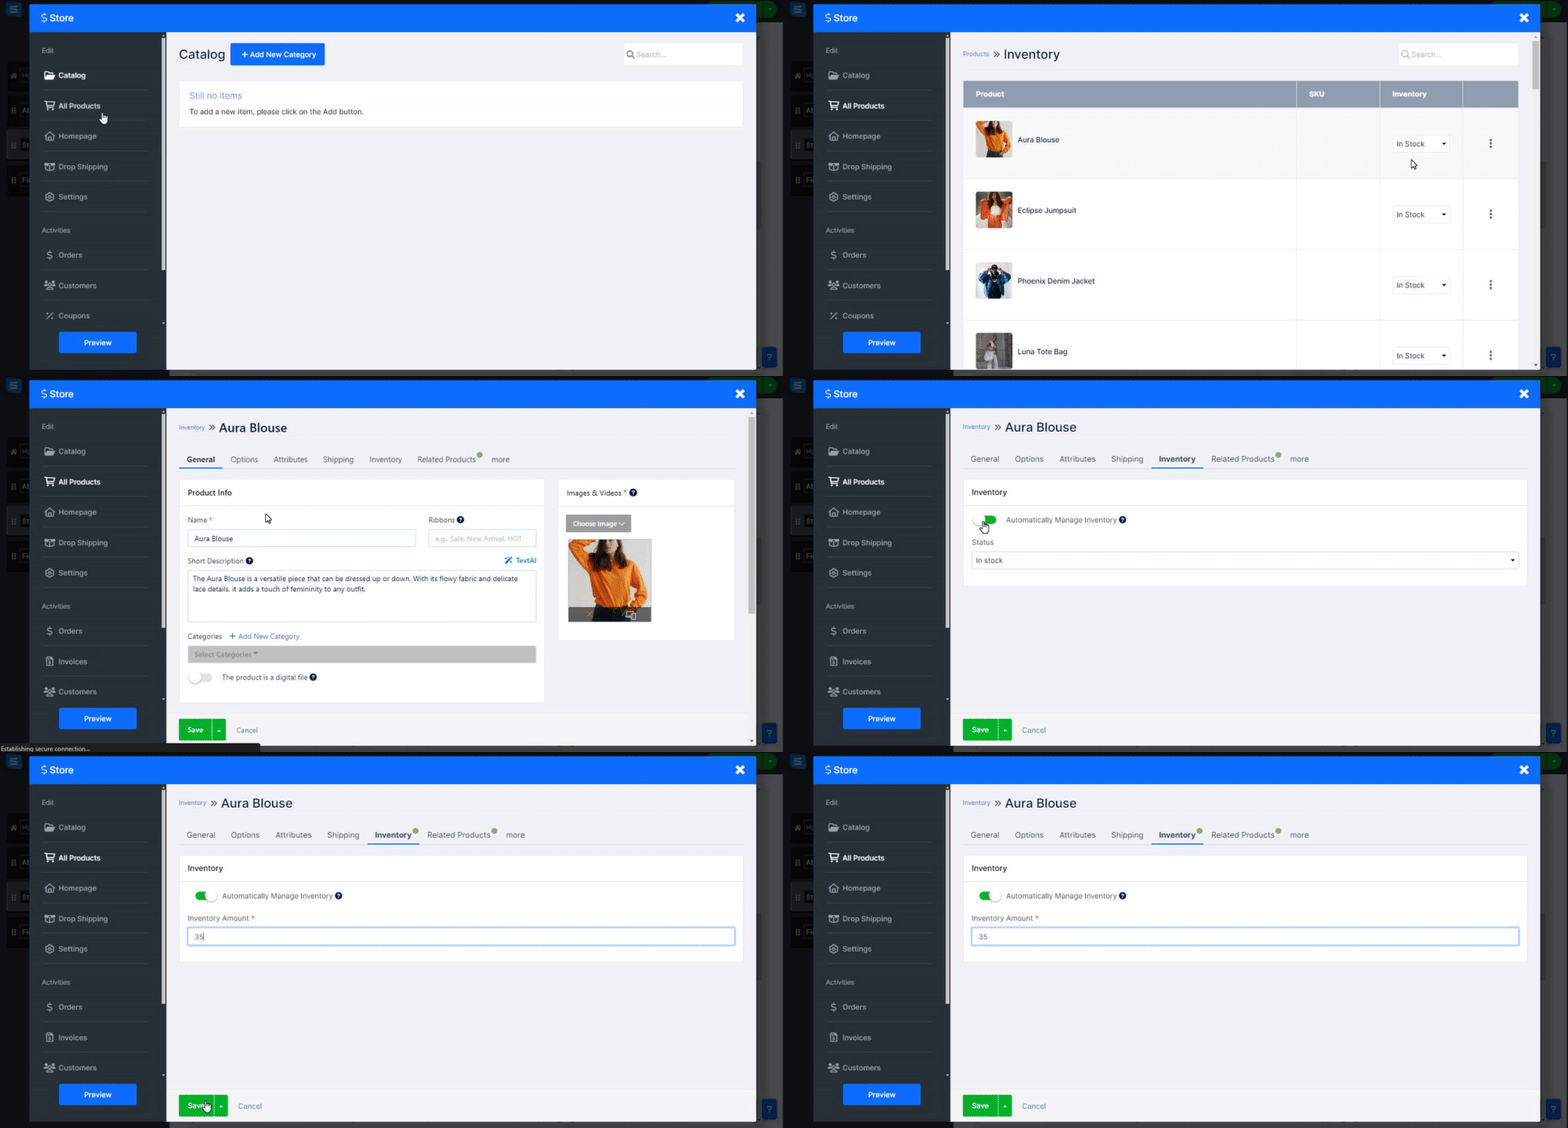
Manage E-commerce product variants and inventory to make sure your customers know whether your products are in or out of stock and to show different variants of the items you provide. In the Website Editor, click Pages, Find the E-commerce (Store) page, and click the Edit button.
From the All Product tab, click the Inventory Button to directly edit your product's availability. Another method is to edit a specific product and manage the product inventory under the Inventory Tab
Automatically Manage Inventory: In your product settings under the Inventory Tab Enable the Automatically Manage Inventory option and set the Inventory Amount of the product. The system will automatically manage the inventory and will alert you when it's close to being out of stock.
Set the option OFF to manually manage the inventory and choose between in or out-of-stock.
👉 Note: Updating your inventory will automatically reflect real-time product availability without needing to publish changes on your website, providing your users with an up-to-date representation of your products.
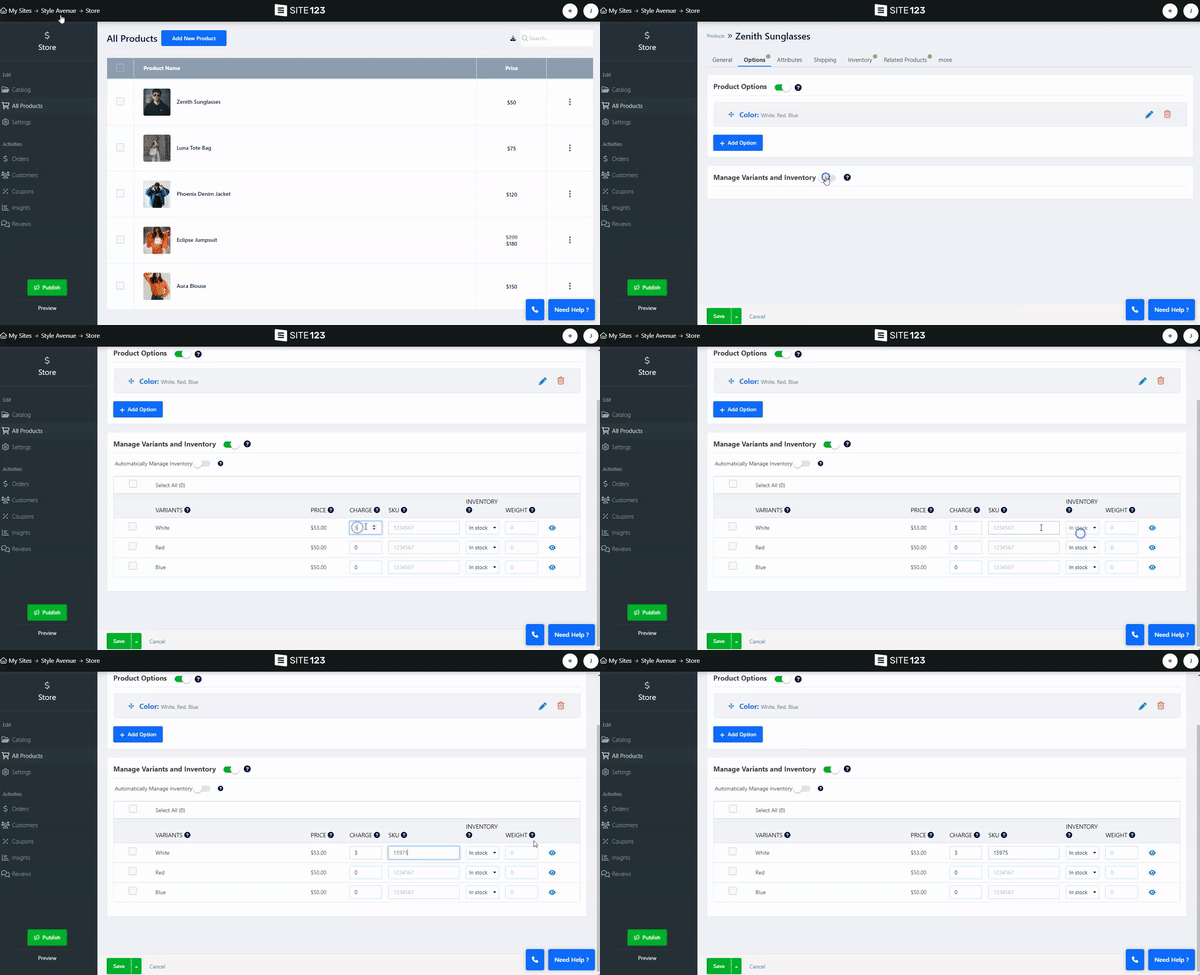
Inside the All Products tab, click the product you want to edit, then the Options tab.
Enable Product Options and add different variants, such as color and size.
Enable the Manage Variants and Inventory option and edit:
Enable Automatically Manage Inventory and set inventory amount per variant. The system will automatically manage the product variant inventory.
Set the option OFF to manually manage the inventory and choose between in or out-of-stock per variant.
Add or remove CHARGE per variant (the money will be added to or removed from the default product price).
Add SKU per variant (this number will replace the default product SKU).
Add WEIGHT per variant (the weight will be added to the default product weight).
Click the eye icon to hide a variant.
👉 Note: If your customer paid with one of the offline payment methods, you need to manually change the order status to "Paid." Read about Checking Your Orders.
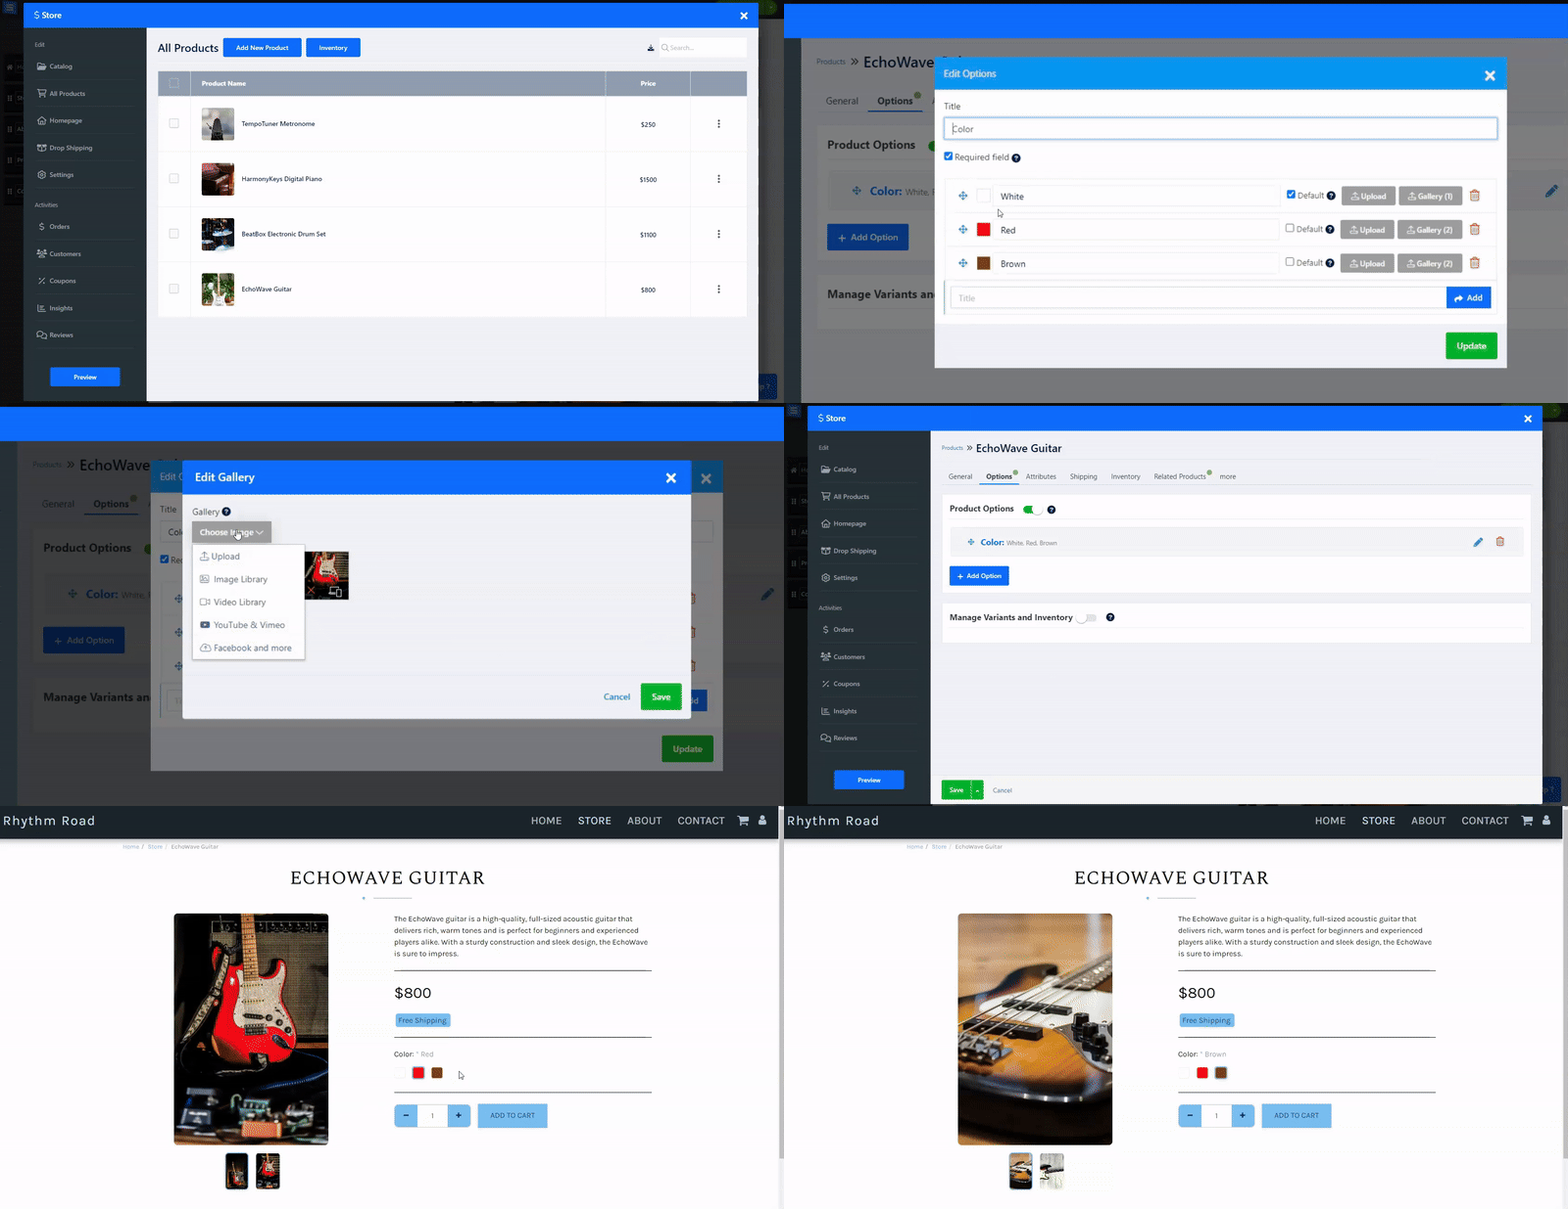
Create a gallery of images for each one of your product options, allowing customers to visualize variations more clearly. To create your product gallery follow these steps:
After adding your product variation option click the Pencil Icon to edit it
Click the Gallery button
Upload your image or video from your computer or choose one from the image and video gallery. you can also add videos from YouTube and or Vimeo or add a file from an external source such as Facebook Dropbox and more.
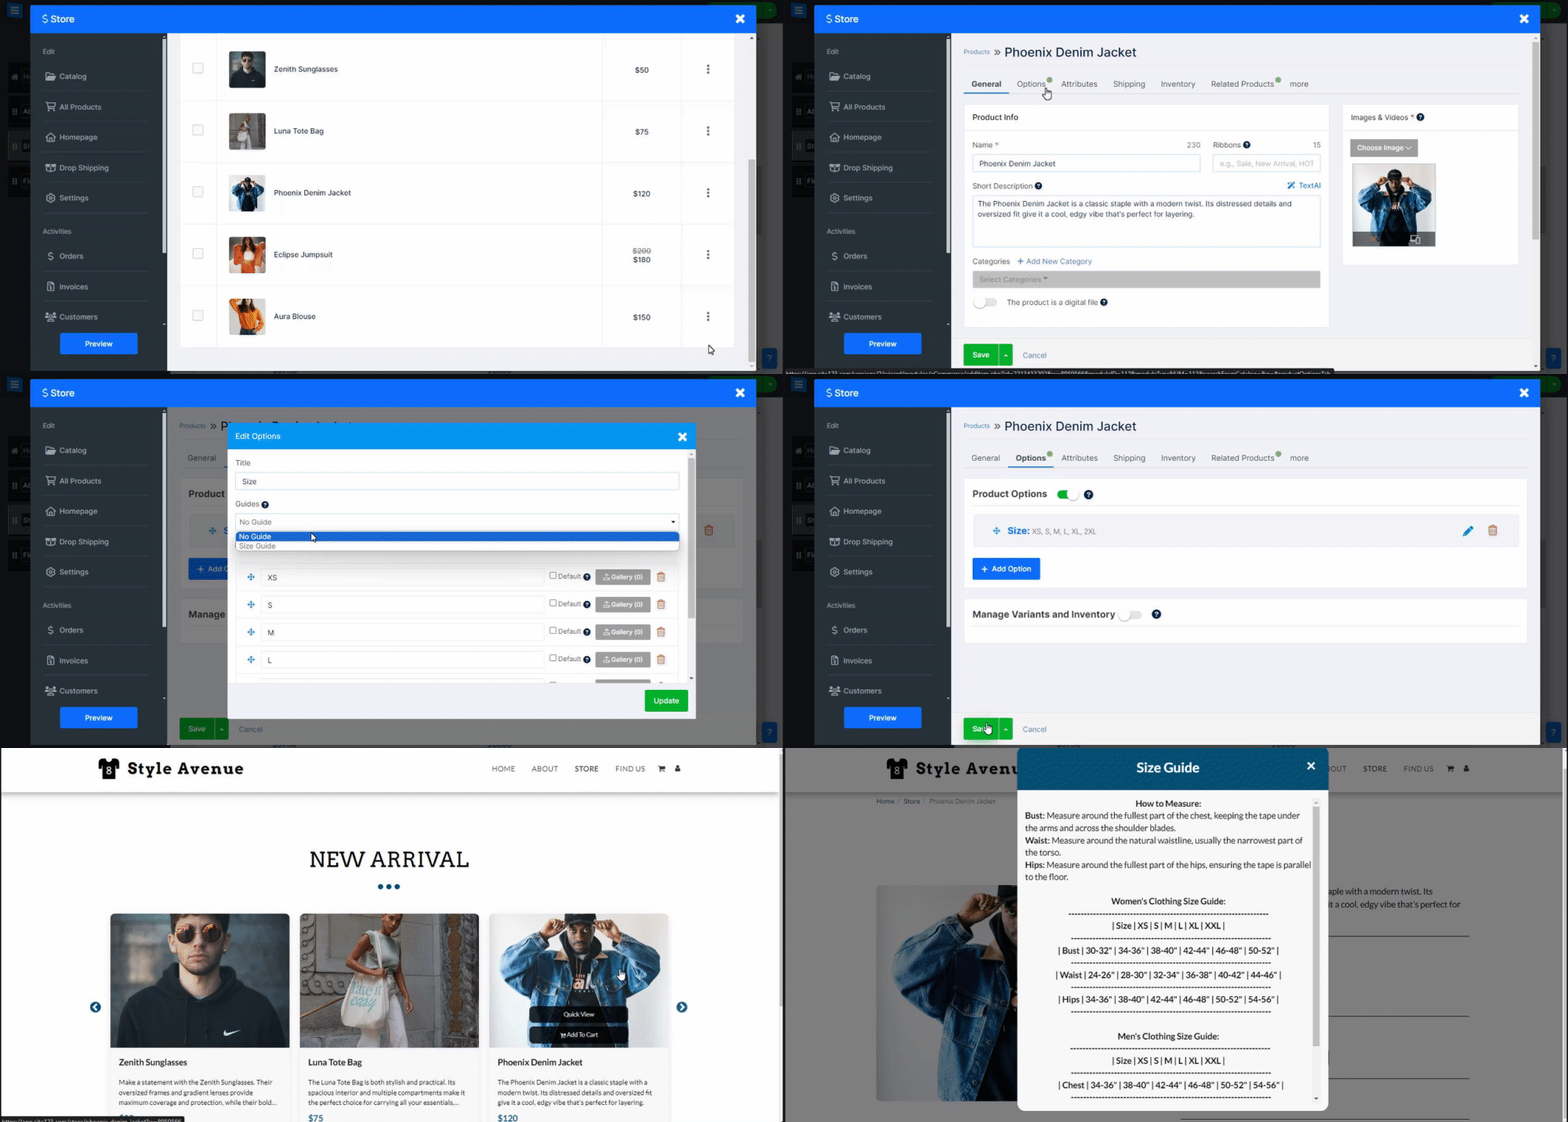
Add a guide to each one of your product options, for example, a size guide, this will allow you to provide more information to your clients regarding the different product options.
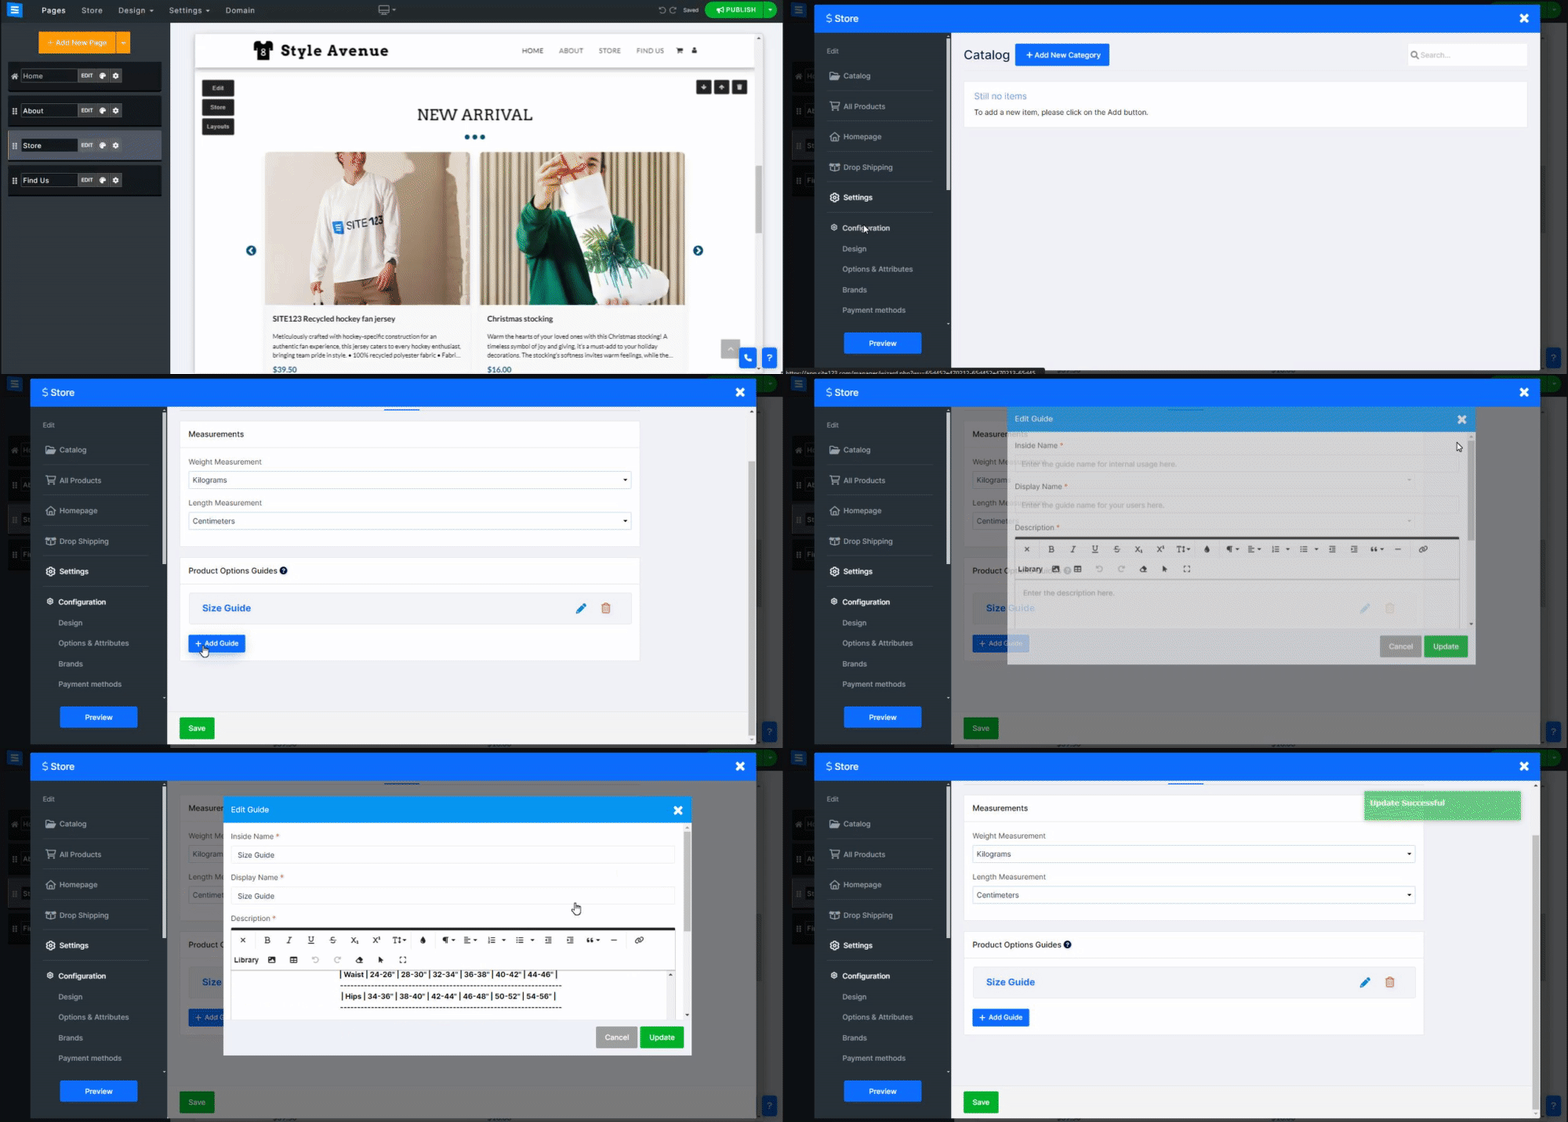
To add the guide follow these steps:
On your store homepage click store
Click Settings and then click Configuration
Click the More tab in the top menu of the configuration screen
Click the Add Guide Button under Product Options Guides
Under Inside Name Enter the name of the guide for internal use only
Under Display Name enter the name of the guide that you wish to display to your users
Use the text editor tool to add your guide content- Read more about the Text Editor Tool
Click Update to save the guide, and click Save to save the changes
After creating a Product Option Guide follow these steps to add it to the relevant product variation:
Go to All Products and click on the desired product
Go to the Options Tab and click on the relevant Variation
Click on Guide Filed under Guides to open the drop-down menu and select the relevant guide.
Click Update to save the guide, and click Save to save the changes
