
Whether you're looking to promote a business seminar, a music concert, a community gathering, or any other event, with the event page, you can manage and track your events easily and efficiently.
In this guide, you will learn how to Edit the event page, Add new events or manage existing ones, manage ticket sales, and more.
In the Website Editor, click Pages.
Find the Event page in the current page list, or Add it as a New Page.
Edit the page Title and Slogan. Read more about Adding a Slogan.
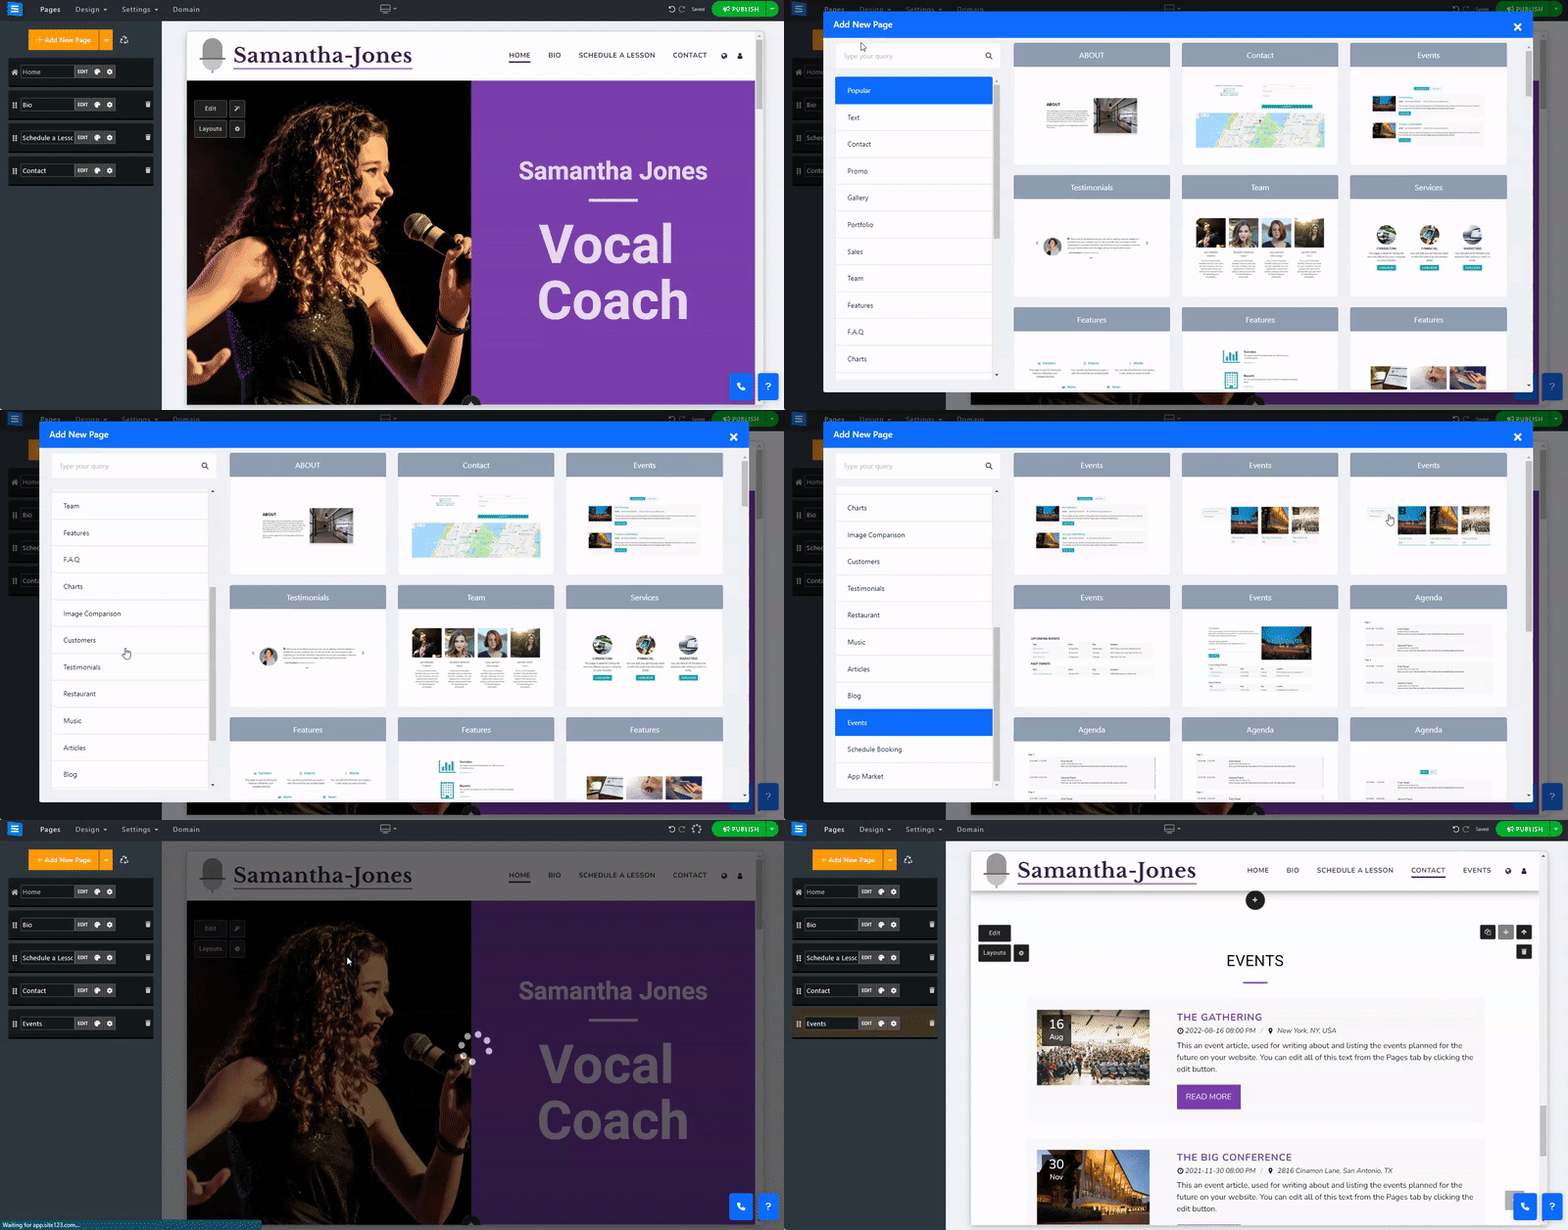
To edit the Event Page In the event main page, click the Edit button.
Inside the Event tab:
Click the three dots icon to Edit, Duplicate, Preview, or Delete an item.
Click the Add New Event button and edit a new Event.
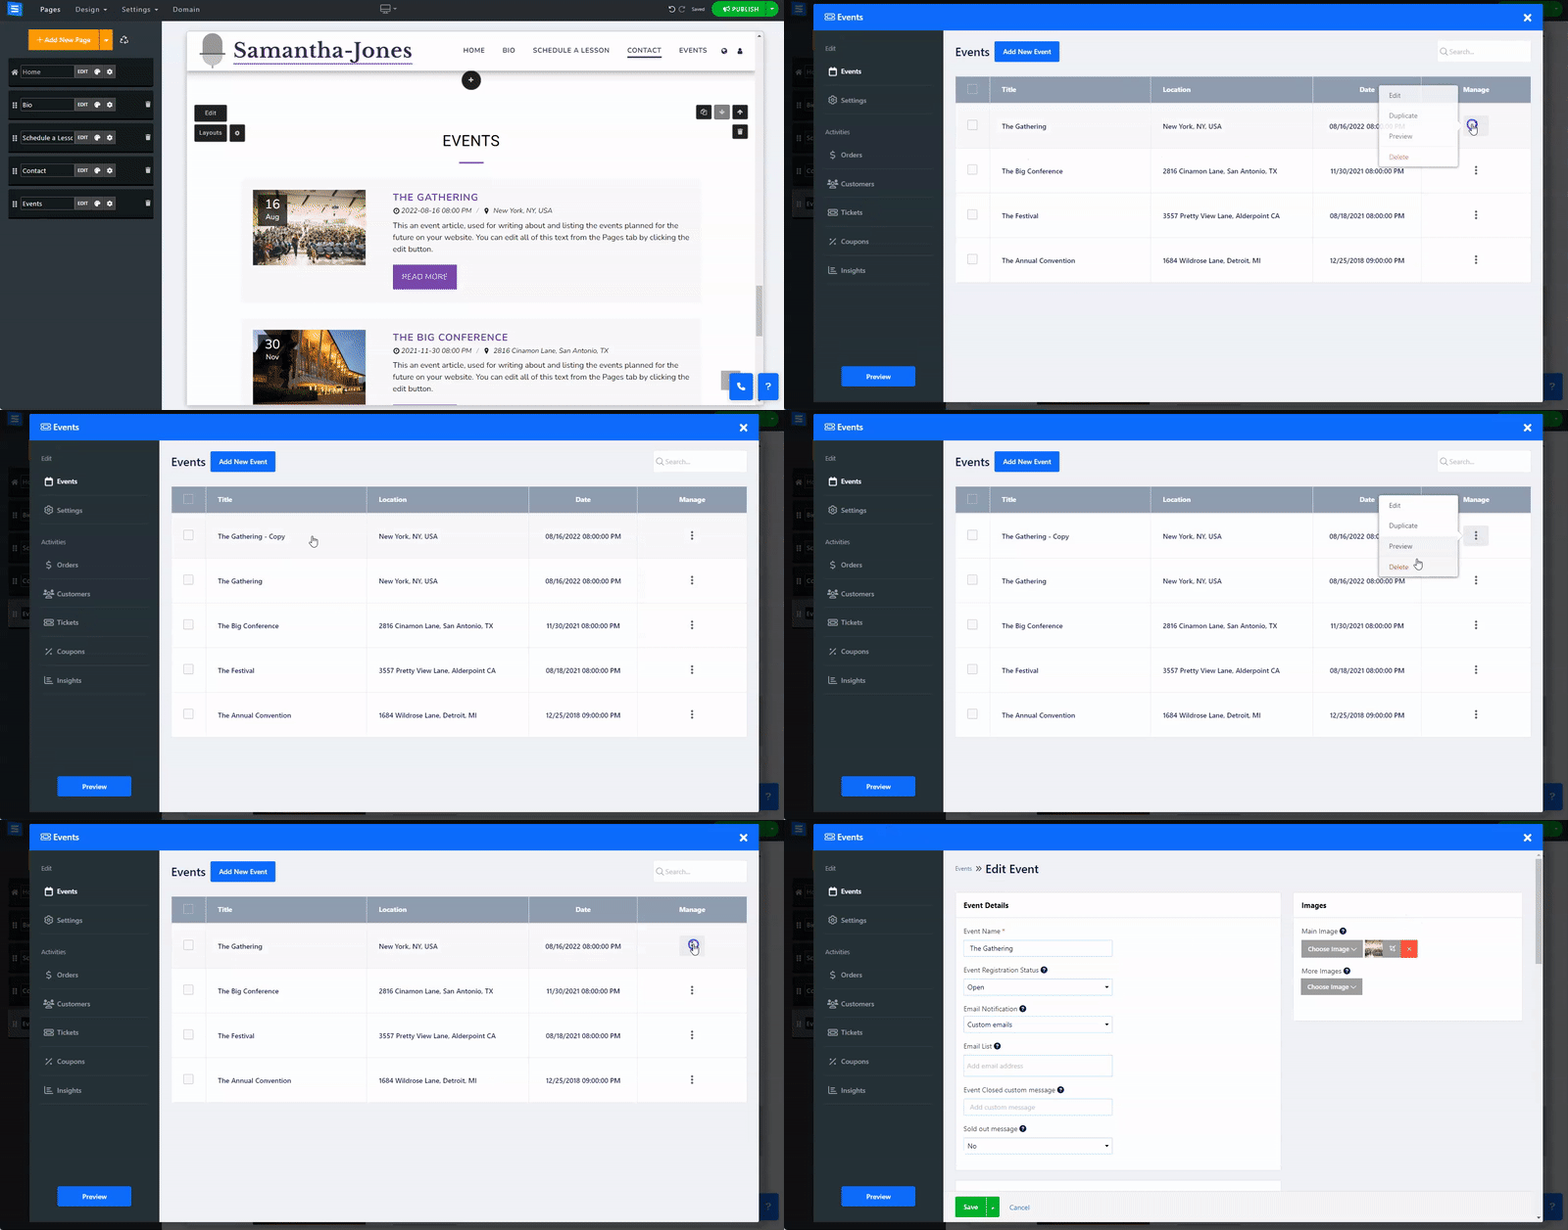
When adding a new event or editing an existing one, you will have the following edit options:
Add general information regarding your event
Event Name - Add your event name
Event Registration Status - Choose the status of your event, select between Open, Close, and Cancel
Email Notification - Add an email address that you would like to receive contact form notifications. Choose from the Admin Email address, Custom, and no notifications.
Email list - When you select "Custom" in Email Notification, a field will appear where you can enter up to 5 email addresses. These addresses will be used to receive notifications from the contact form.
Event Closed custom message - Add a custom message that will be displayed when the event is closed. Leave this field empty if you wish to use the default text.
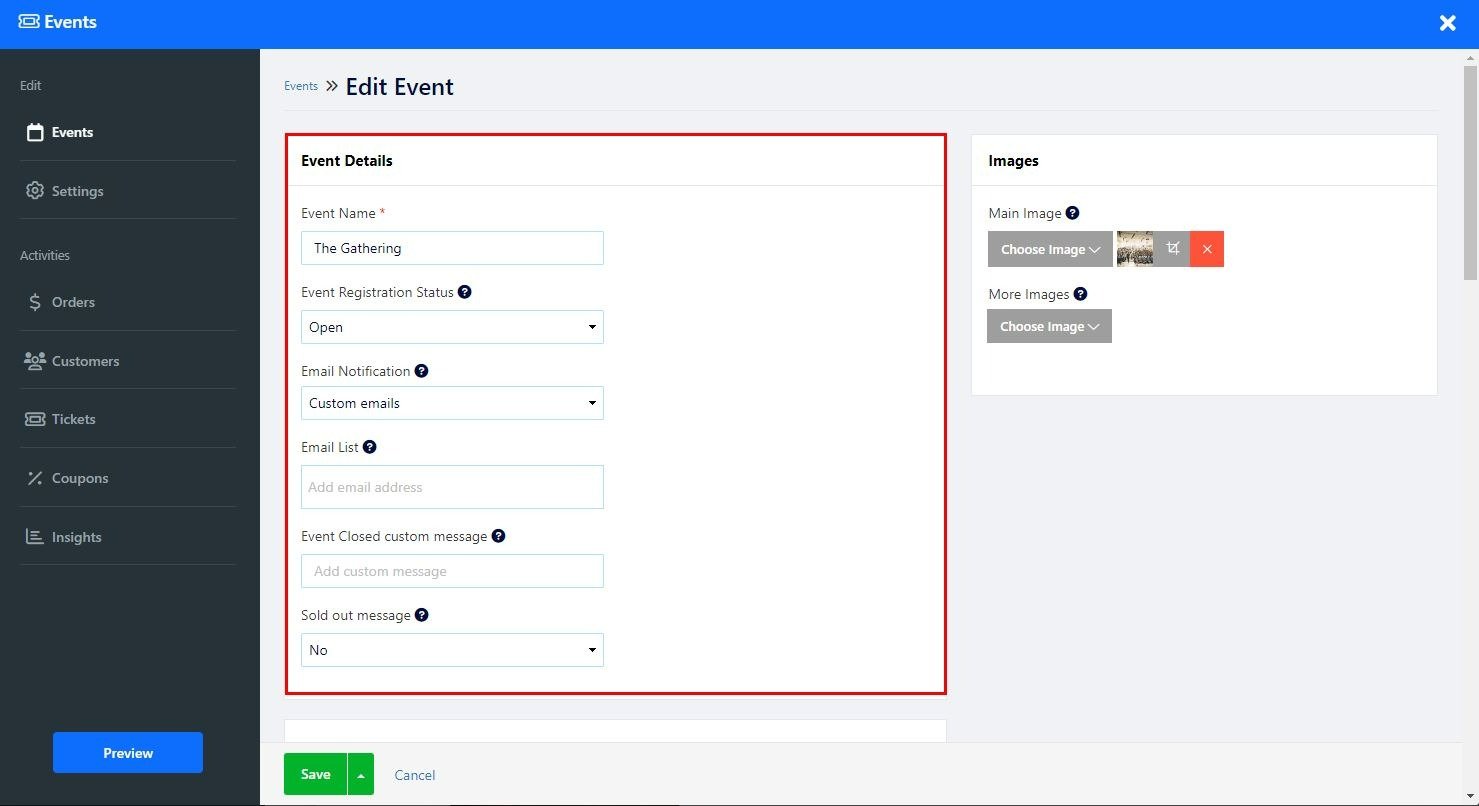
Set up the event date, location, and additional information.
Date- Set a date for your event. Click the blue plus Icon to add an End Date, this allows you to set a range of dates on which your event is occurring, such as a music festival.
Location - Set the Event Location, choose from a Venue or online event, or announce it later with the To Be Announced option
Event Address - When choosing the Venue option, you will be able to add the Venue address. The system will generate a map of the venue based on the added address.
Service location additional information - Add additional information about the location, such as specific directions, a building number, or an exact floor.
Meeting URL - add a URL to your Online Event, and buyers will receive the URL in their purchase success email.

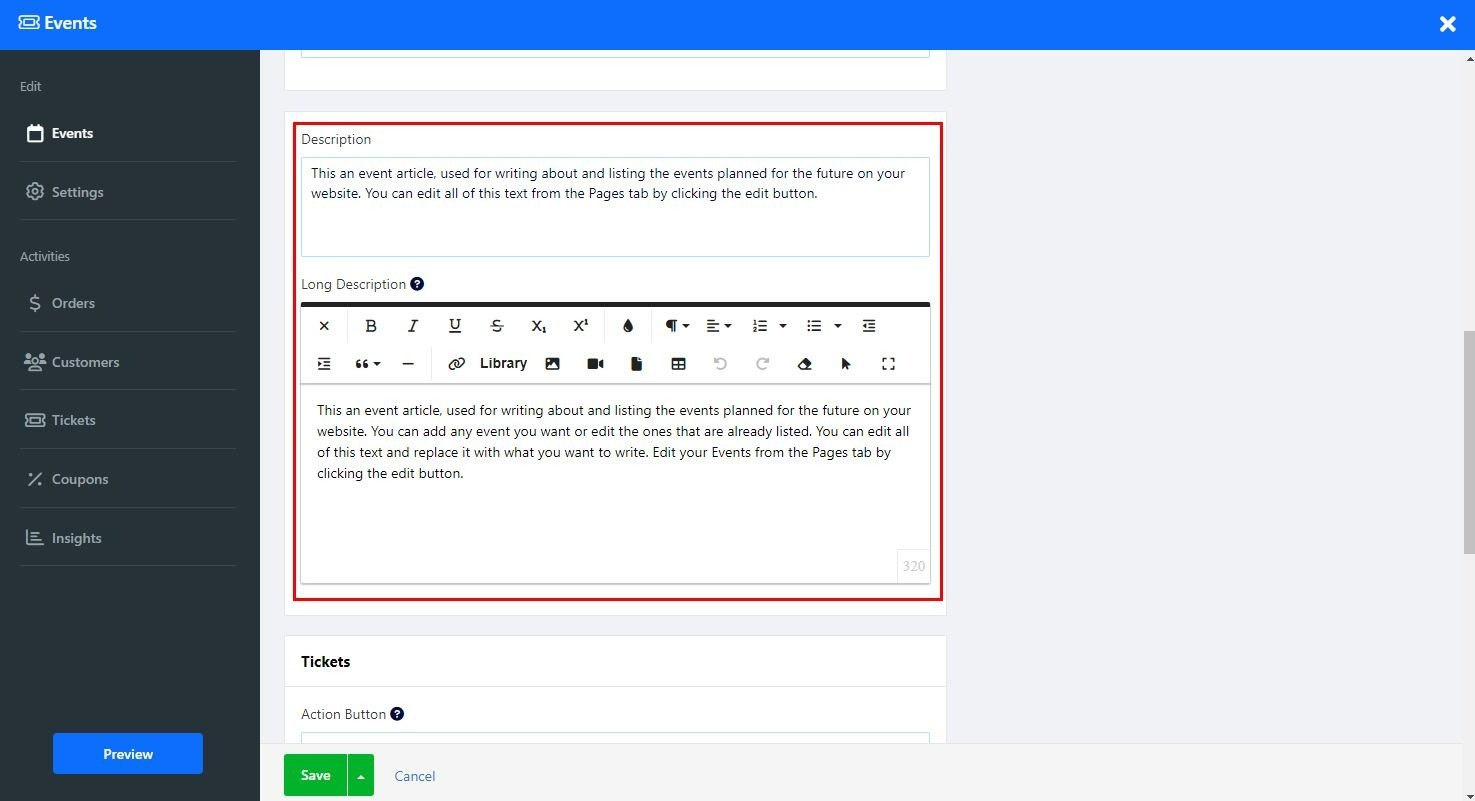
Add a short description of the event.
Add Additional Description (Blue Plus Icon) - Clicking this option will open the Text Editor, which will allow you to add a longer description as well as edit and customize the text. Read more about the Text Editor.
Set up your event tickets.
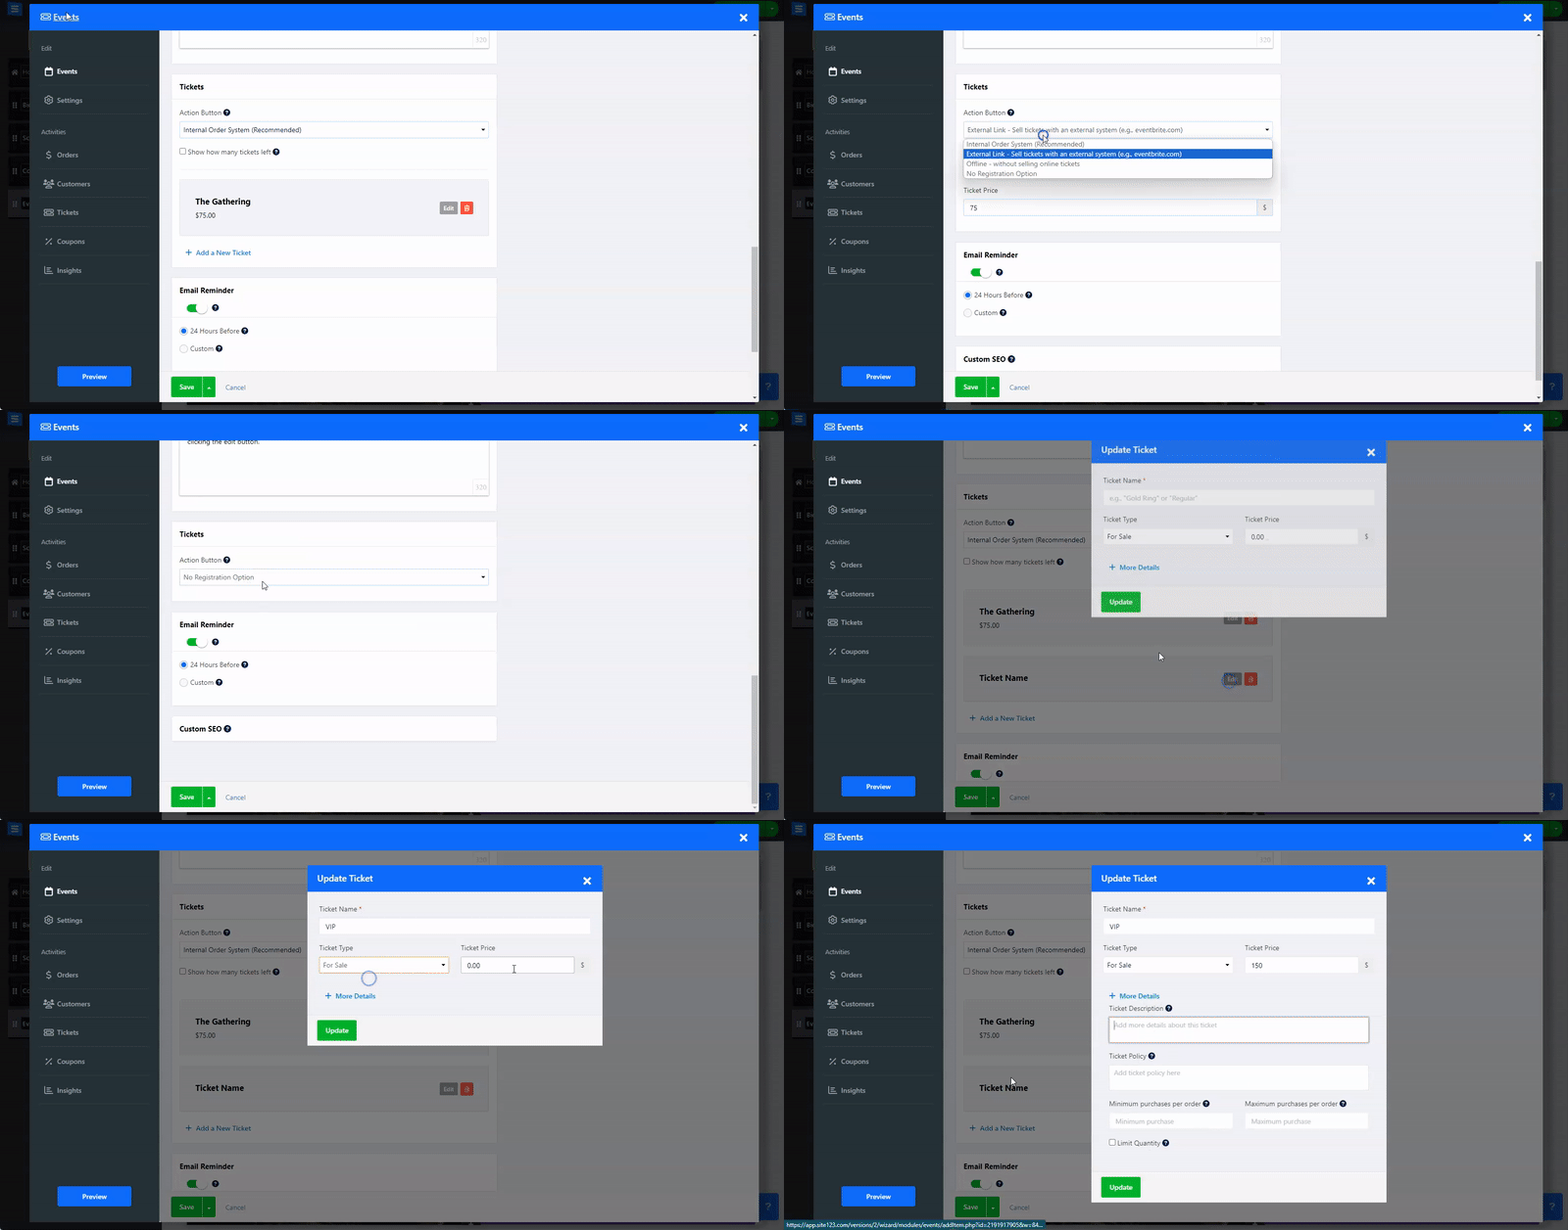
Action Button - Choose the method of selling tickets:
Internal Order system (recommended) - This method will allow you to sell tickets from within your website. With this option, you can track the amount of sold tickets, display how many tickets are left,
Ticket edit option - This option is only available when choosing the internal order system. Click edit to set the ticket name, price, and type, and click More Details to add Ticket Description, Policy, Minimum/Maximum purchases per order, and Limit Quantity.
External links - Sell your tickets using an external platform,
Payment Button Link - Set the purchase button to redirect your users to the preferred external service.
Offline- Set this option if you do not wish to sell tickets online.
No Registration option- Set this option if you are not planning on selling tickets to the event.
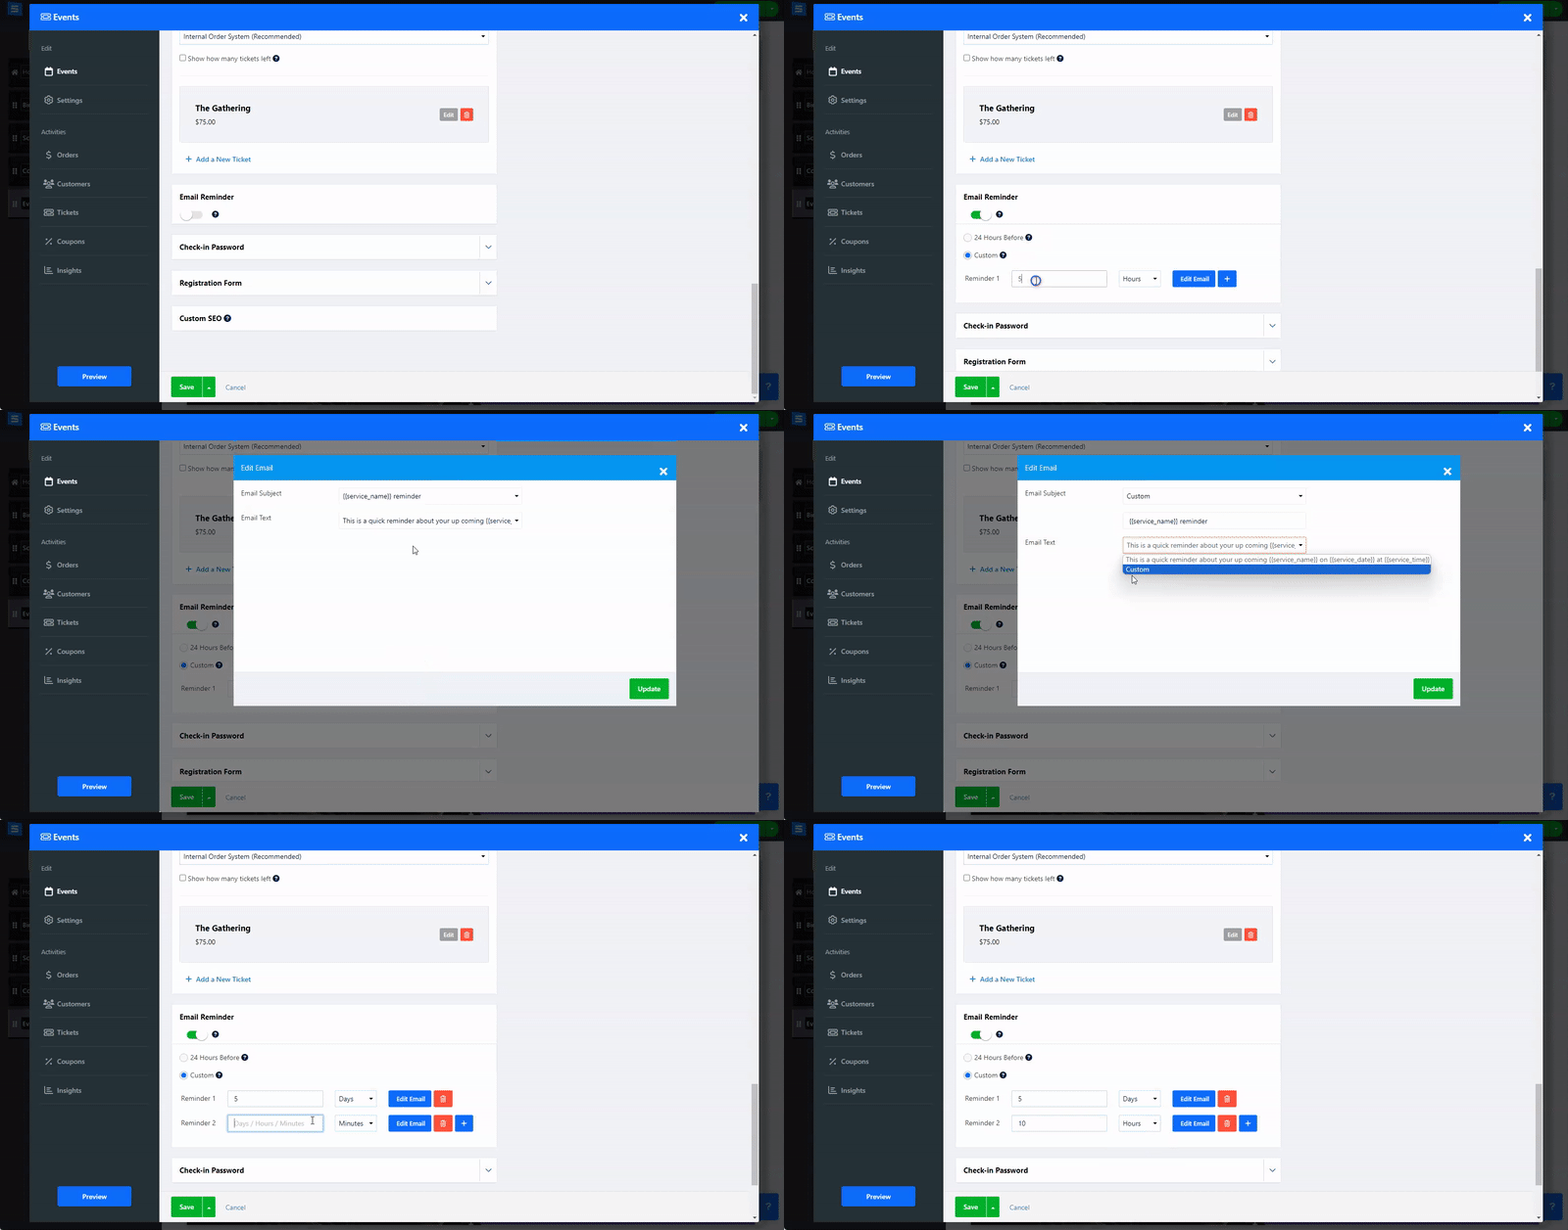
Send a reminder to your clients about an upcoming scheduled service
Set the reminder to be sent within 24 hours before the scheduled date, or use the Custom option to customize both the time the reminder would be sent as well as the content of the reminder email.
Users can also add the event directly to their calendar by clicking the Add to Calendar button at the end of their checkout process.
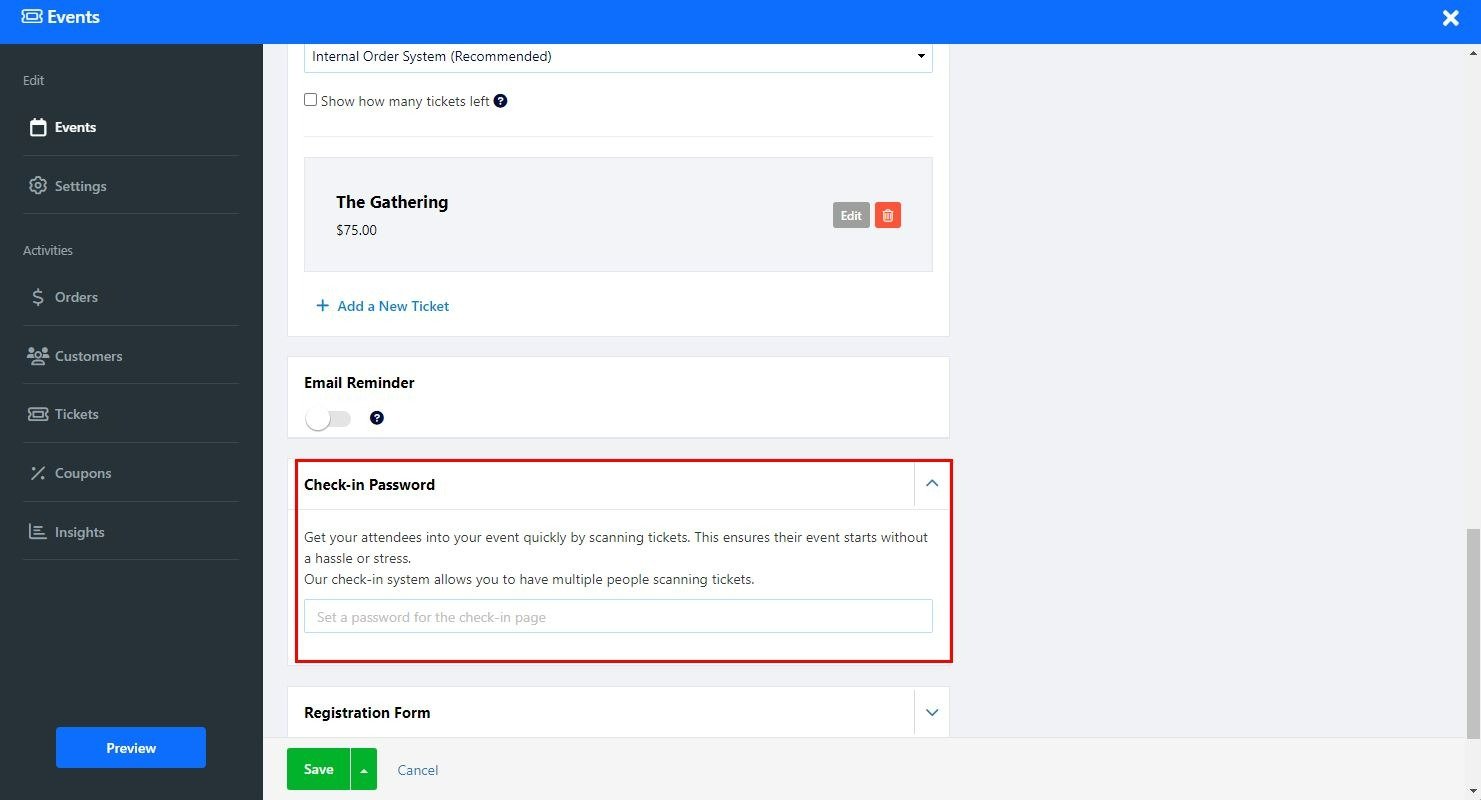
Get your attendees into your event quickly by scanning tickets. This ensures their event starts without hassle or stress.
Our check-in system allows you to have multiple people scanning tickets.
Create a custom Registration Form for visitors to fill out when booking a service.
Read more about the use of the custom form builder. Please note that editing the Custom Form is only available for Premium packages.
Adjust the SEO settings of your different services. Read more about Custom SEO.
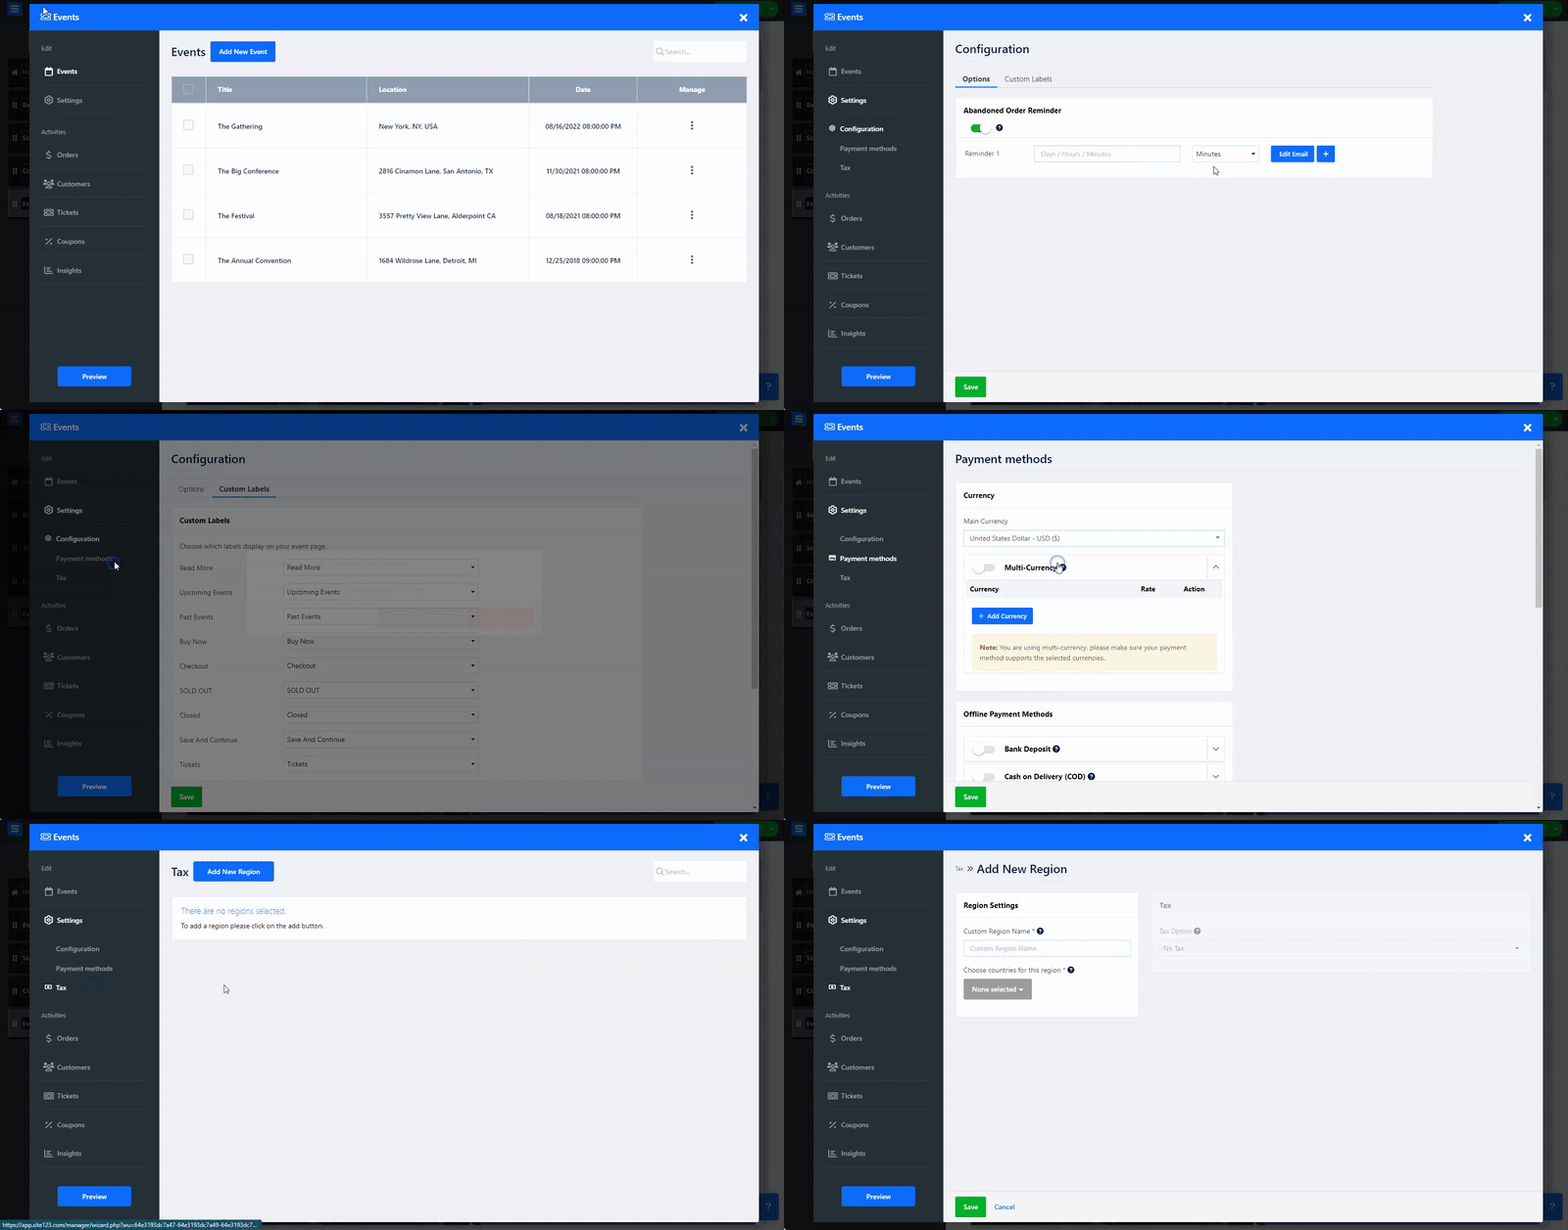
Set up your payment method, custom labels, and more.
Inside this tab, set your event custom labels and abandoned cart settings:
Options - enable the Abandoned Order Reminder to send reminder emails to visitors who abandoned their shopping cart mid-purchase. Read about the Abandoned Cart Reminder Tool.
Custom Labels - Add custom labels.
Inside this tab, set your accepted currency and payment methods. Read about setting Currency and Payment Methods.
Inside the tab, add regions and tax. Read about setting Tax.
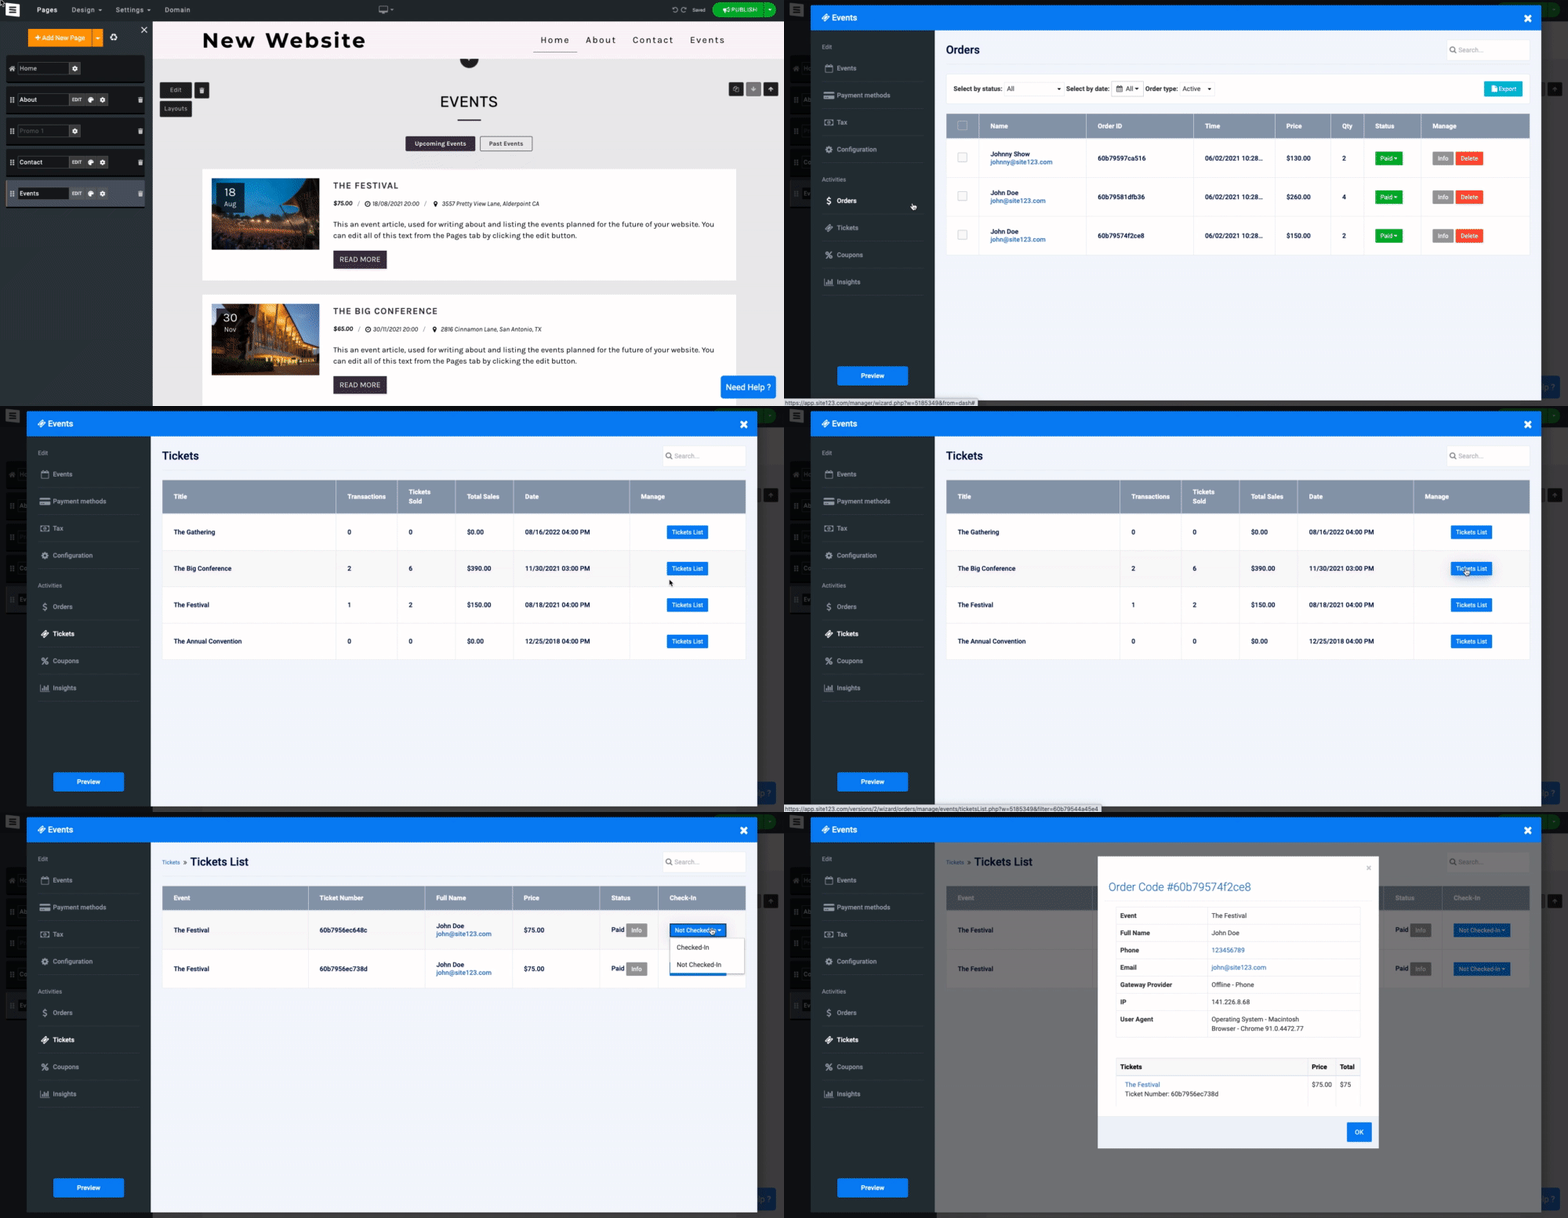
See the list of all the orders, filter them by status, date, and type, and manage them. Read about Checking Your Orders.
In your Customer Tab, you can view all of your customers, both subscribed and unsubscribed customers,
You can Manage customer information, add customized tags, Import and export customer lists, subscribe them to your mailing list, and communicate with them via Direct messages sent from the Customer table. Read more about the Customer Tab.
See the list of tickets per event and the relevant info about it. Read about Checking Your Tickets List.
Create coupons to give special deals and discounts. Read about Creating Coupons.
Monitor and analyze order activity.