
Add products to your E-commerce and manage them to keep your store updated and allow your customers to purchase from you.
To add products, follow these steps:
In the Website Editor, click Pages.
Find the E-commerce (Store) page and click the Store button.
Inside the Catalog tab, categorize your products into different groups. Read more about managing your E-commerce Categories and Subcategories.
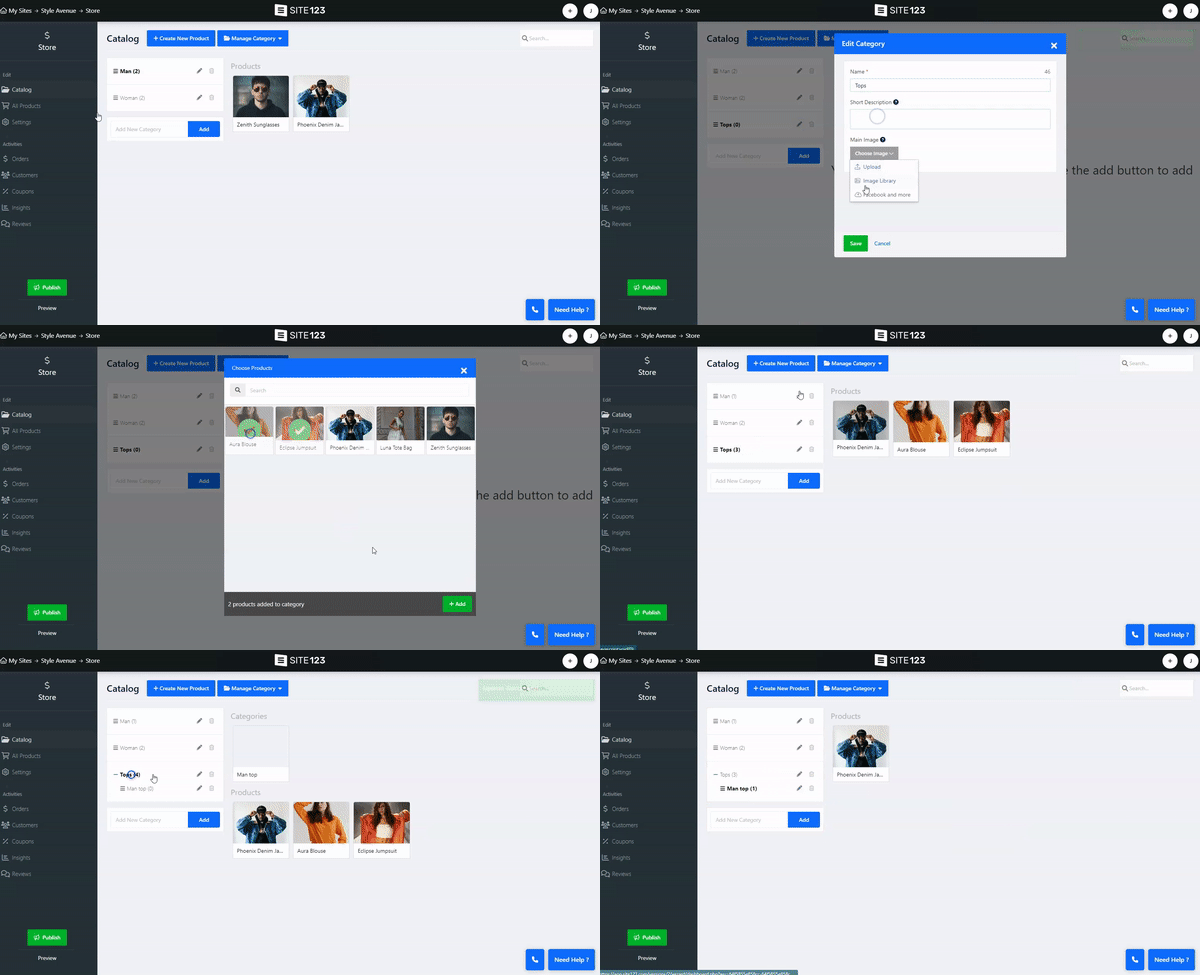
Inside the All Products tab, view all your products.
Click the Add New Product button, and under the General tab, enter the relevant details:
Product Info - Add the product Name, Description, and Category. You can add a Ribbon, which will display as a banner on the product image.
Digital File - Enable this option if you sell a digital version and upload the file.
Images and Videos - upload images/videos of the product and set the image focus point.
Price - Set the Price of the product, and choose if you want to list it On Sale. Read more about setting Currency and Payment Methods.
Additional Info - add a Stock Keeping Unit number to refer to the particular stock-keeping unit of that product, Brands or vendors that make the product, and Extra Description (read more about The Text Editor Tool).
Custom SEO - Set Custom SEO for the product.
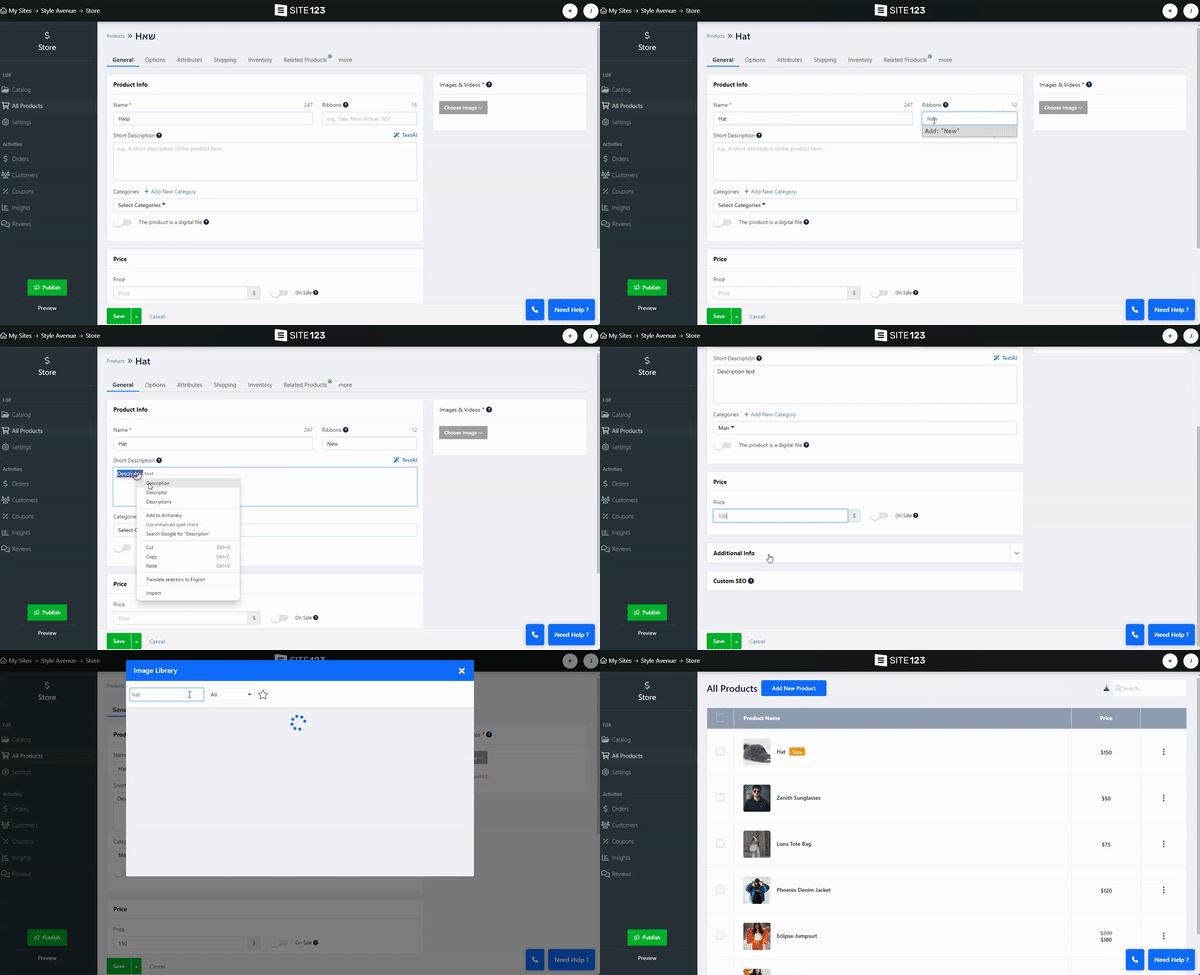
Under the Related Products tab, choose between showing products from the same category or all products:
Auto - the system will try to find products from the same category. If the system does not find products in that category, it will show products from all categories.
Custom - select which products to show.
Off - no related products will show.
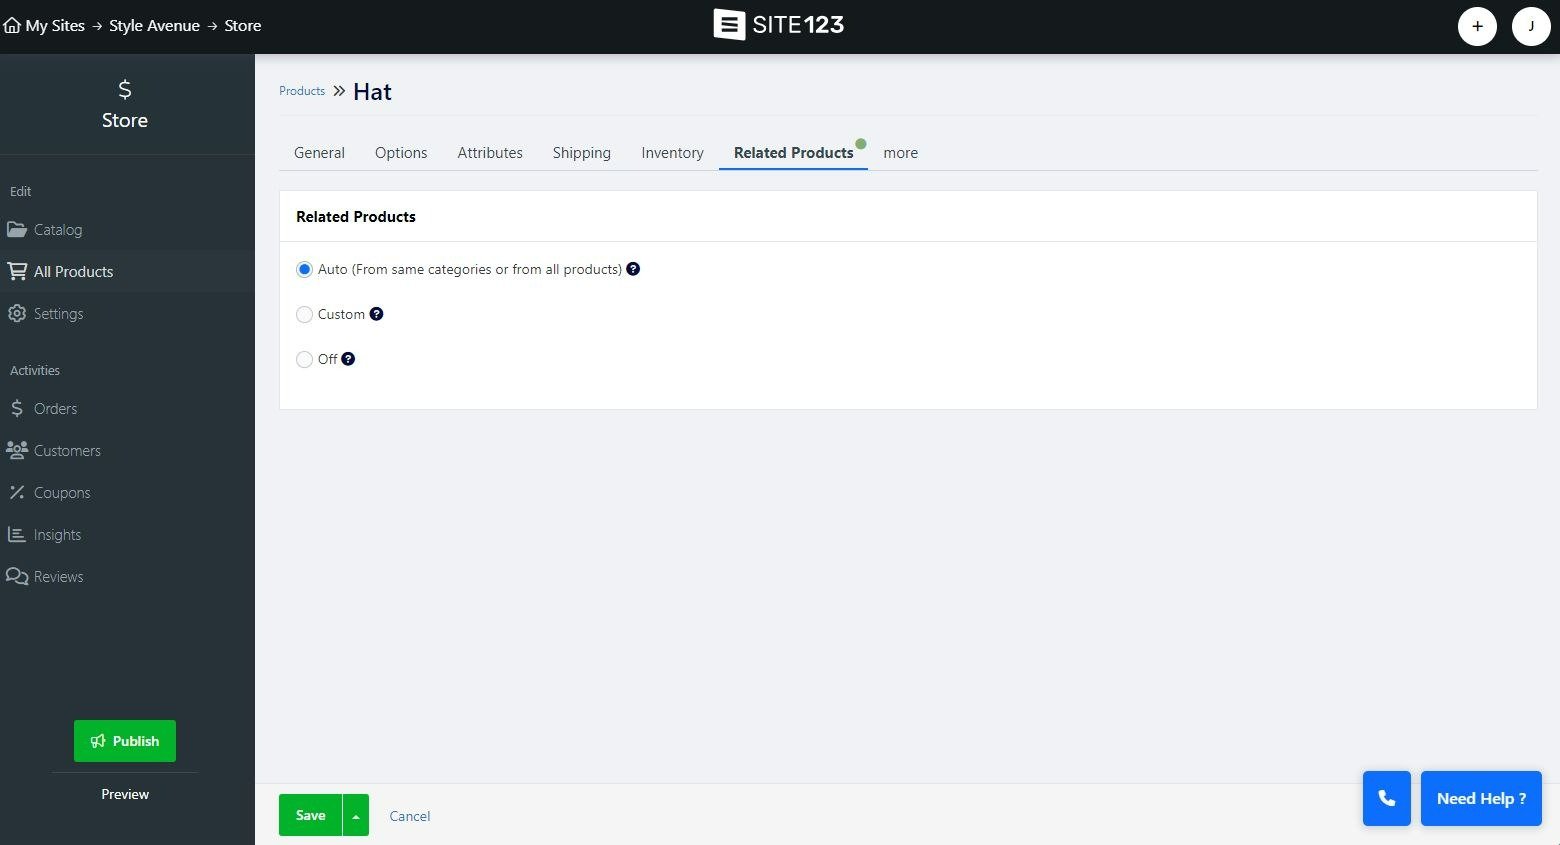
Under the More tab:
Set the Minimum and Maximum amount purchase of the product per order.
Set the product as Non-taxable.
Enable the Bought Together option and assign products.
Enable F.A.Q. for the product and add questions.
Replace the Add to Cart button and set it as Contact Us type, or set it to Redirect to an External URL and add an external link where you sell products. It's a great way to direct your visitors to purchase from your affiliate links!
Set your Product Condition to reflect the condition of your item choose between Used, Refurbished, or New
Your users will have the option to review your products and share them on relevant social media
Allow your users to submit a review of a product on your store.
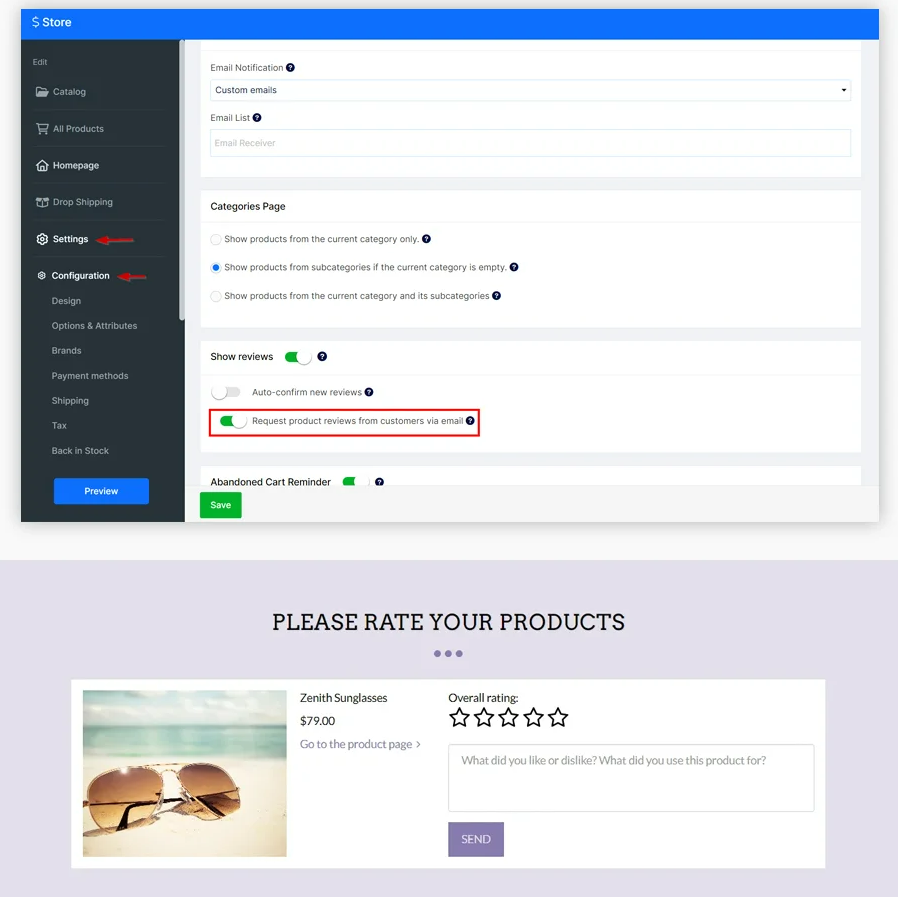
To activate this option click the settings tab in your store edit screen.
Under the configuration tab scroll down and toggle on Show Review.
Auto-confirm new reviews: toggle this option on to allow all reviewers to automatically appear under your product
Request product reviews from customers via email - Toggle this option to be able to send a review request to your users via email - this option is only available to users with the Platinum package
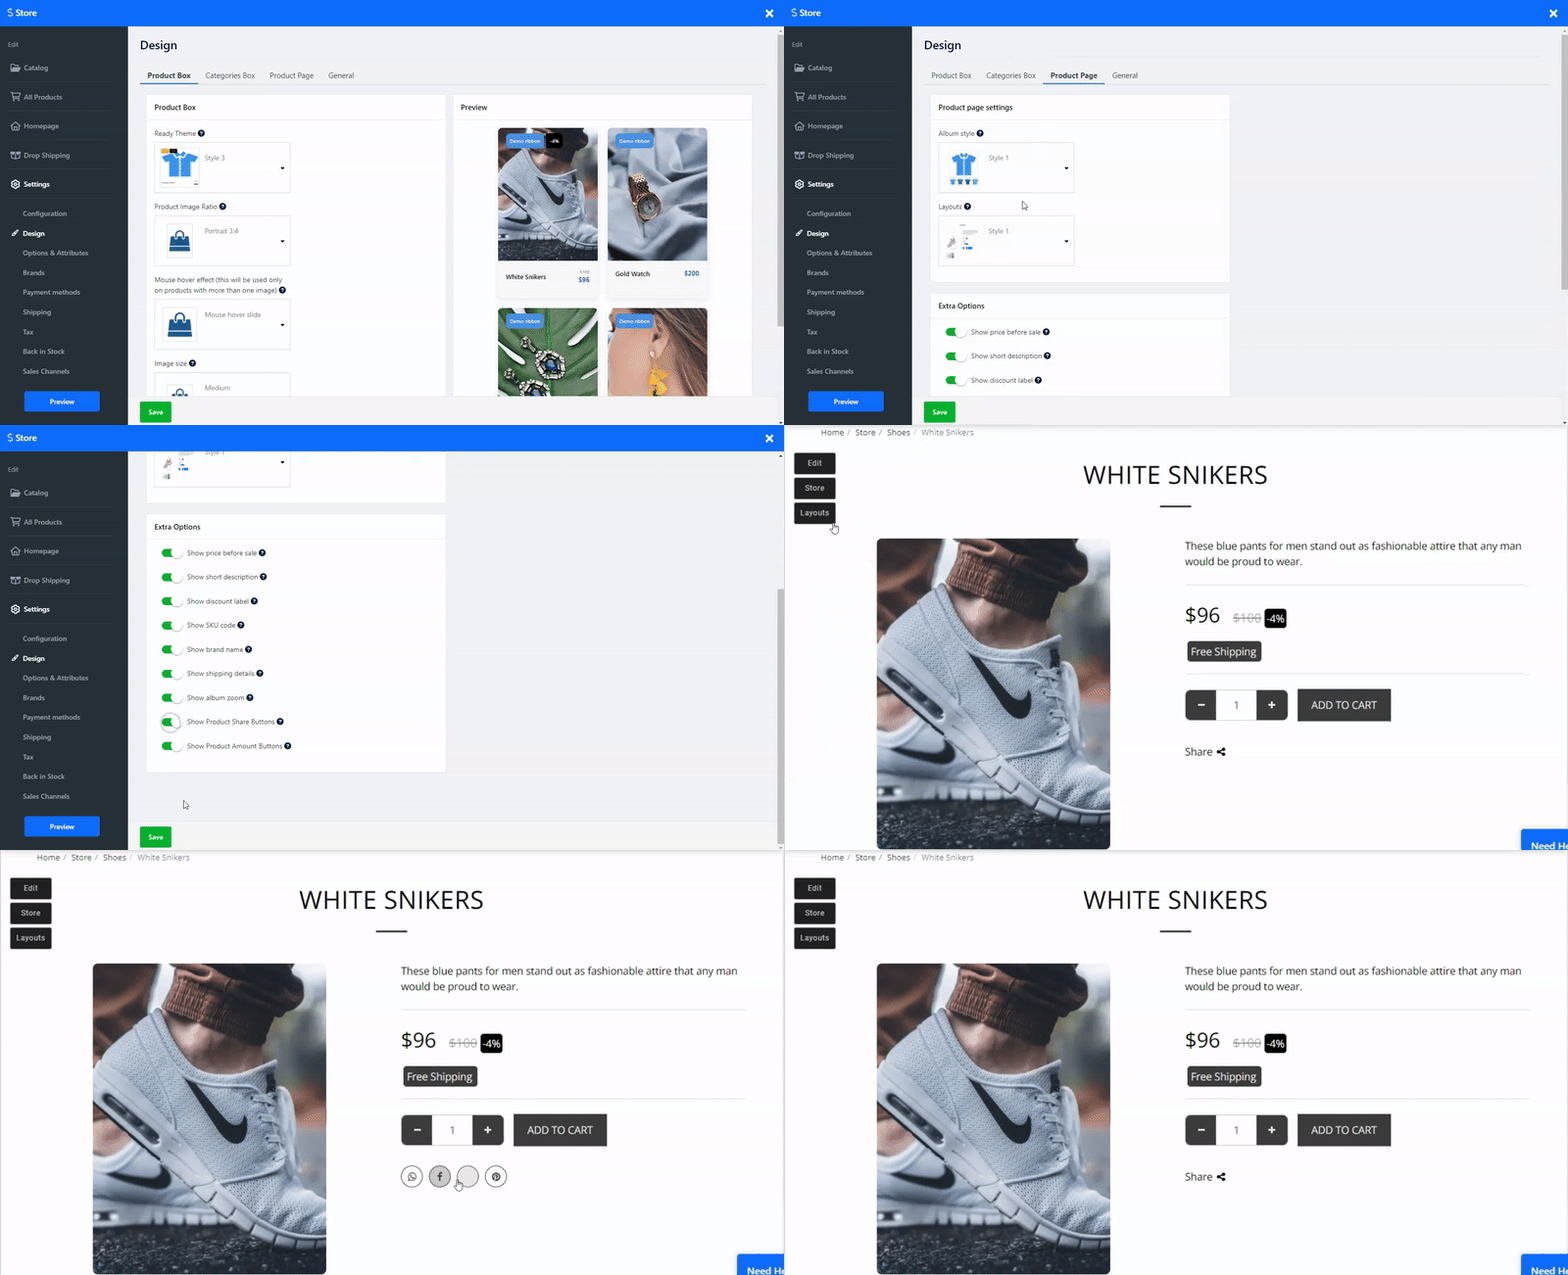
Clients can easily share your products on popular social platforms including WhatsApp, Facebook, Twitter, and Pinterest, broadening your product's reach and visibility.
To allow product sharing follow these steps :
On your Store homepage Click Store
Click Setting and then go to Design
Click the Product Page Tab
Toggle On Show Product Share button
This will add a share icon that when hovered over with the mouse curses will display the relevant sharing platform.
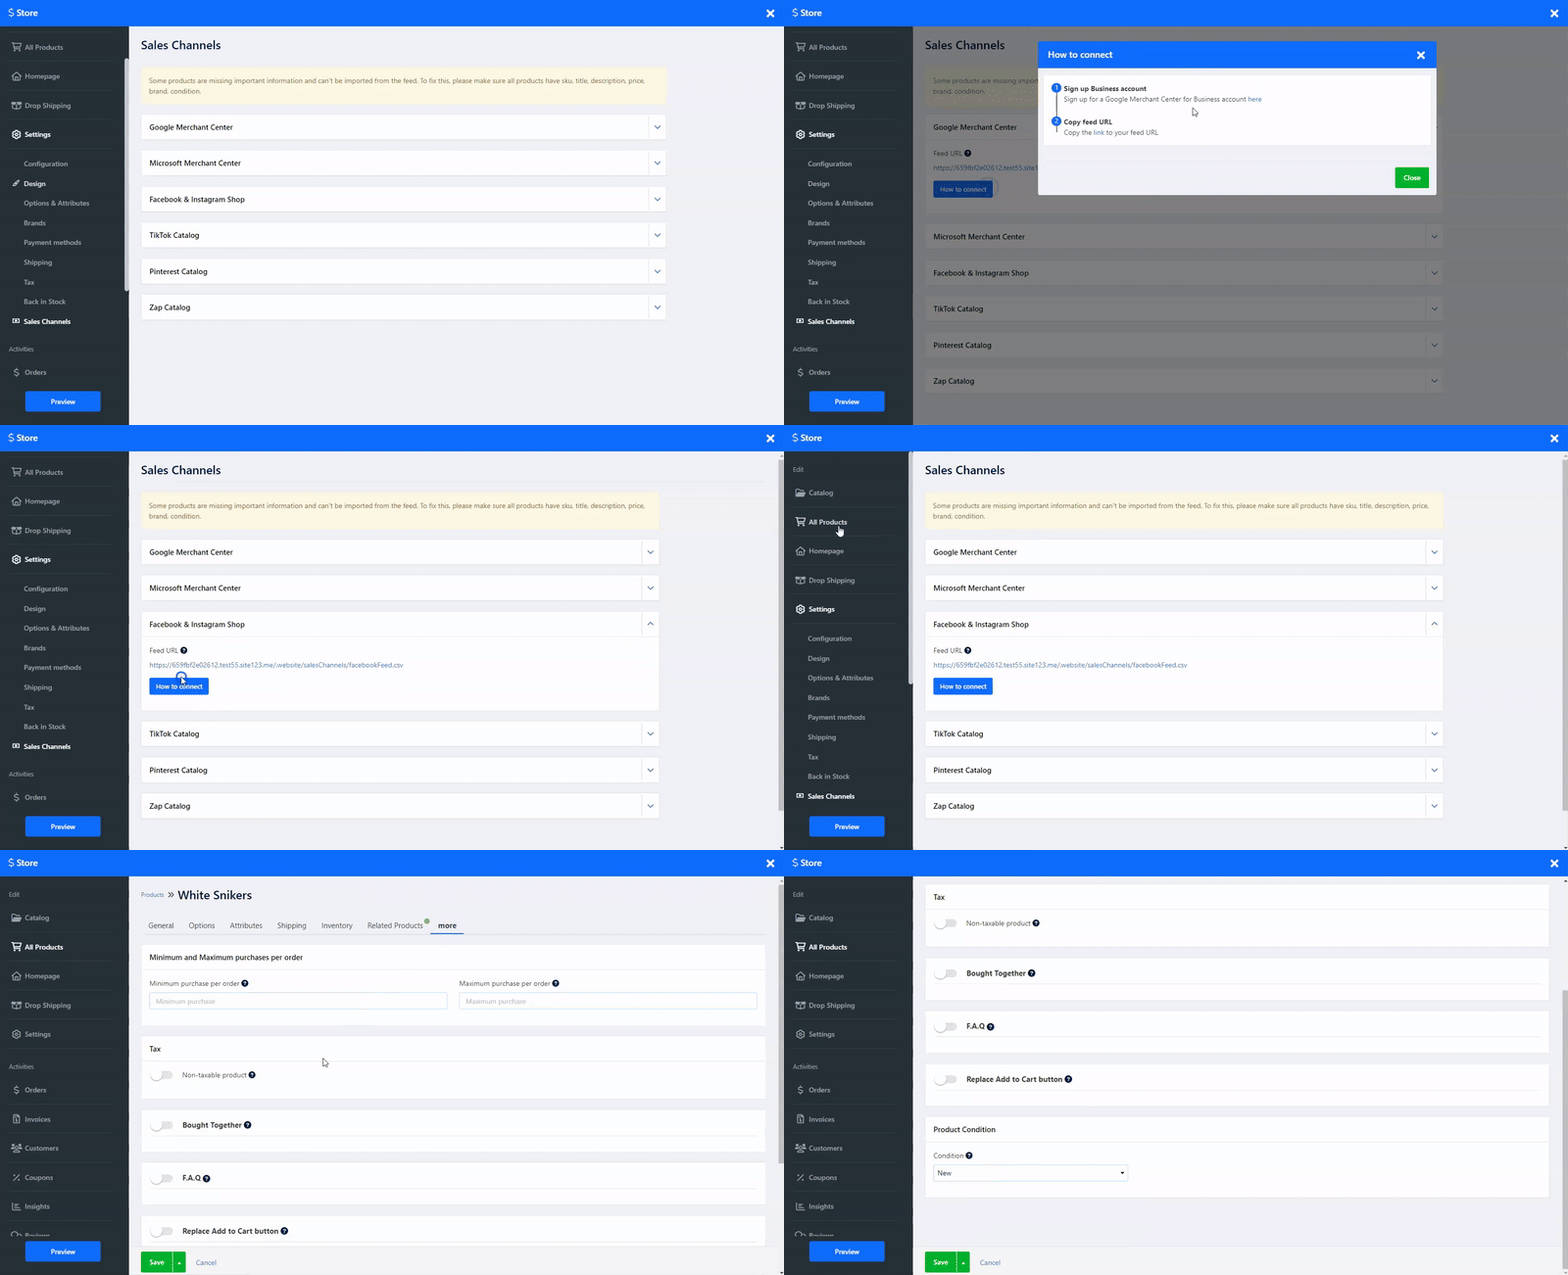
export your store products to multiple platforms, including Google Merchant Center, Microsoft Merchant Center, Facebook & Instagram Shop, TikTok Catalog, Pinterest Catalog, and zap.co.il.
On your Store homepage Click Store
Click on Setting on the side menu and then click on Sales Channels
Click on the preferred Sale channel and copy the Feed URL
Click on How To Connect to view instructions on how to connect to the relevant sales channel service.
? Note:
Shipping options are not available for digital products. Read about Setting Shipping Methods.
To manage your inventory, read about Managing Variants and Inventory.