
The Client Zone tool will enable your visitors to register as website members and have their details saved in the system. With the help of this tool, you can Limit Your Website Access, Manage Your Forum, and allow your users to log in to their Client Zone and view their profile, addresses, and order details.
In the Website Editor, click Design and select Header from the drop-down list.
In the Show Login Icon box, switch the button to ON. Note that this option will only be available if you have the flowing pages on your website :
E-commerce Store
Booking
Forum
Blog
Online Course
If none of the above are on your website, the option will be grayed out and inaccessible.
Once you enable this option, a Log-in icon will appear on your website's header that will allow your users to log in to their Client Zone, manage their profile details and addresses, view their orders, post on your forum page, etc.
After enabling the Client Zone, click Edit to set its Unique name. This name will be displayed to your users when they sign up or log in to their Client zone.
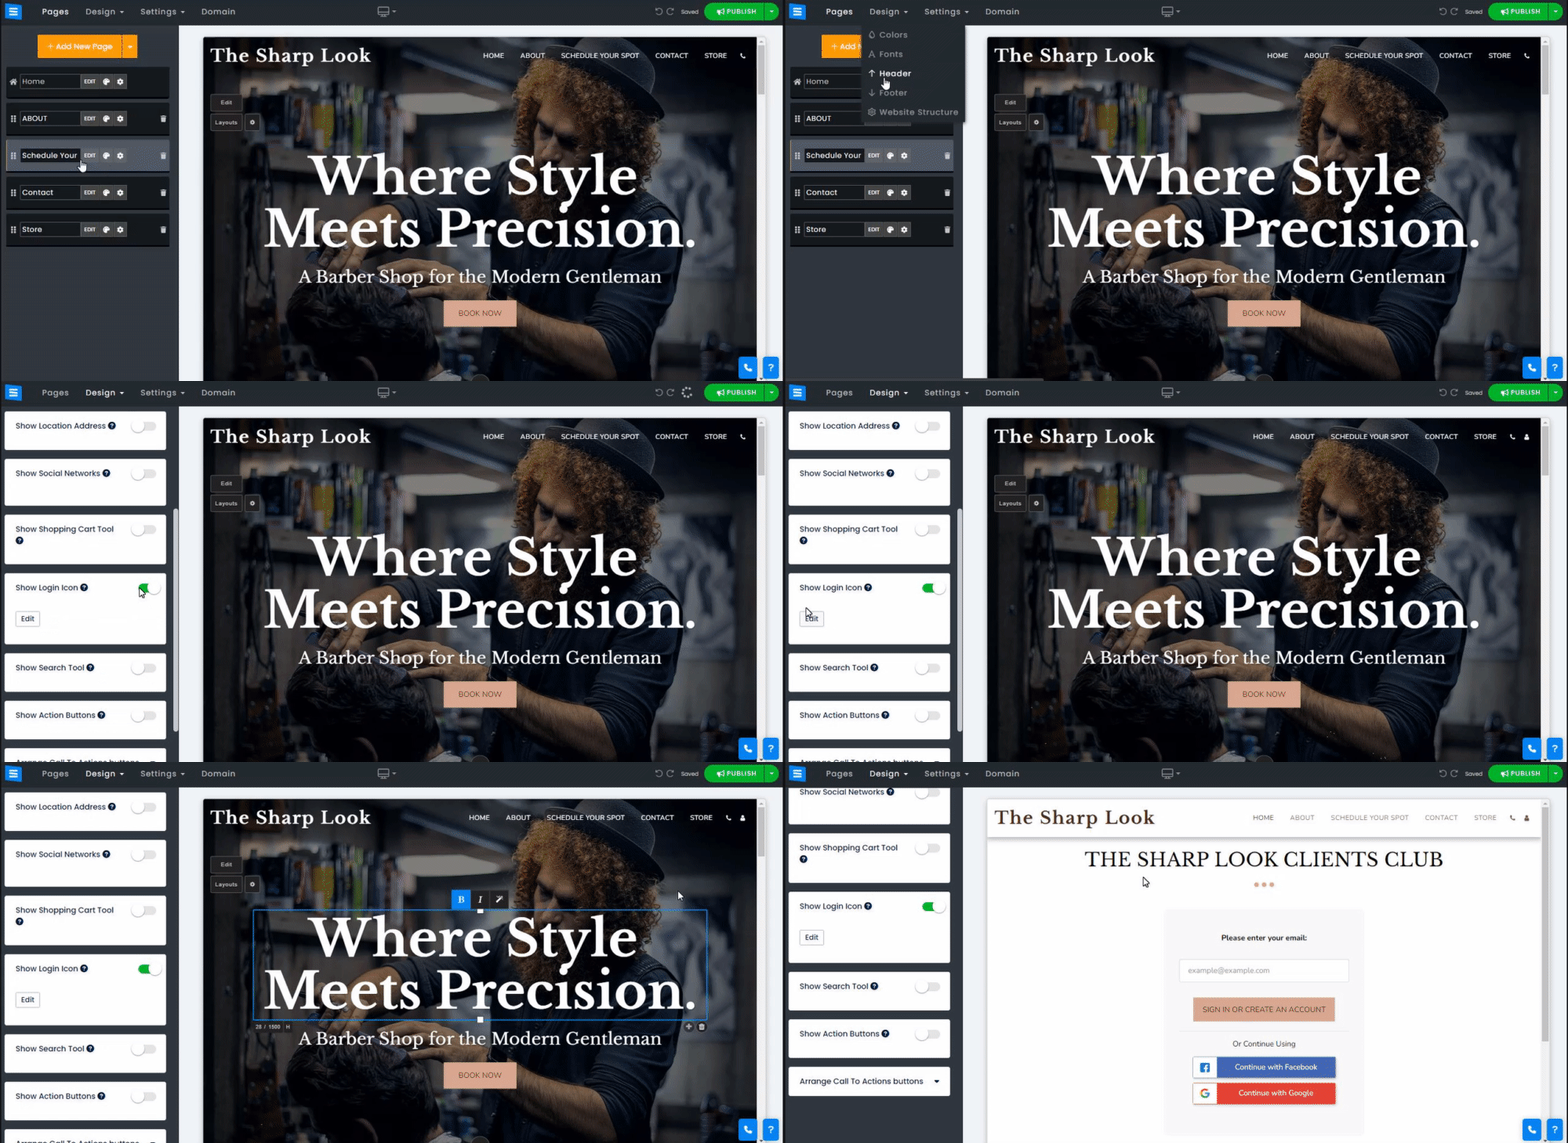
To log in to the Client Zone, the user must enter their email and click Request Login Code, They will receive the login code to the email they entered.
Users can also choose to log in using their Facebook or Gmail accounts. This provides an additional layer of security and allows them to sign up for your client zone quickly and easily.
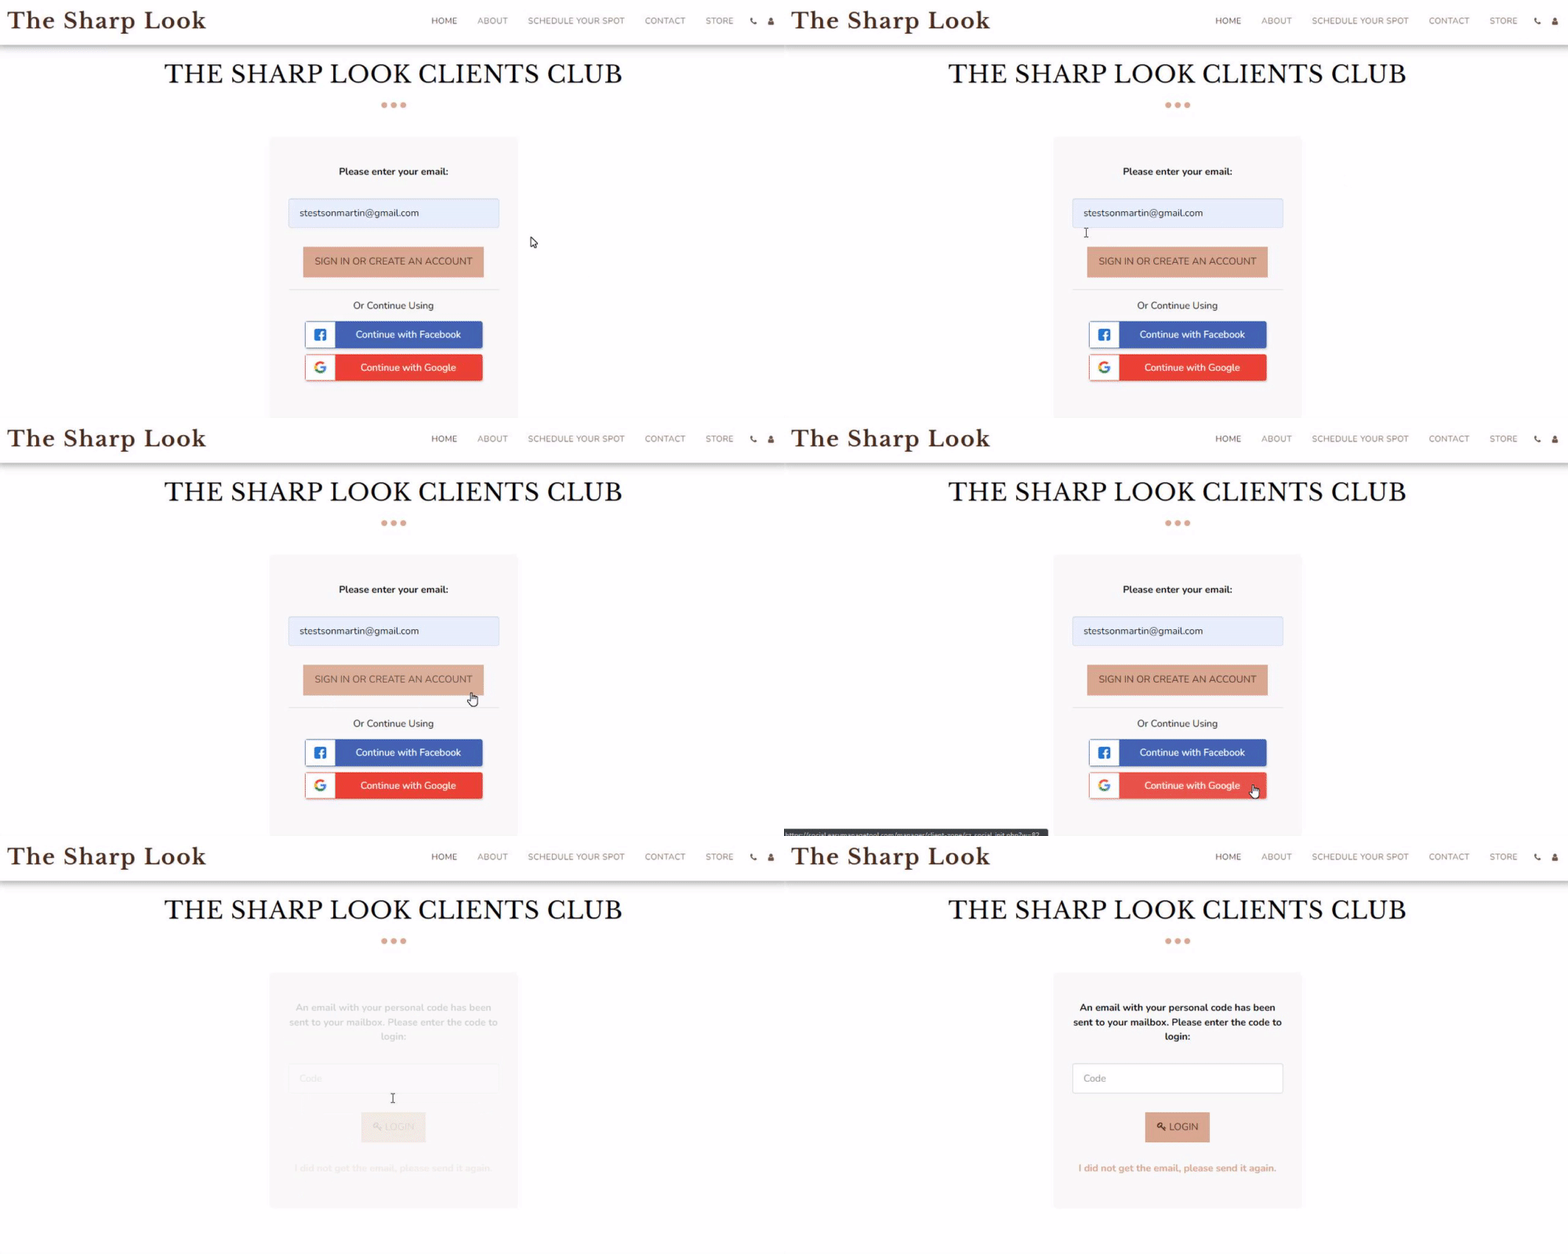
Once logged in to their Client Zone, your users will find the following options:
Users can edit their profile details, such as Name, Last Name, Nickname, Phone, and Country, and add an Image.
The client can also sign up for your newsletter and receive updates about your products and services.
Clicking the three dots next to the profile picture will allow your clients to change their picture and Log out from the Client Zone.
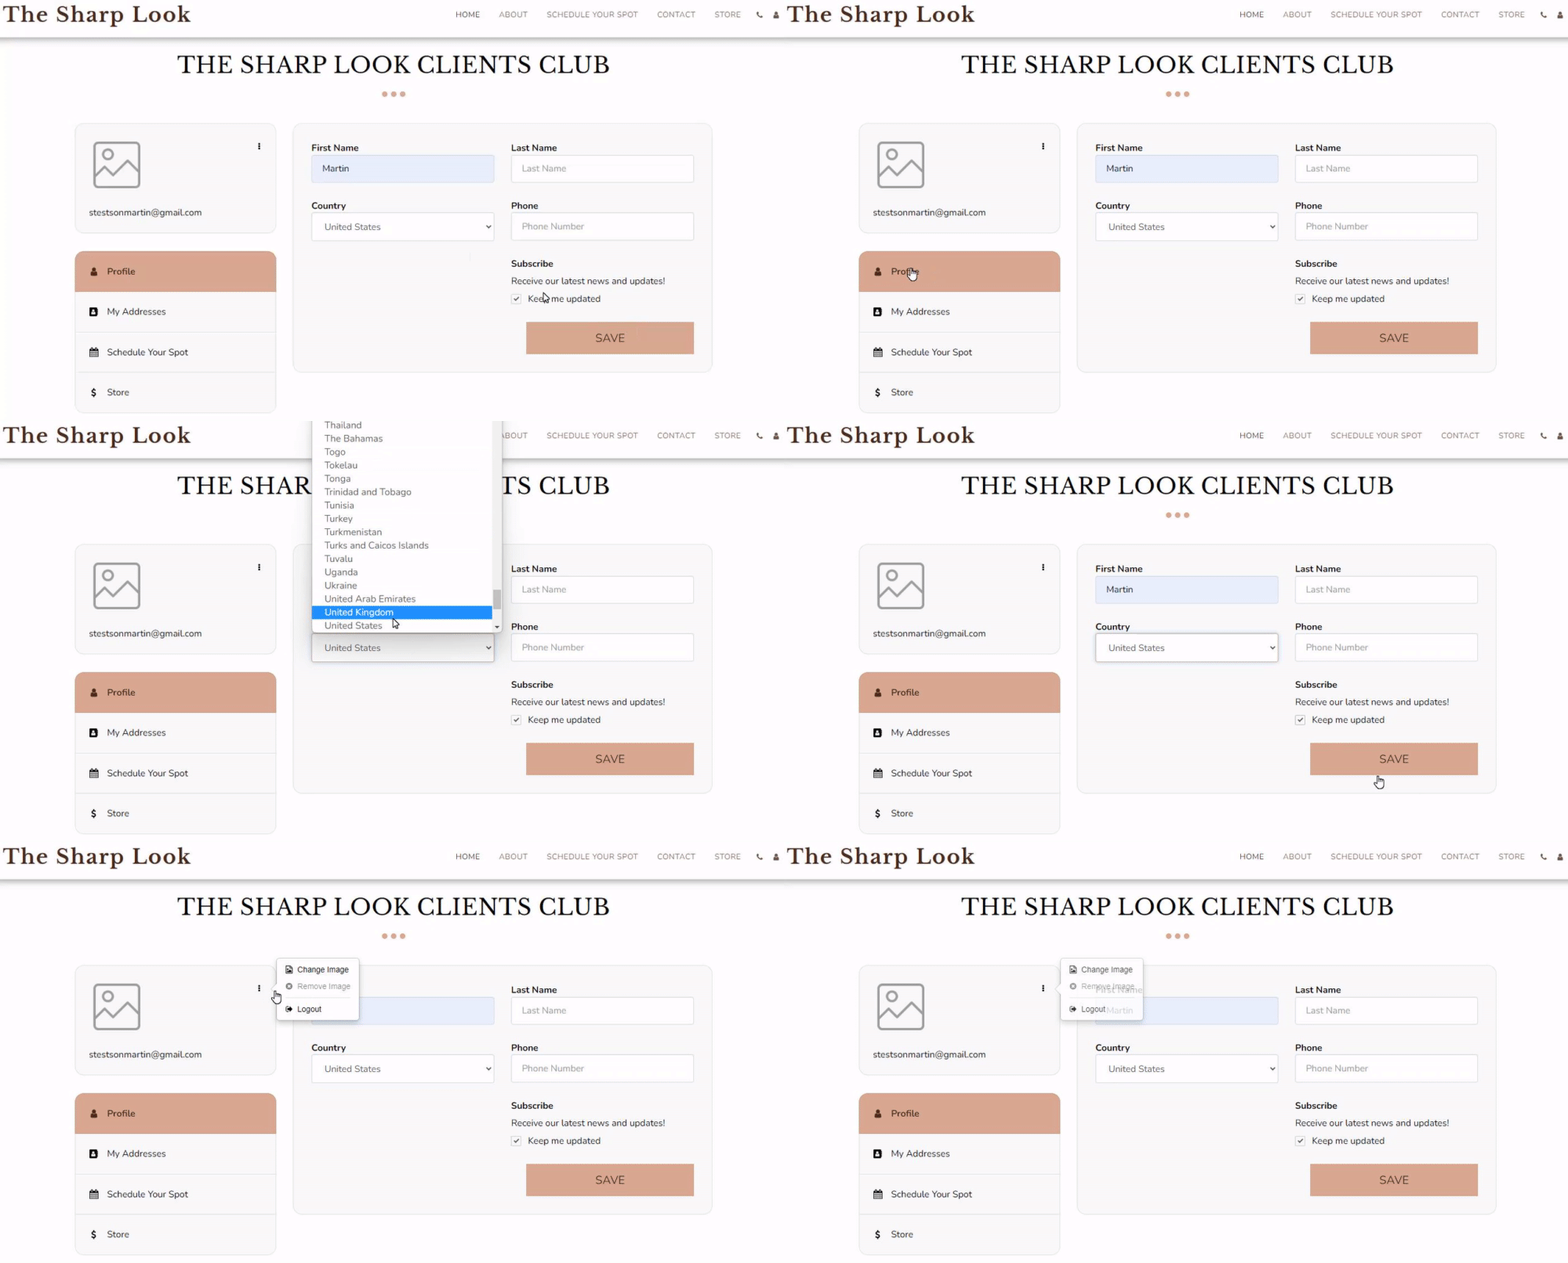
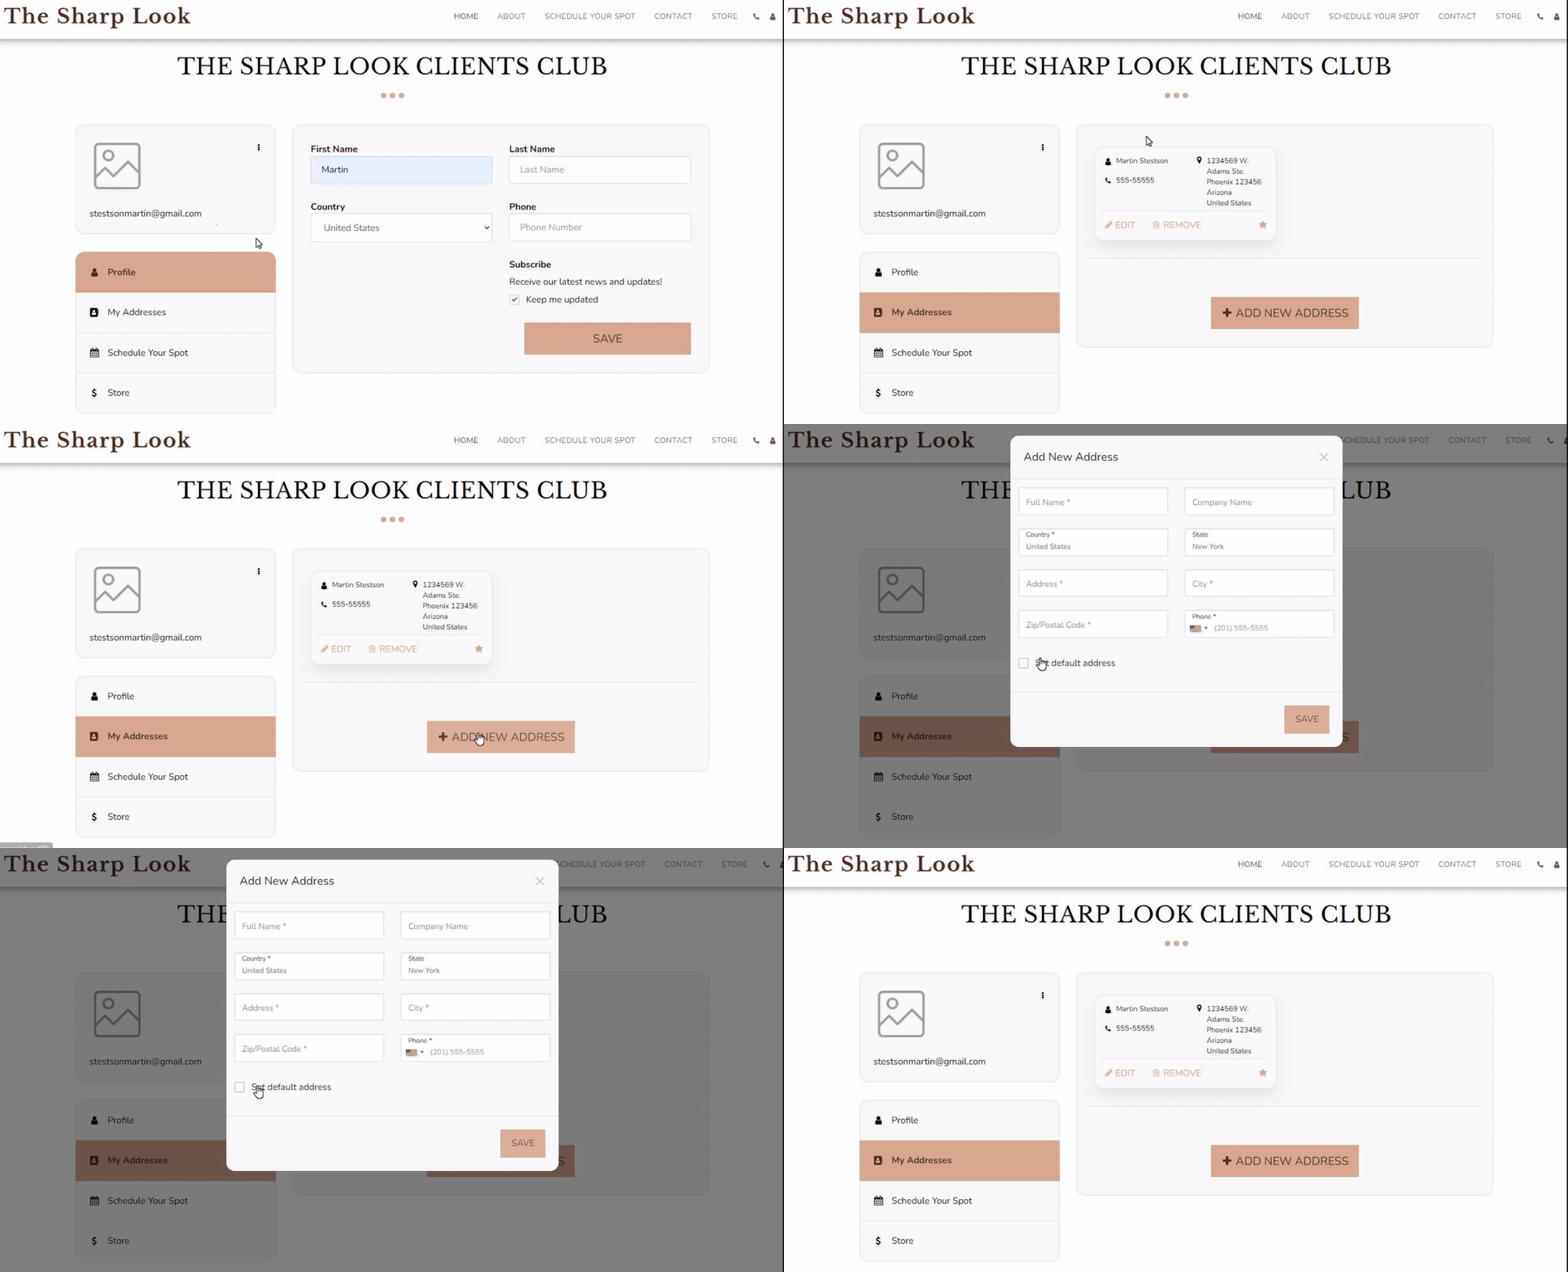
Each user can add multiple addresses and use them when making orders on your website, as well as edit them when necessary. The Client can set up multiple addresses and decide on the primary one.
Users can use this tab to view information about their booking and, if permitted, cancel or reschedule their appointments.
This Tab will allow them to do the following:
Info - Will show the booking details.
Pay - Will let the client pay for the scheduled service.
Downward arrow - if the option is enabled in the schedule page settings, your clients will be able to reschedule or cancel their appointments
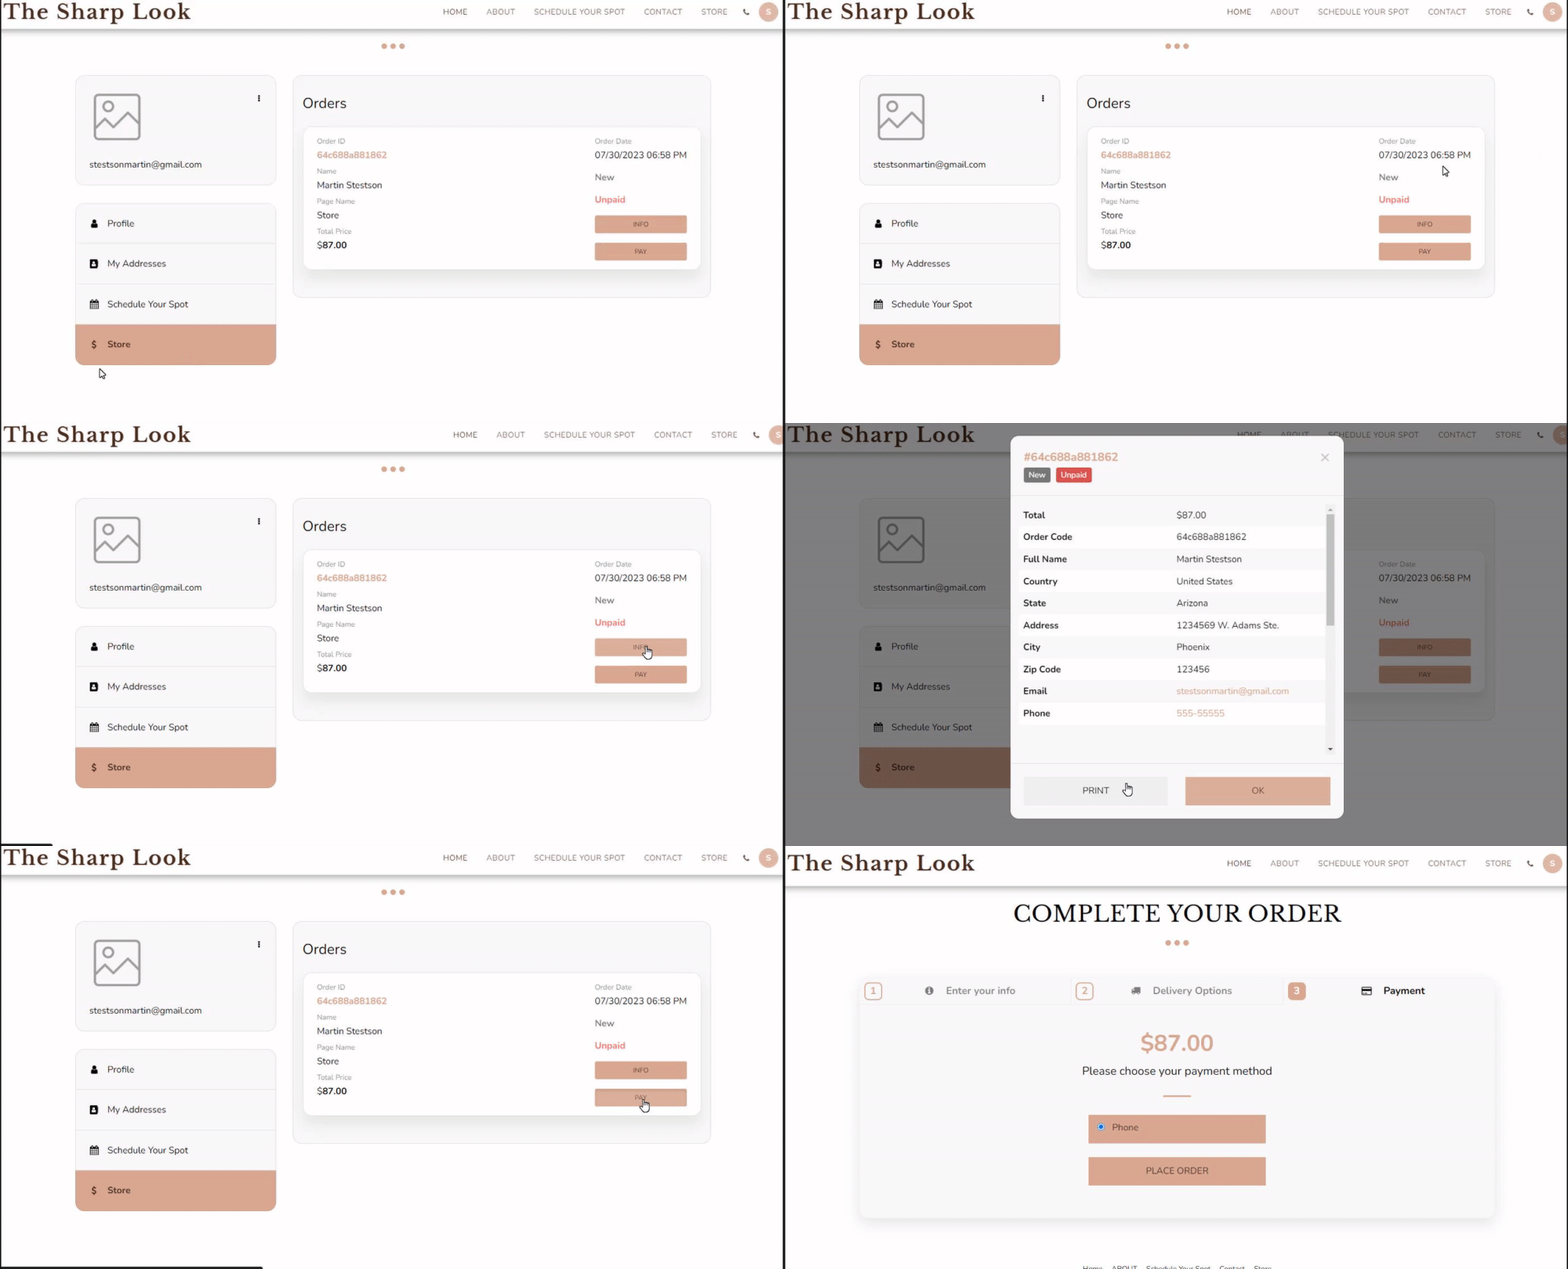
If your website has an E-commerce store, they will be presented with this tab. Any order the user has made will be present here.
This Tab will allow them to do the following:
Info: The user can review their order details, including the shipping address, total cost of the order, and other relevant information.
Pay: The user can pay any unpaid order from within their client zone. This will redirect the client to a payment screen where they can pay for the desired order.
If you offer a subscription to your Blog/Online Courses, your users will be able to manage their subscription through the Client Zone, under the Subscription tab your users will be able to check relevant information about their subscription, Users will also be able to check the status of their subscription and have the option to cancel their subscription by clicking the Cancel button
Under this tab, your users will be able to pay for their subscription to your blog,
Info: The user can review their order details.
Pay: The user can pay any unpaid order from within their client zone. This will redirect the client to a payment screen where they can pay for the desired order.
If you are offering online courses on your website under this Tab, the user will be able to see all the courses he signed up to
Info: The user can review their order details.
Pay: The user can pay any unpaid order from within their client zone. This will redirect the client to a payment screen where they can pay for the desired order.
Go To Course Button: Clicking this option will take the user to the selected course
You can enhance your branding by customizing the default names (Labels). This allows you to display what you want your clients to see, for example, "Best Clothes Store," "The Conference Gathering," or anything else that empowers your brand.
To set up a branded Tab on your website client zone, go to the E-commerce store or to the Booking page, click The Store or Edit buttons, respectively, and follow these steps:
Click Settings in the side menu and then click Configuration.
Click Custom Labels and set the Store or Booking category to Custom.
Add the custom brand tag and save.
This will replace the existing tab with the branded label.
Read more about the E-commerce Store and the Schedule Booking page settings.