Every great restaurant needs a great menu. Use the Restaurant Menu page to display your dishes, describe the dish, and present the restaurant theme and vibes.
In this guide, you will learn how to add your dishes, arrange them under categories, and use our AI tool to add existing dishes to your menu.
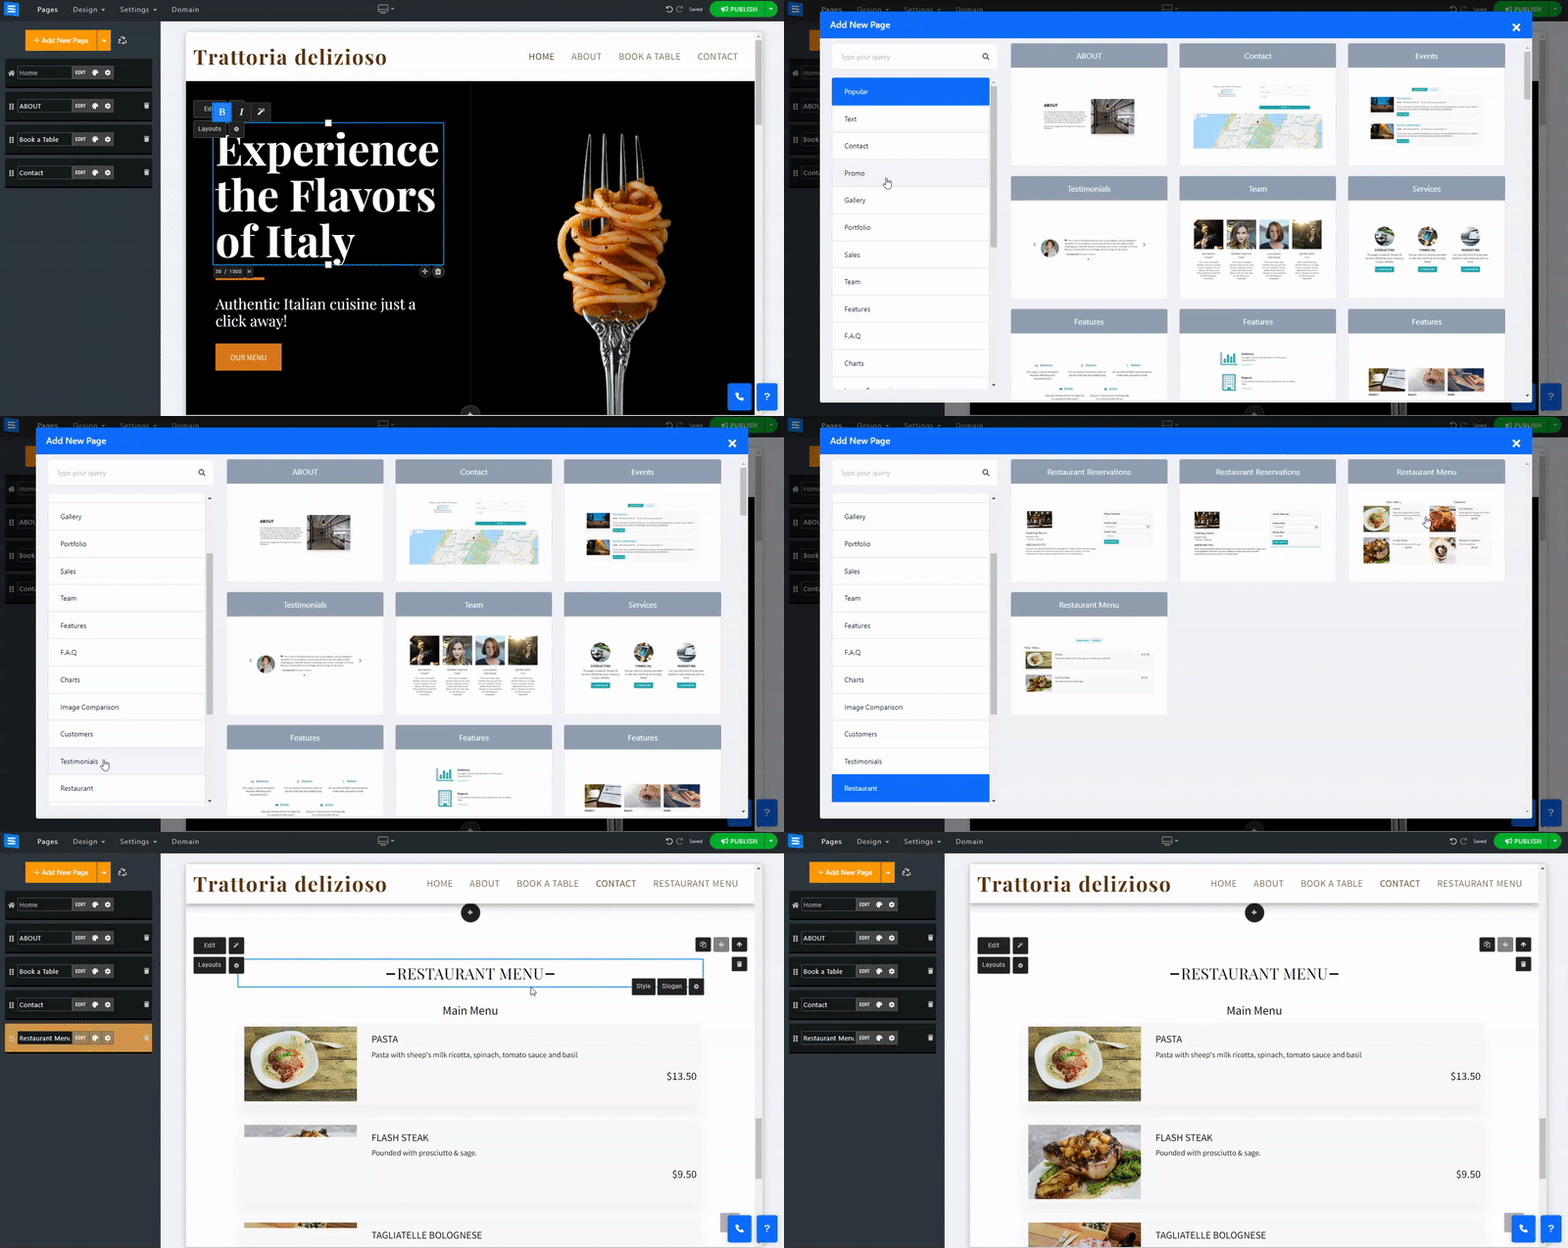
In the Website Editor, click Pages.
Find the Restaurant Menu Page in the current page list, or Add It as a New Page.
Edit the page Title and Slogan. Read more about Adding a Slogan.

In this section, you will learn how to Add, remove, and manage the items on your Restaurant Menu page.
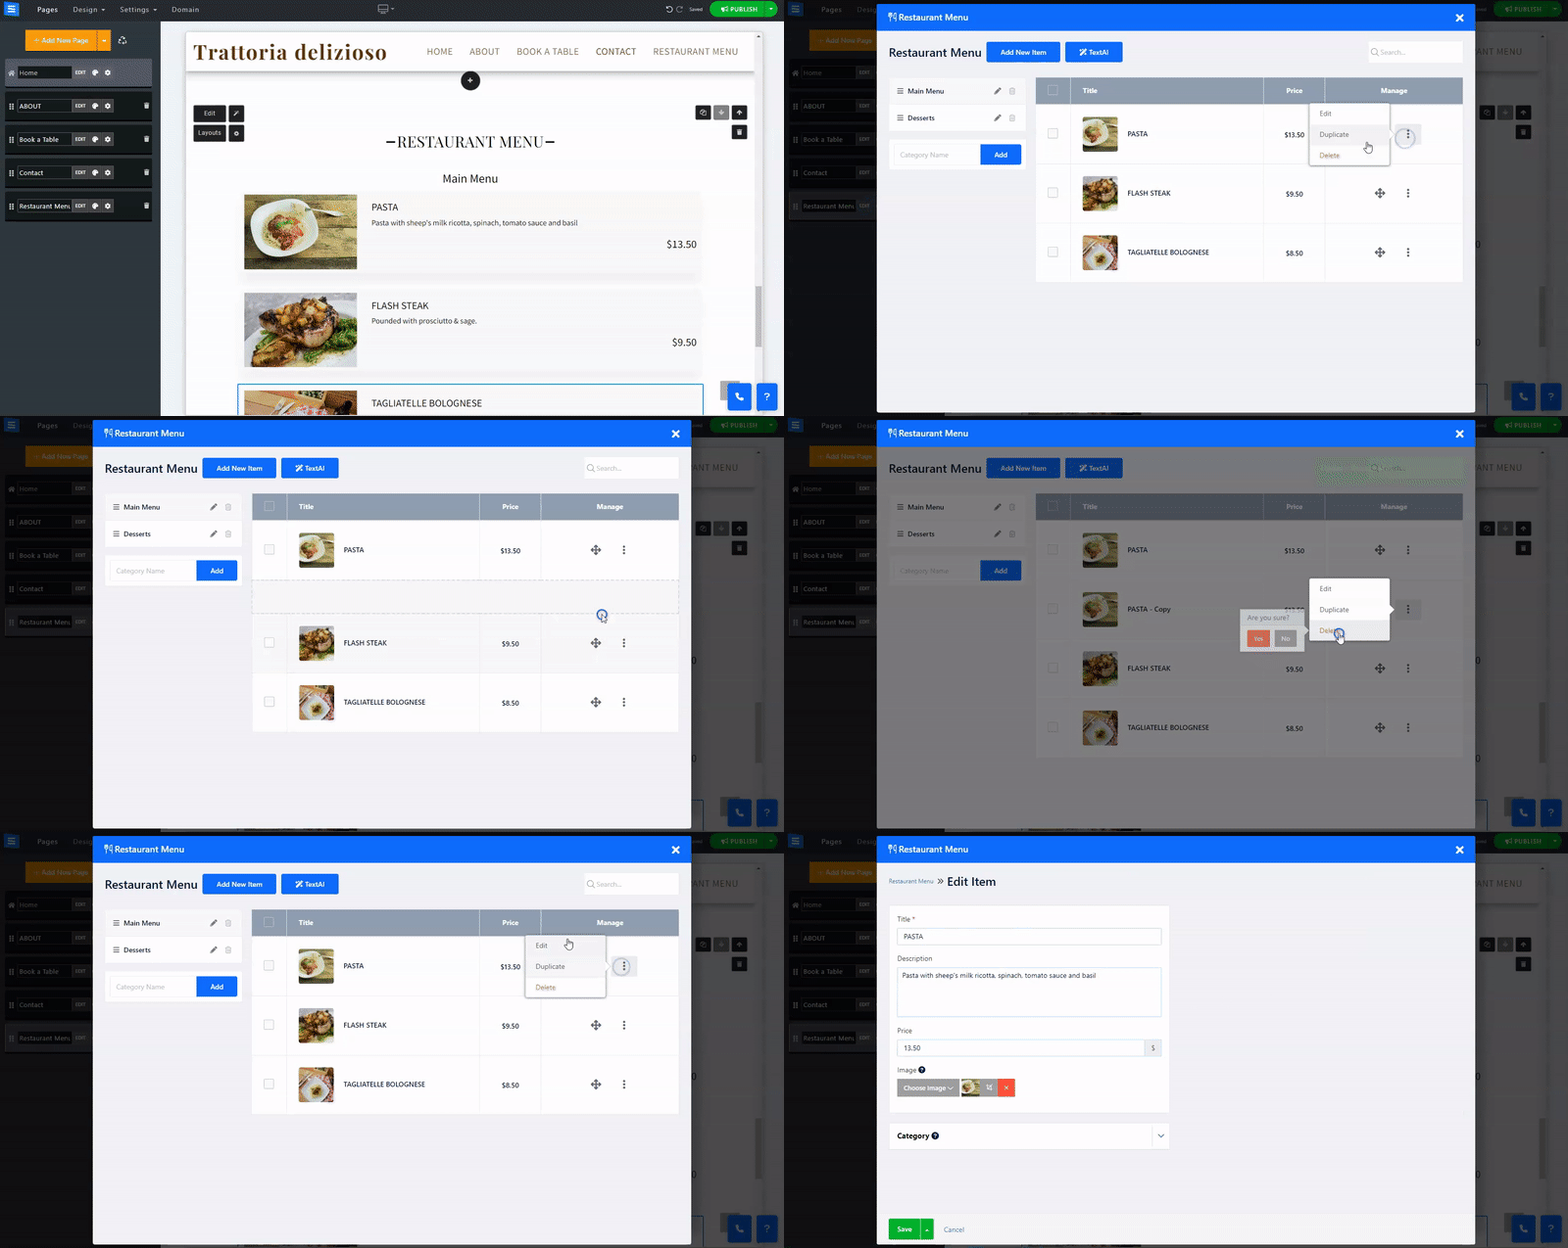
Click the Edit button.
Click the Arrows Icon and drag to reposition an item in the list.
Click the Three Dots Icon to Edit, Duplicate, Preview, or Delete an item.

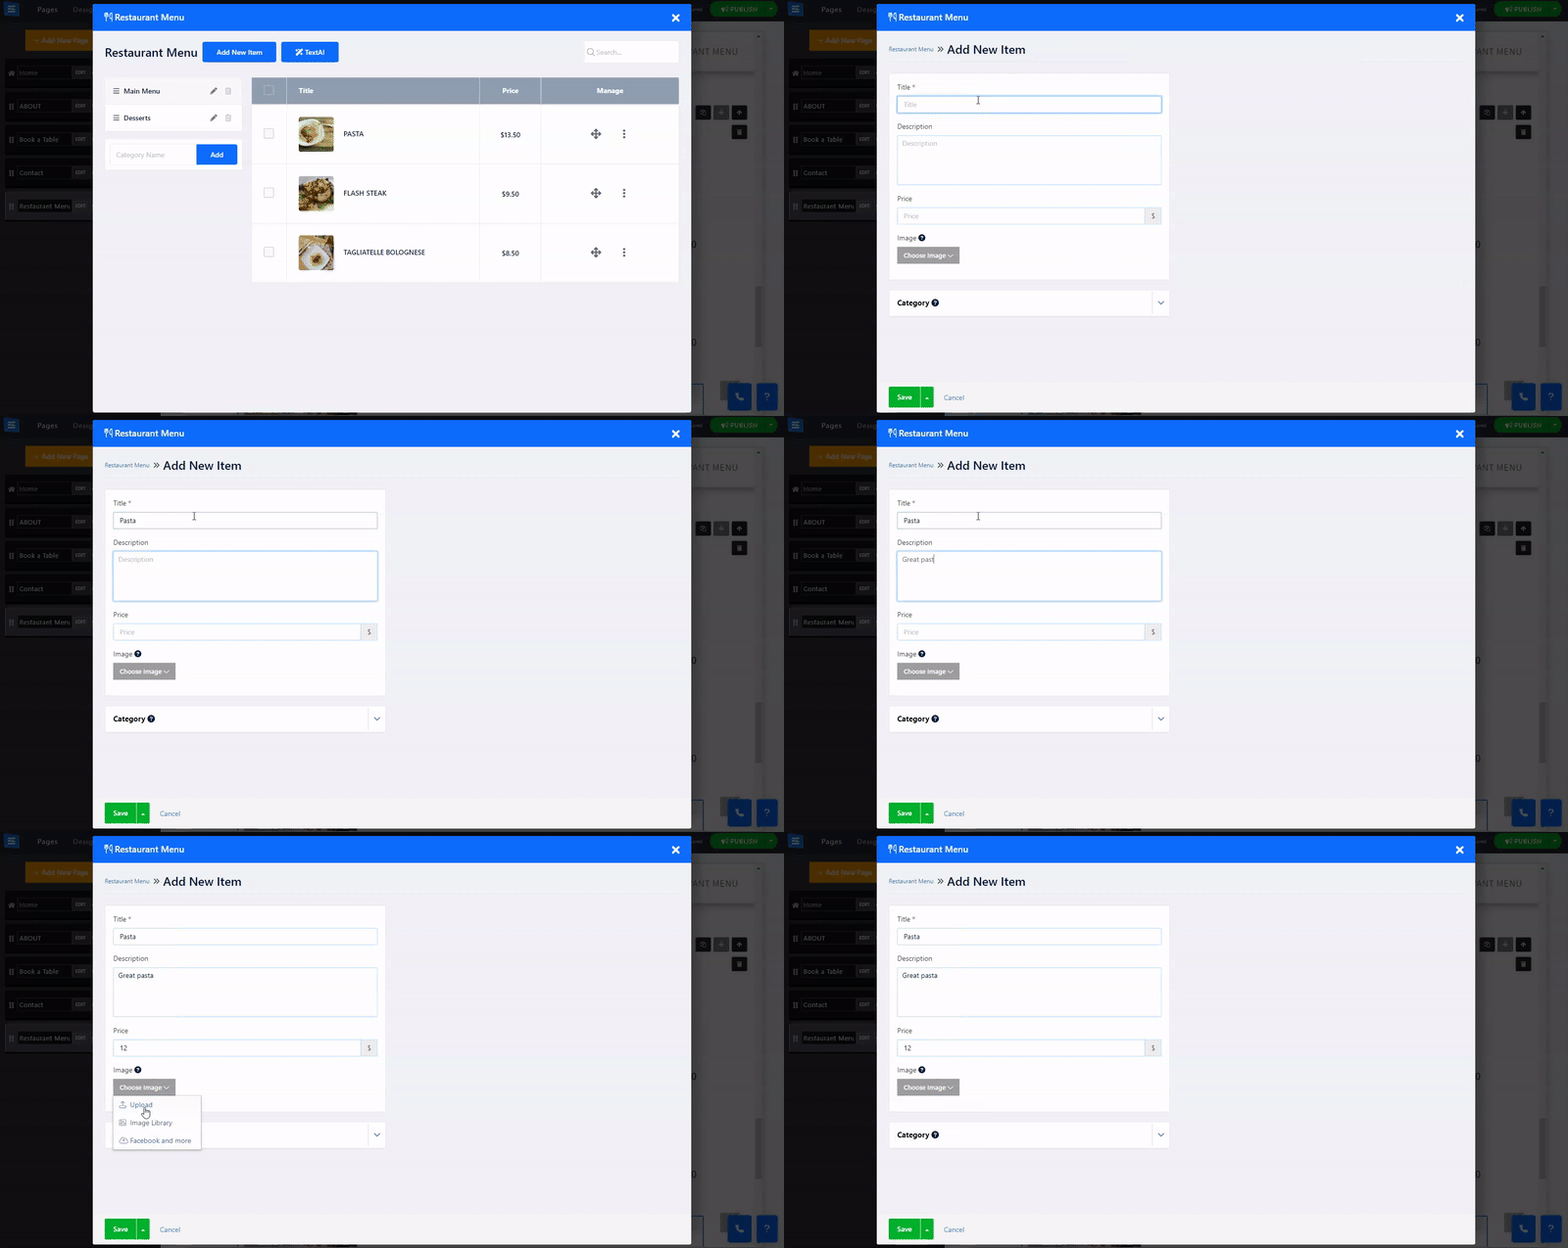
Click the Add New Item button to add a new dish to your menu.
Title - Set the title for your new dish
Description - Add a dish description
Price - Set the dish price
Image (size limit 50MB) - Add an image from your computer. You can also select one from the image library or add an image from an external source, such as Facebook.

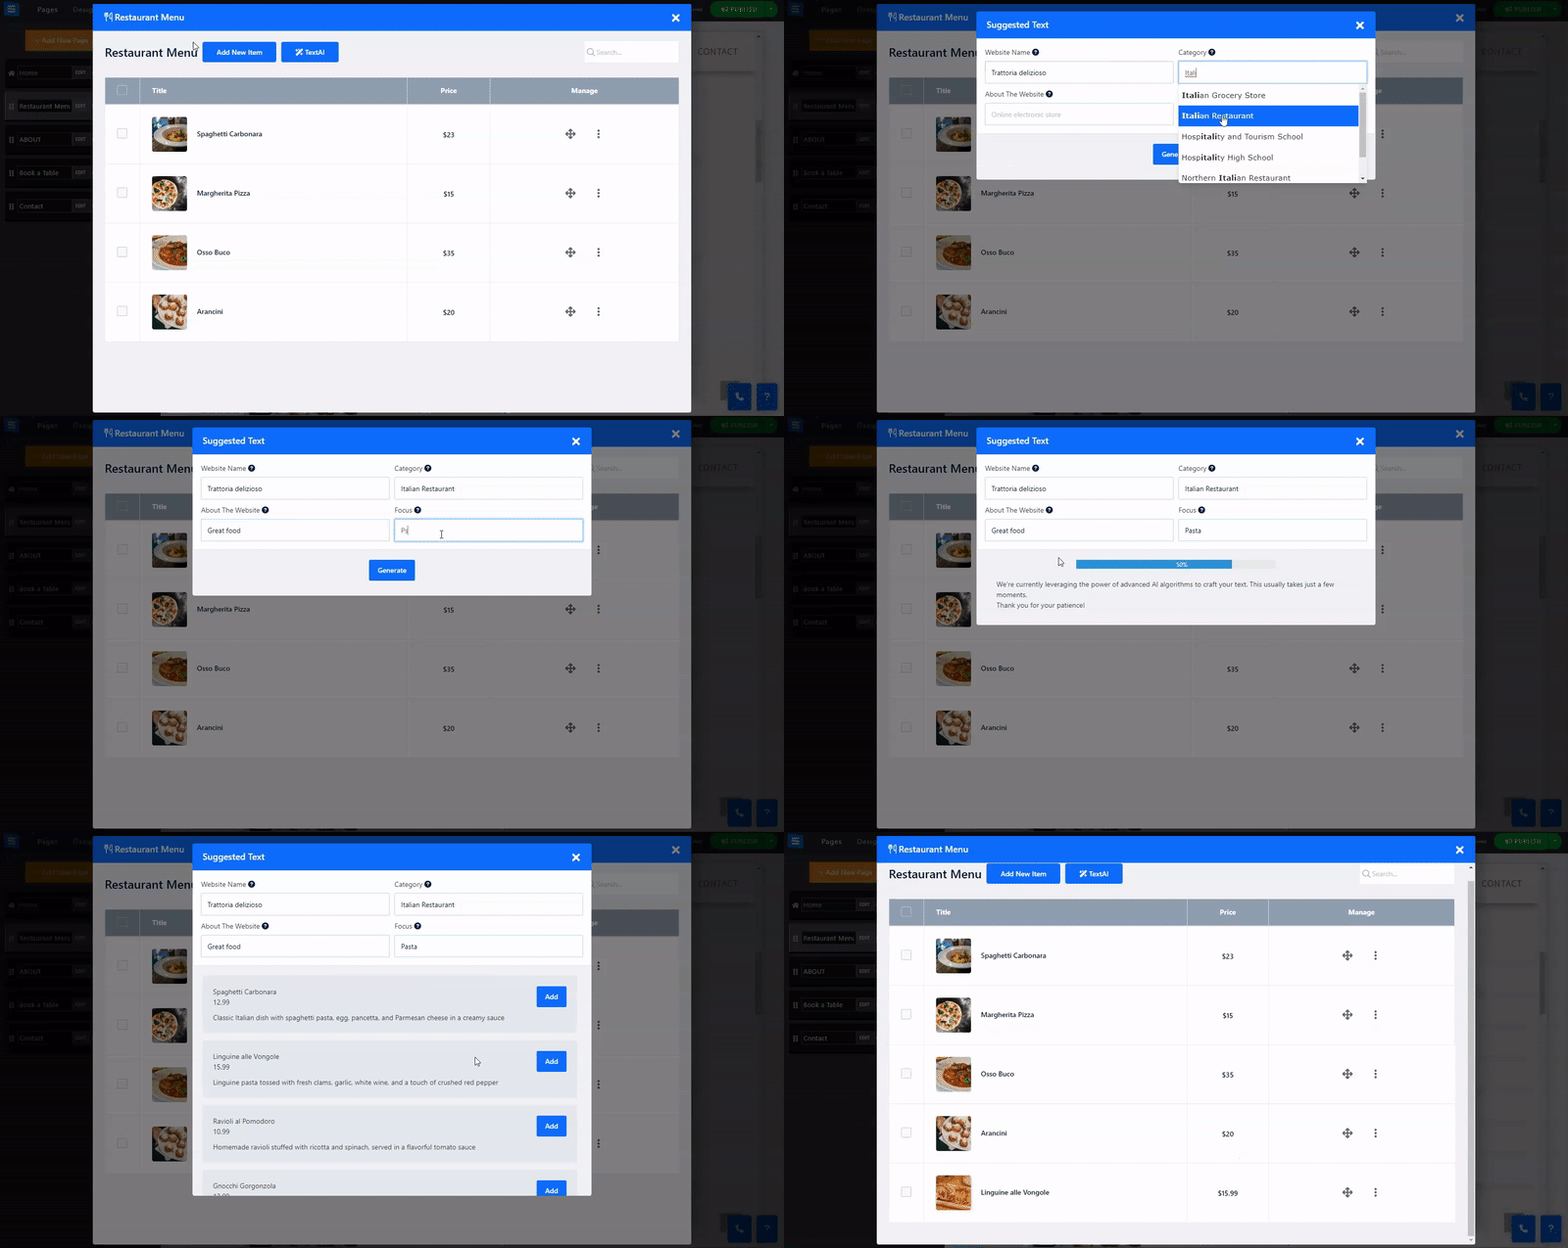
Utilize our AI tool to promptly incorporate personalized Menu Dishes.
The AI tool will produce various text options for you to select from. Simply choose the most fitting one and add it to your page.
To access the tool from your Restaurant Menu Page, click the Magic Wand icon. You can also access the tool from within the Edit window by clicking the TextAI button.
Provide the AI tool with the following information:
Website Name - Add the name of your website
Category- Add your Restaurant category, for example, Italian Food. This will allow the tool to generate text oriented to your restaurant.
About the website - Add a short description of your restaurant - This will allow the tool to generate text using the provided baseline characteristics.
Focus - Focus the AI Tool to generate content related to a specific ingredient or wanted dish by adding a focusing word or sentence.

Read more about the Page Layout.