Effectively managing your website customers is the cornerstone of success in the digital realm. A Customer tab is available in all the tools that enable order reception, including Online Store, Schedule Booking, Events, and more.
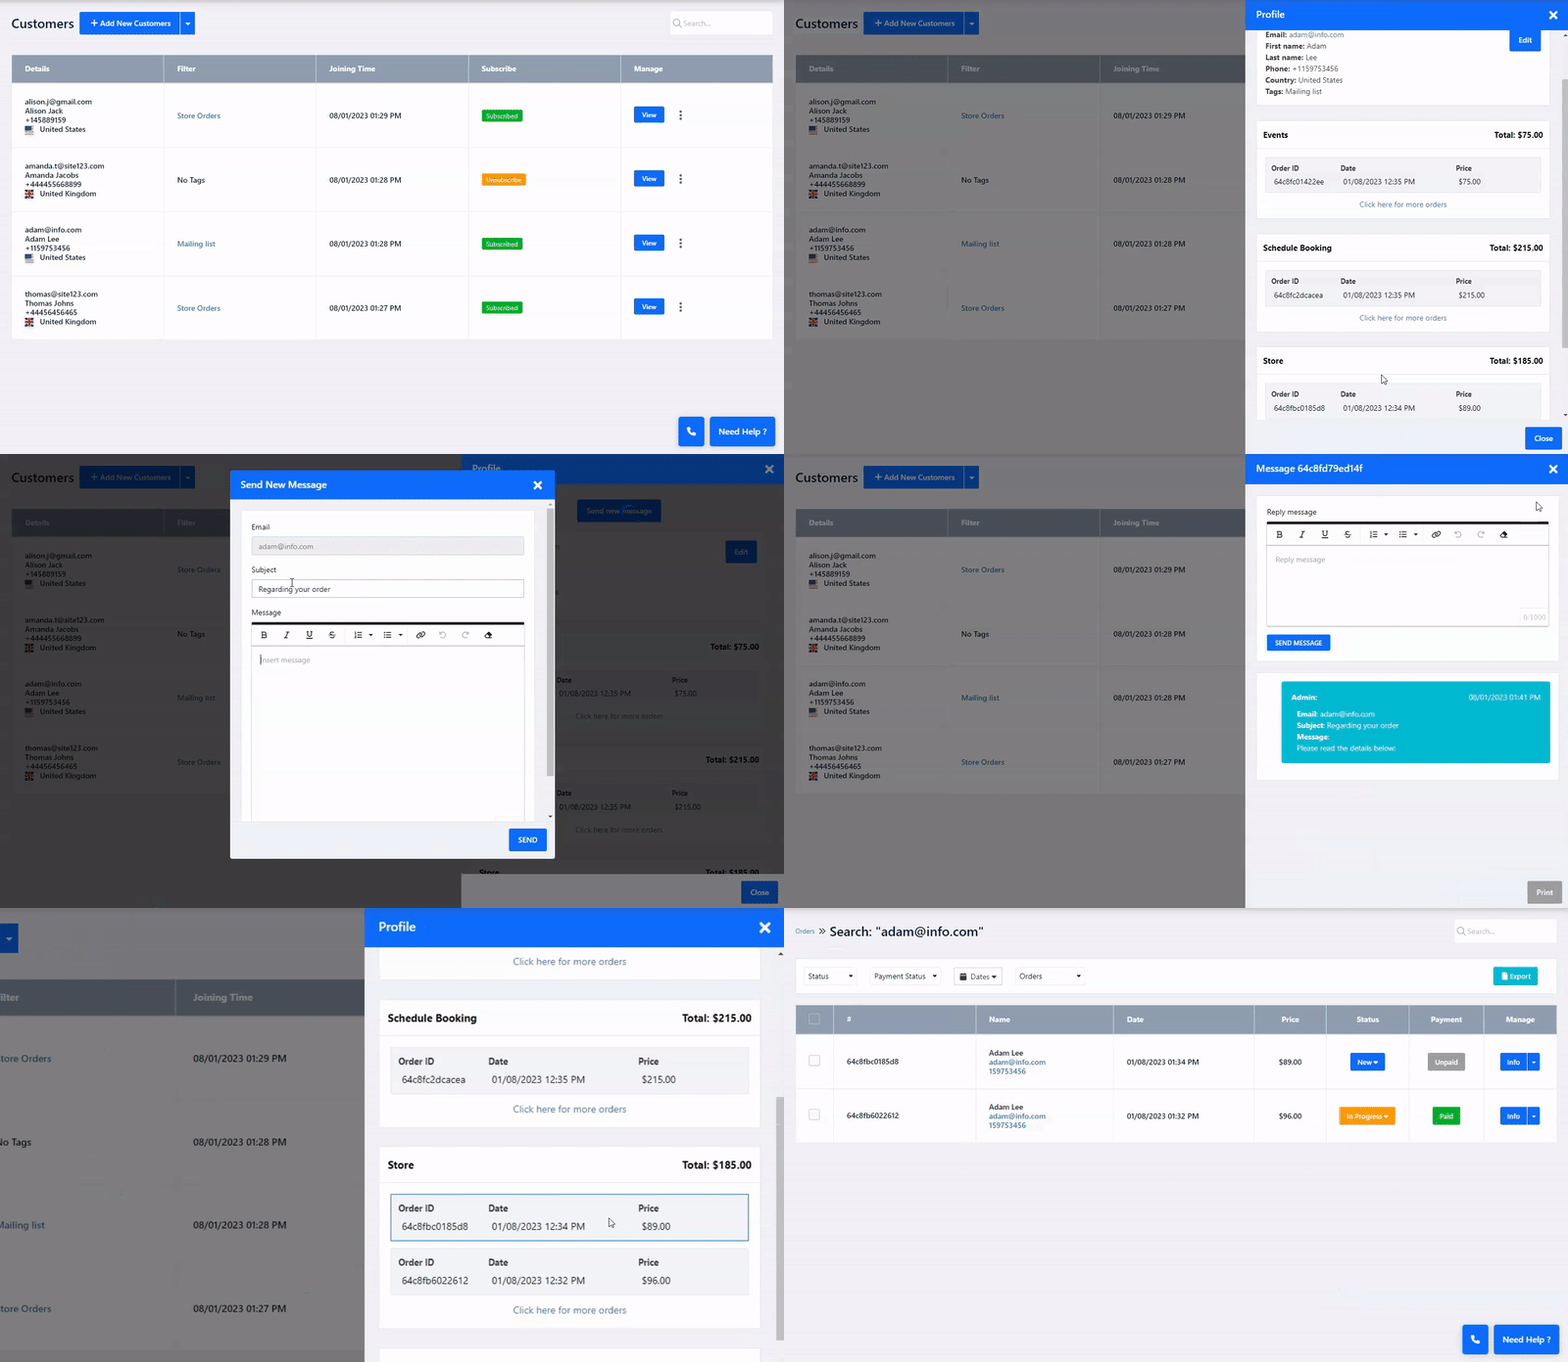
With this feature, you can easily view all the orders a customer has made, along with their details, order amount, and more. Furthermore, you can also send messages directly to customers from this tab. In the website editor, navigate to the Pages section. Locate the specific page where you want to manage its customers In the pages list, and click Edit.
In the page Edit section, locate the Customer Tab. Once there, you will see all your website customers in a list format.
Details - Displays the customer’s Email address, Name, Phone number, and Country.
Filter - This empowers you to sort your customers according to the associated tag. By Clicking the designated tag, you can filter and exhibit all customers linked to that specific tag.
Joining Time - displays the date and time your customer was added.
Subscribe- This shows if the Customer has also subscribed to your mailing list.
Manage - View more info. edit, delete, and send your customers messes. Read ahead for more information.

Click view to see more information about the Customer. You can view more detailed information about your customer, including Customer orders, booked services, and messages.
Click the Three Dots to access the options menu from this menu:
Add A coupon - enables you to add a coupon to an individual customer. Learn more about Creating Coupons.
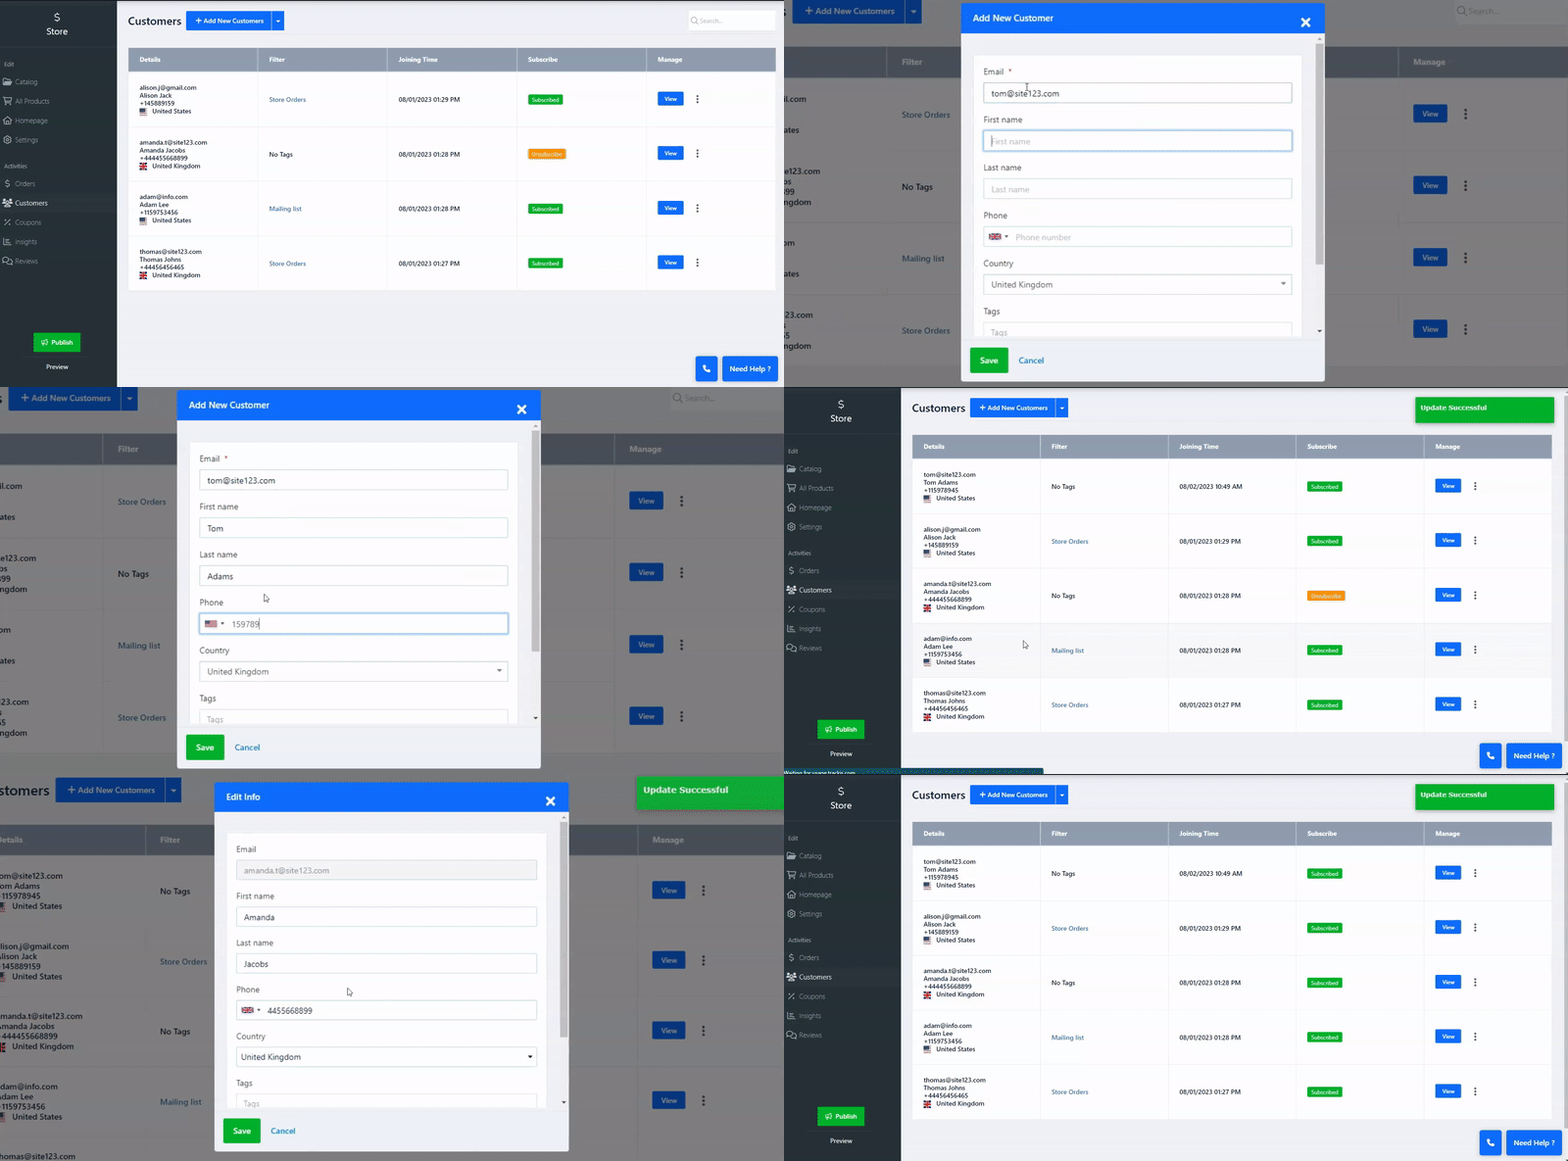
Edit - In the edit window, You can edit the customer information such as name, phone number, and country. In this window, you can also add a unique tag to your customer to better help you with filtering customers in your list.
You can also subscribe them to your mailing list by toggling ON the customer agreement button or unsubscribe them by toggling the option OFF.
Send message - Communicate with your customers by sending them messages directly from the Customer Tab. Messages will be sent to the email address used by your customer. In the received email, your customer will have the option to reply directly to the sent message. All messages will be presented as threads to the original message in the info window.
Delete - Choose this option to remove a customer from your customer list.
You can manually add new customers to your customer list
Click the blue Add New Customers button on the top of the Customer Tab
Add the customer information to the relevant fields, and click save to add them to the list.
Please note that from this screen, you can also tag and subscribe the new customer to your mailing list.

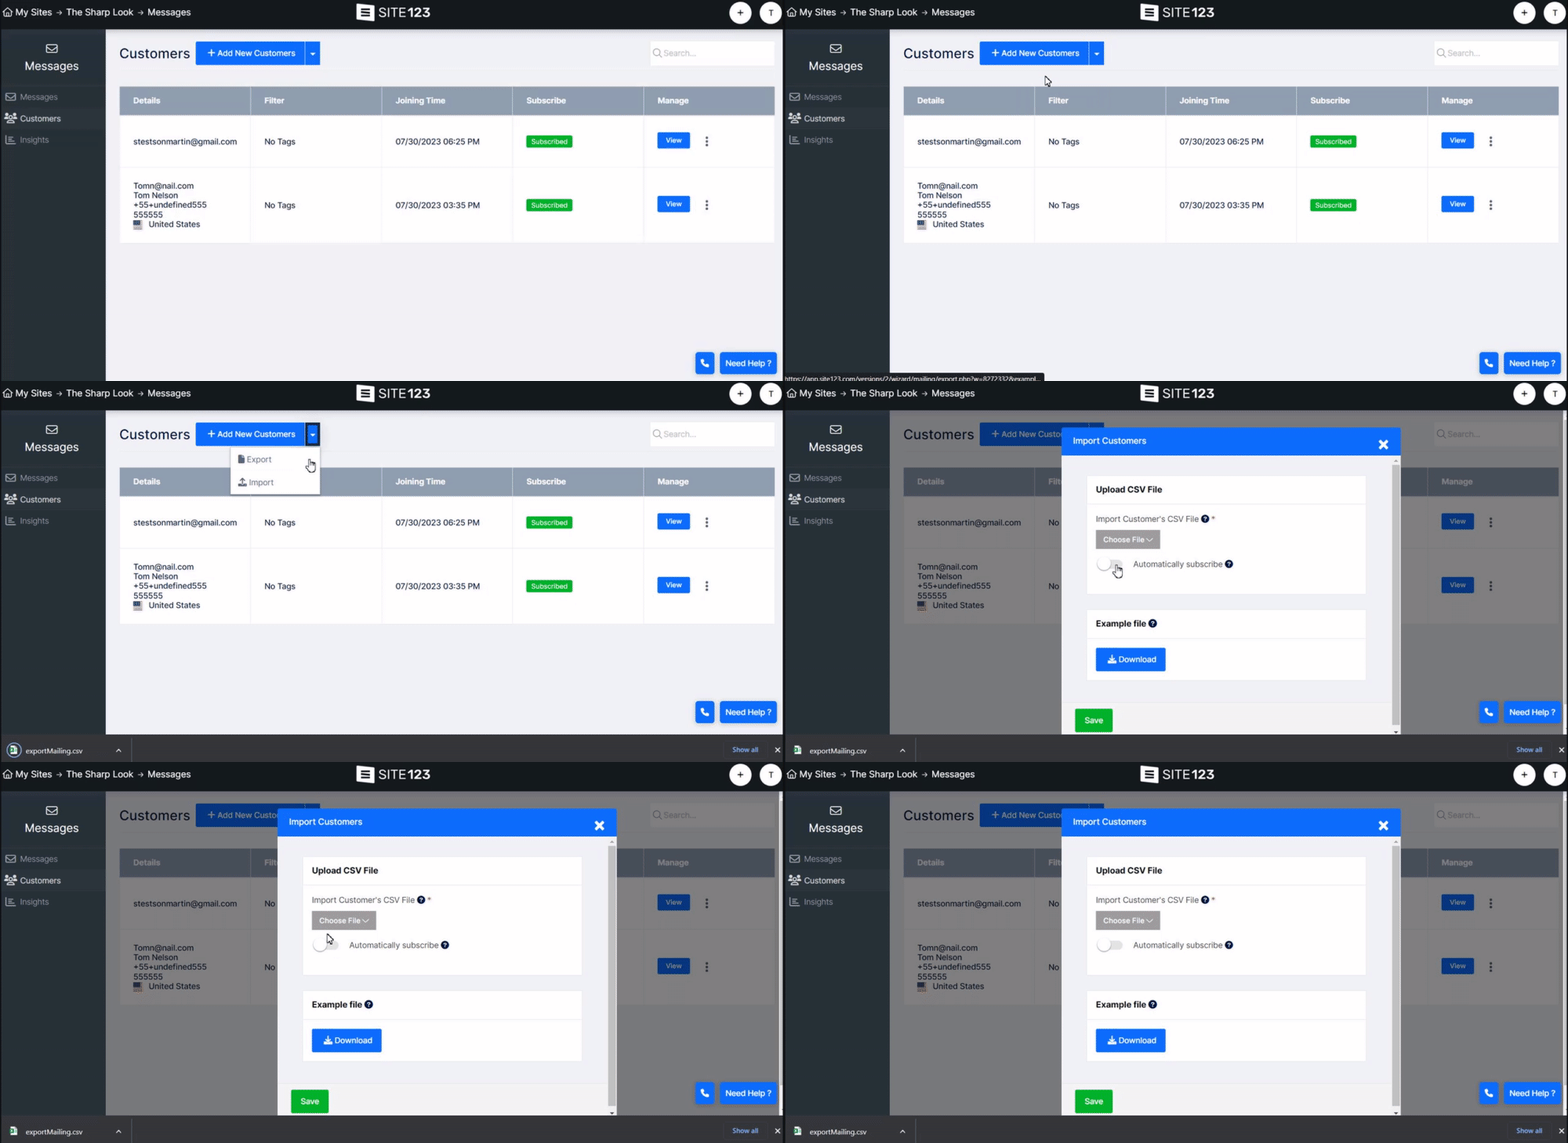
Use the Export and Import option to manage existing customers or add new ones.
Click the Downward facing arrow to the right of the Add New Customer button to access these options.
Export - Exporting your customer list will allow you to manage your customers using external software such as Microsoft Excel or Google Sheets.
Import - If you already have a CSV file containing a list of customers, you can import it into your website customer list and add them to it.
