Showcase job positions that are currently available within your organization.
Advertise available positions, gather applications, and locate your next employee.
In this guide, you will learn how to set up the Job Page to best fit your organization's hiring needs. Learn how to publish available positions, sort CVs and applicants, and more.
In the Website Editor, click Pages.
Find the Jobs page in the current page list, or add it as a new page.
Edit the page Title and Slogan. Read more about Adding a Slogan.

In this section, you will learn how to Add, remove, and manage the items on your job pages.
Click the Edit button.
Click the Arrows icon and drag to reposition an item in the list.
Click the Three dots icon to Edit, Duplicate, Preview, or Delete an item.
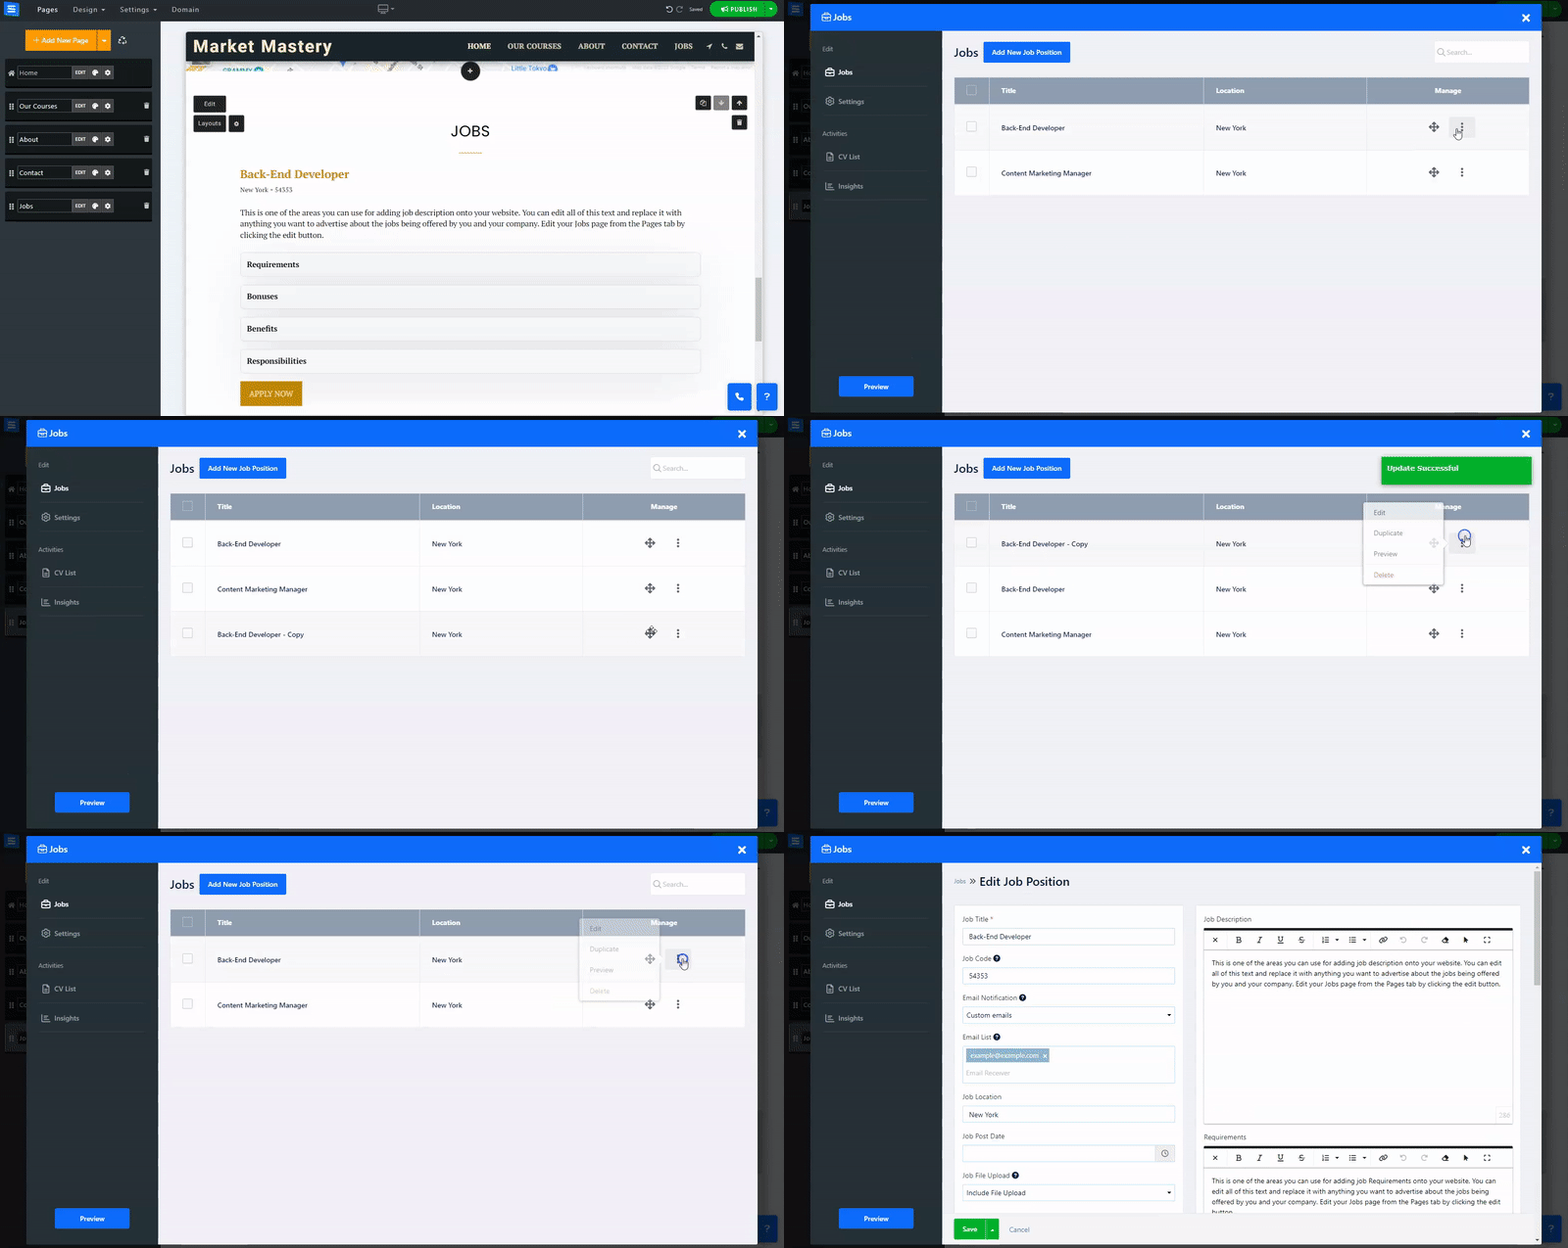
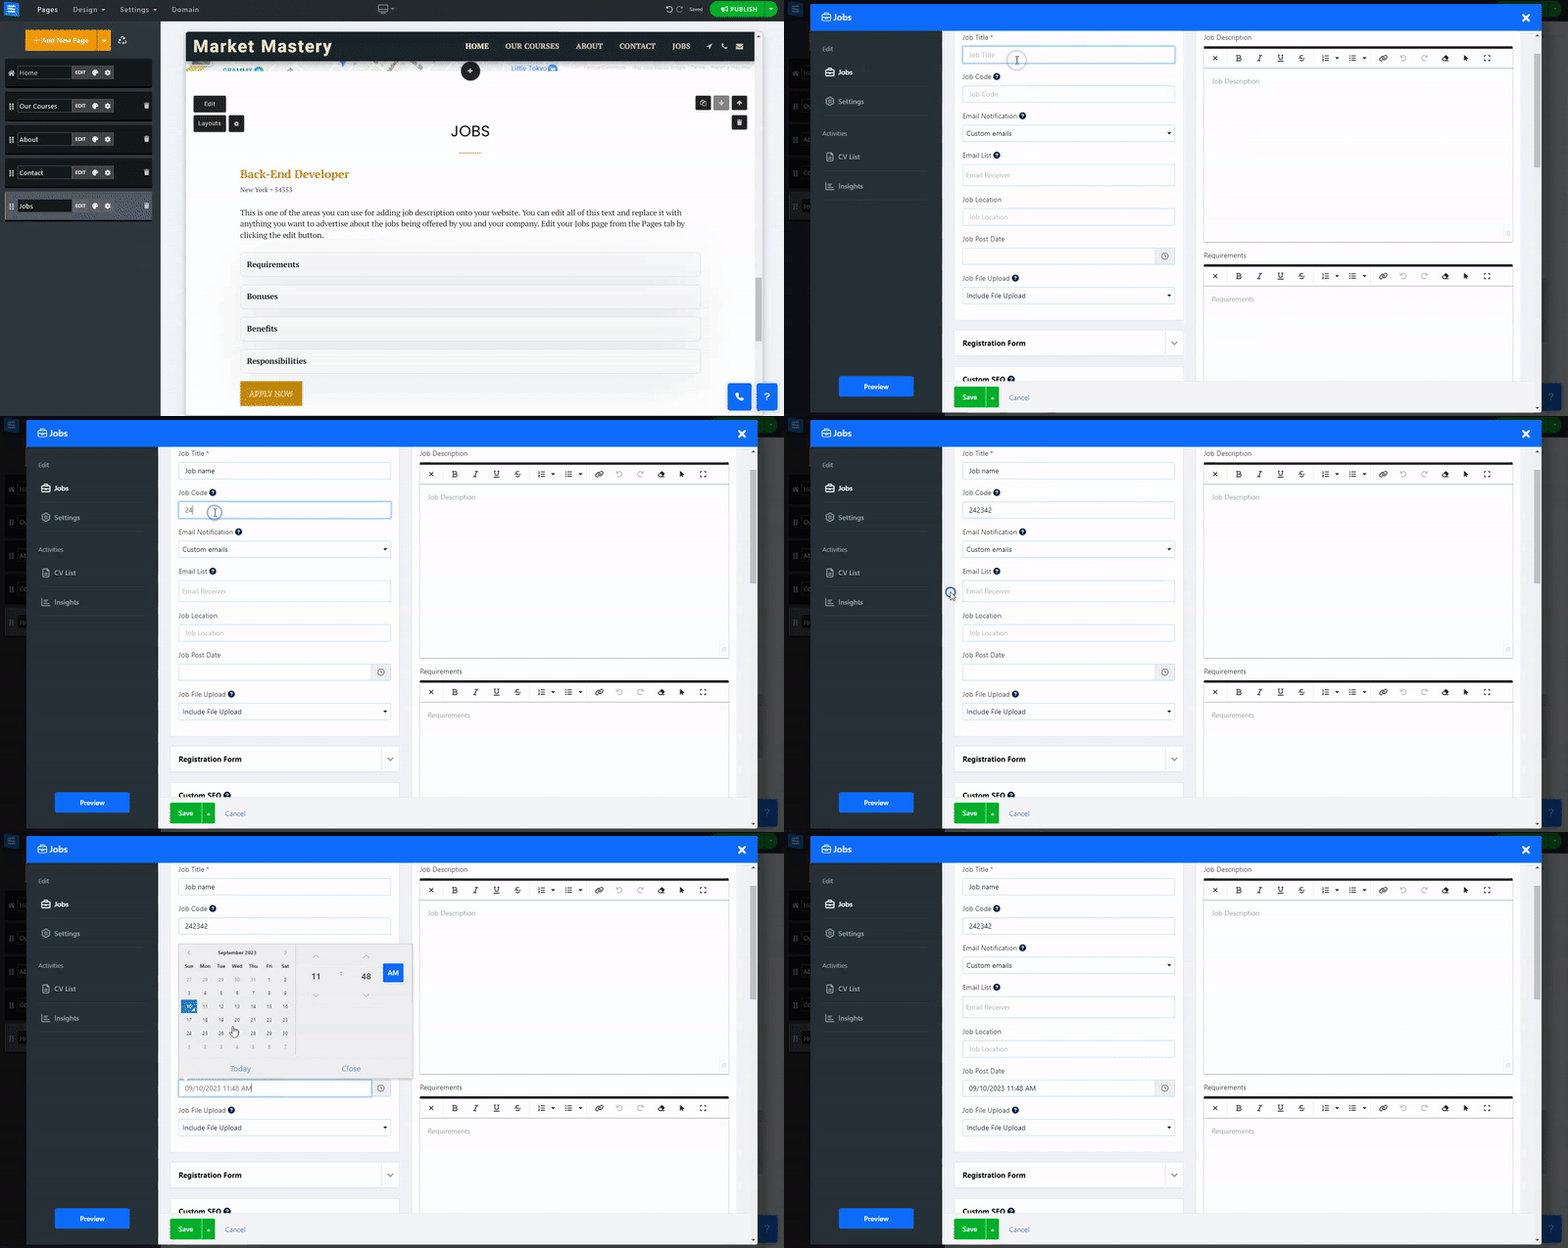
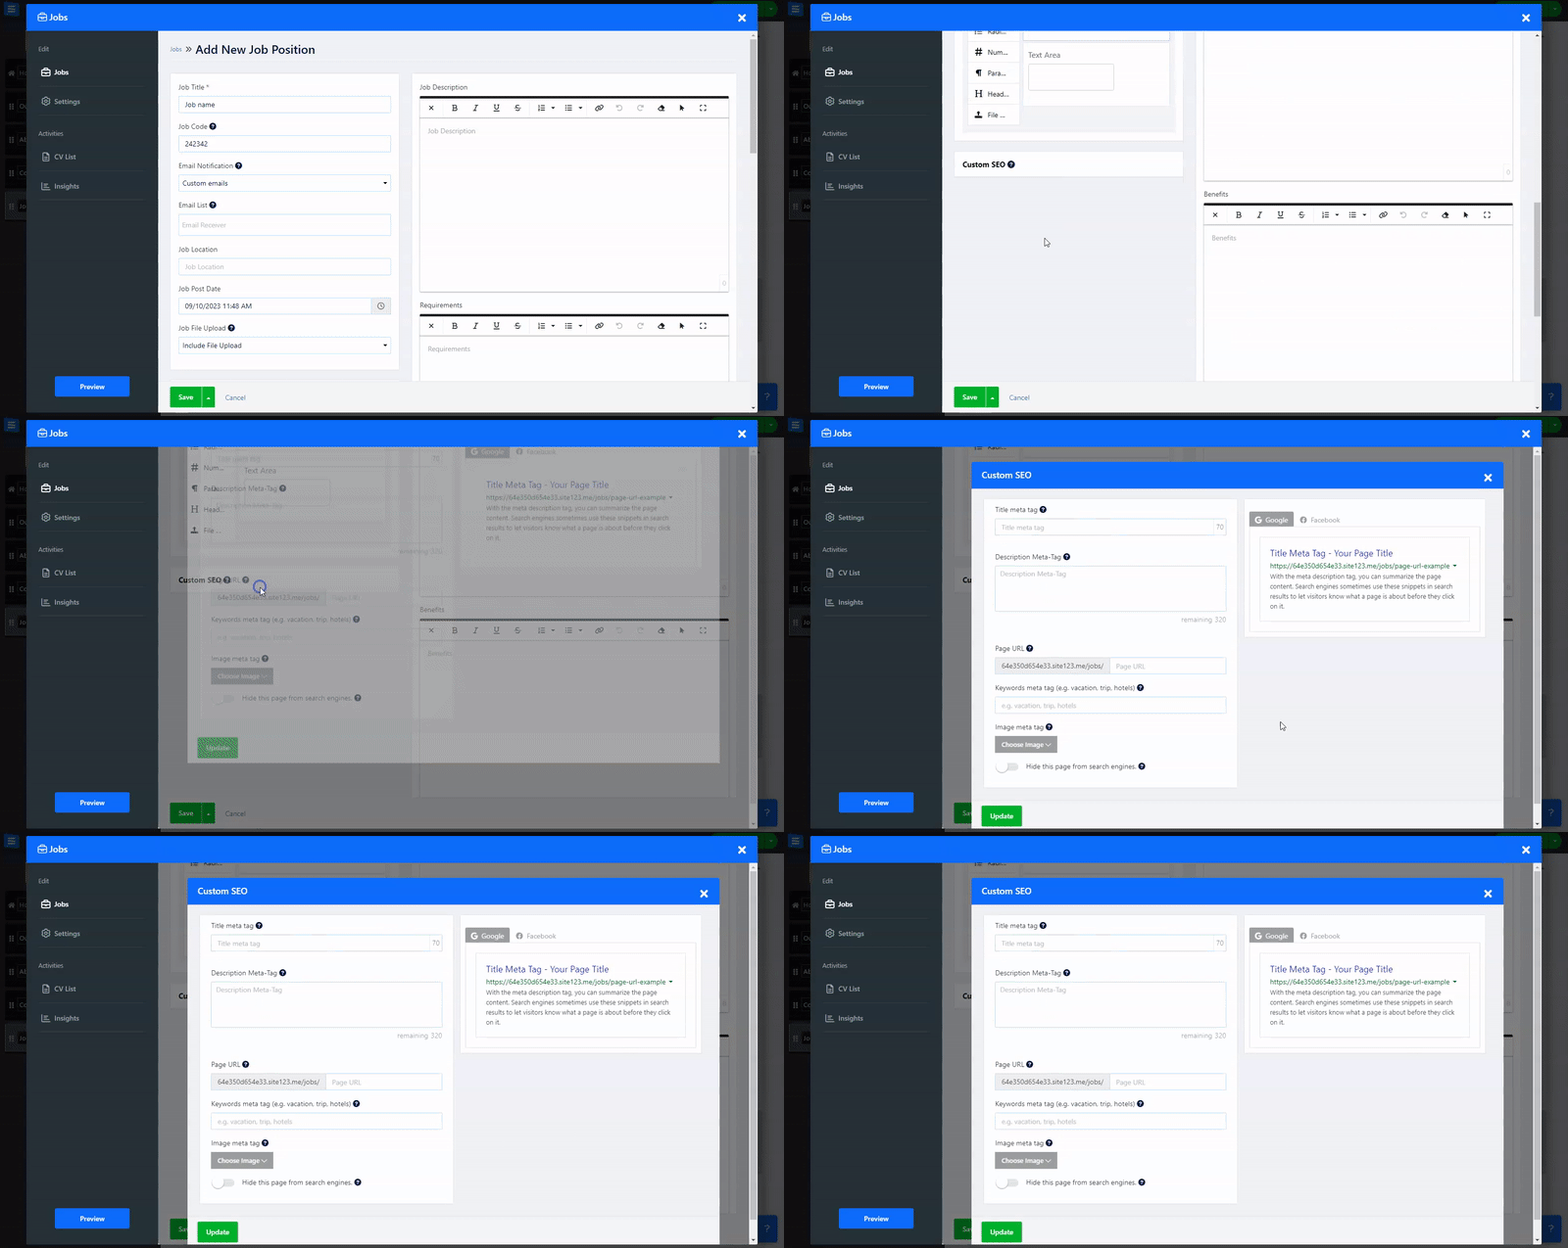
Click the Add New Item button to add a Job position. Enter the relevant details:
Job Title - Add the job position title
Job Code - Add a position code
Email Notification - Add an email address where you want to receive notifications regarding the position. Choose from the Admin Email address, Custom, and no notifications.
Email List - When you select "Custom" in Email Notification, a field will appear where you can enter up to 5 email addresses. These addresses will be used to receive notifications in regard to the specific position.
Job Location - Add the job location.
Job Post Date - Add the Posting date for the position.
Job File Upload - Enable or disable the option to upload files. Selecting Remove File Upload will hide the file upload option from the position application form.
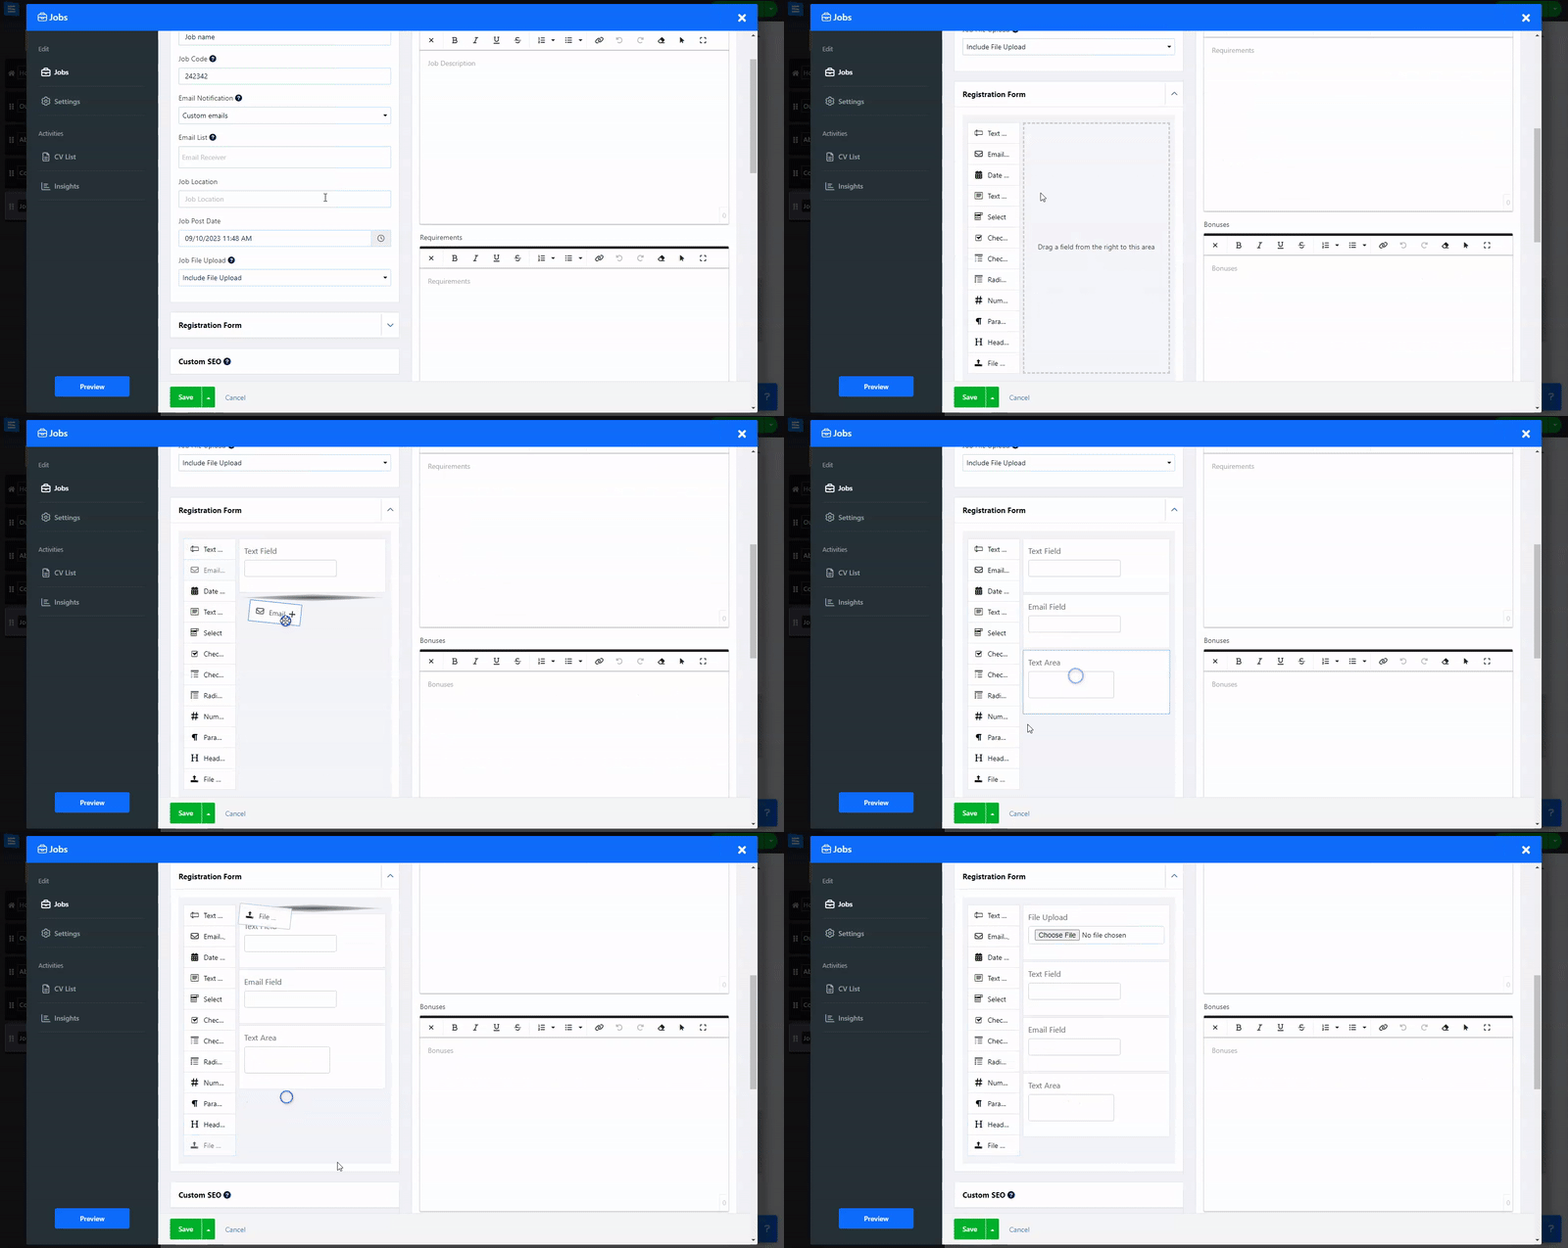
Create a custom Application Form to allow your candidates to submit messages, select from provided options, Upload files, and more.
Please Note- when using the Custom form option, it will replace the Default Form. The Selected option to the custom form will not be added to the default form, and any relevant form options from the default form will need to be manually added. Read more about the use of the Custom Form Builder.
Adjust the SEO settings of your different applications. Read more about Custom SEO.
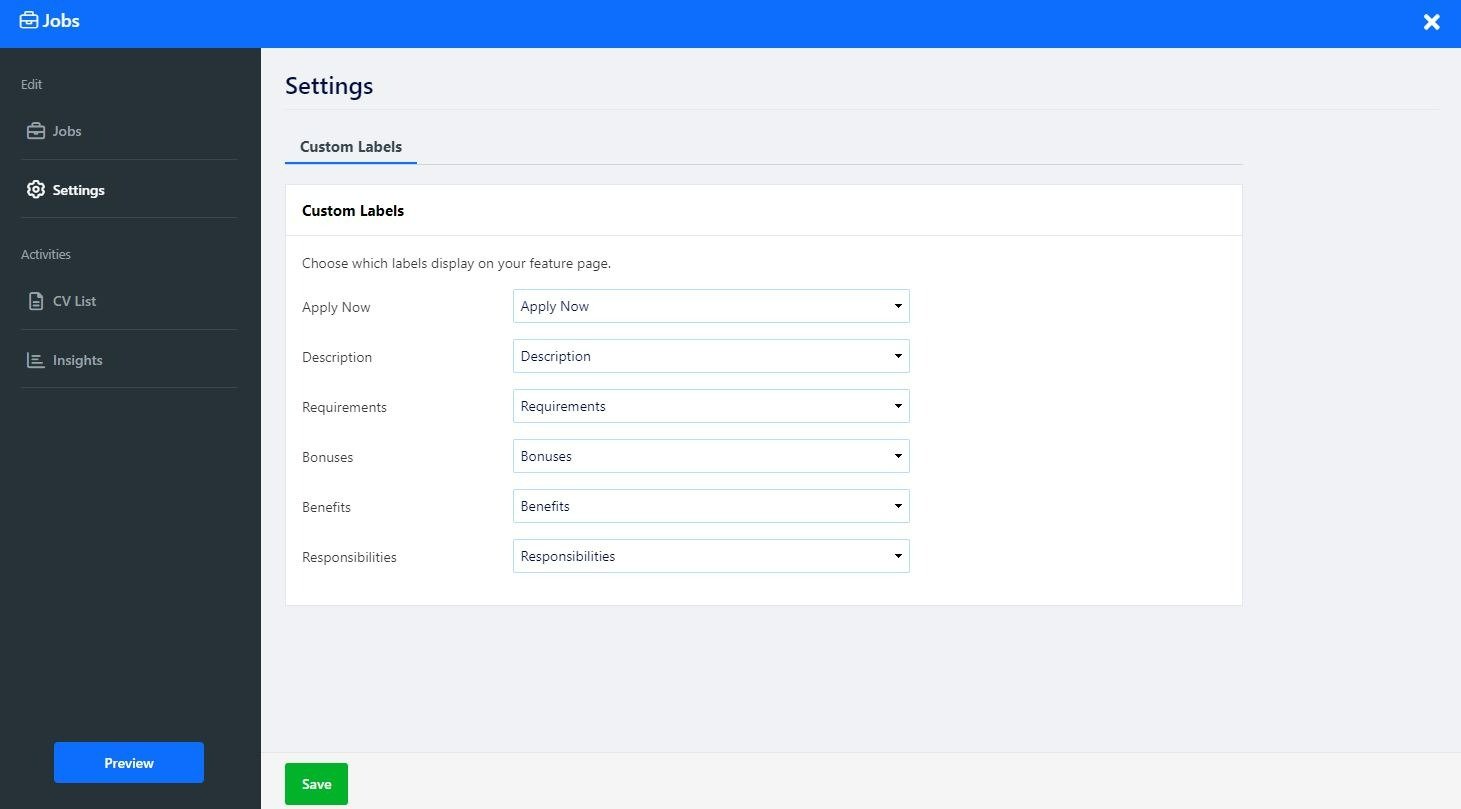
Under the Settings Tab, create custom labels that will be presented when a potential candidate views the position. Customize the label by choosing the Custom option.
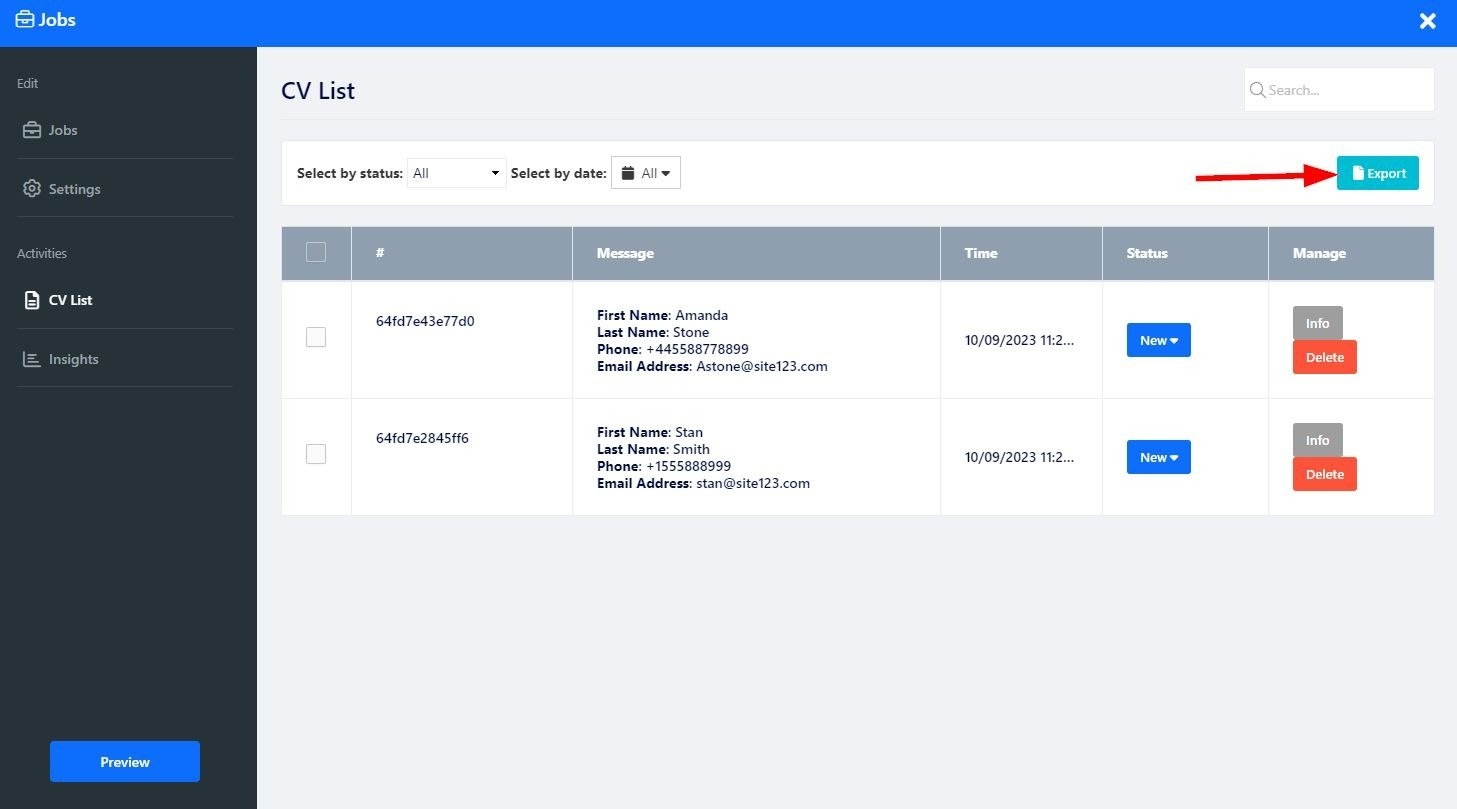
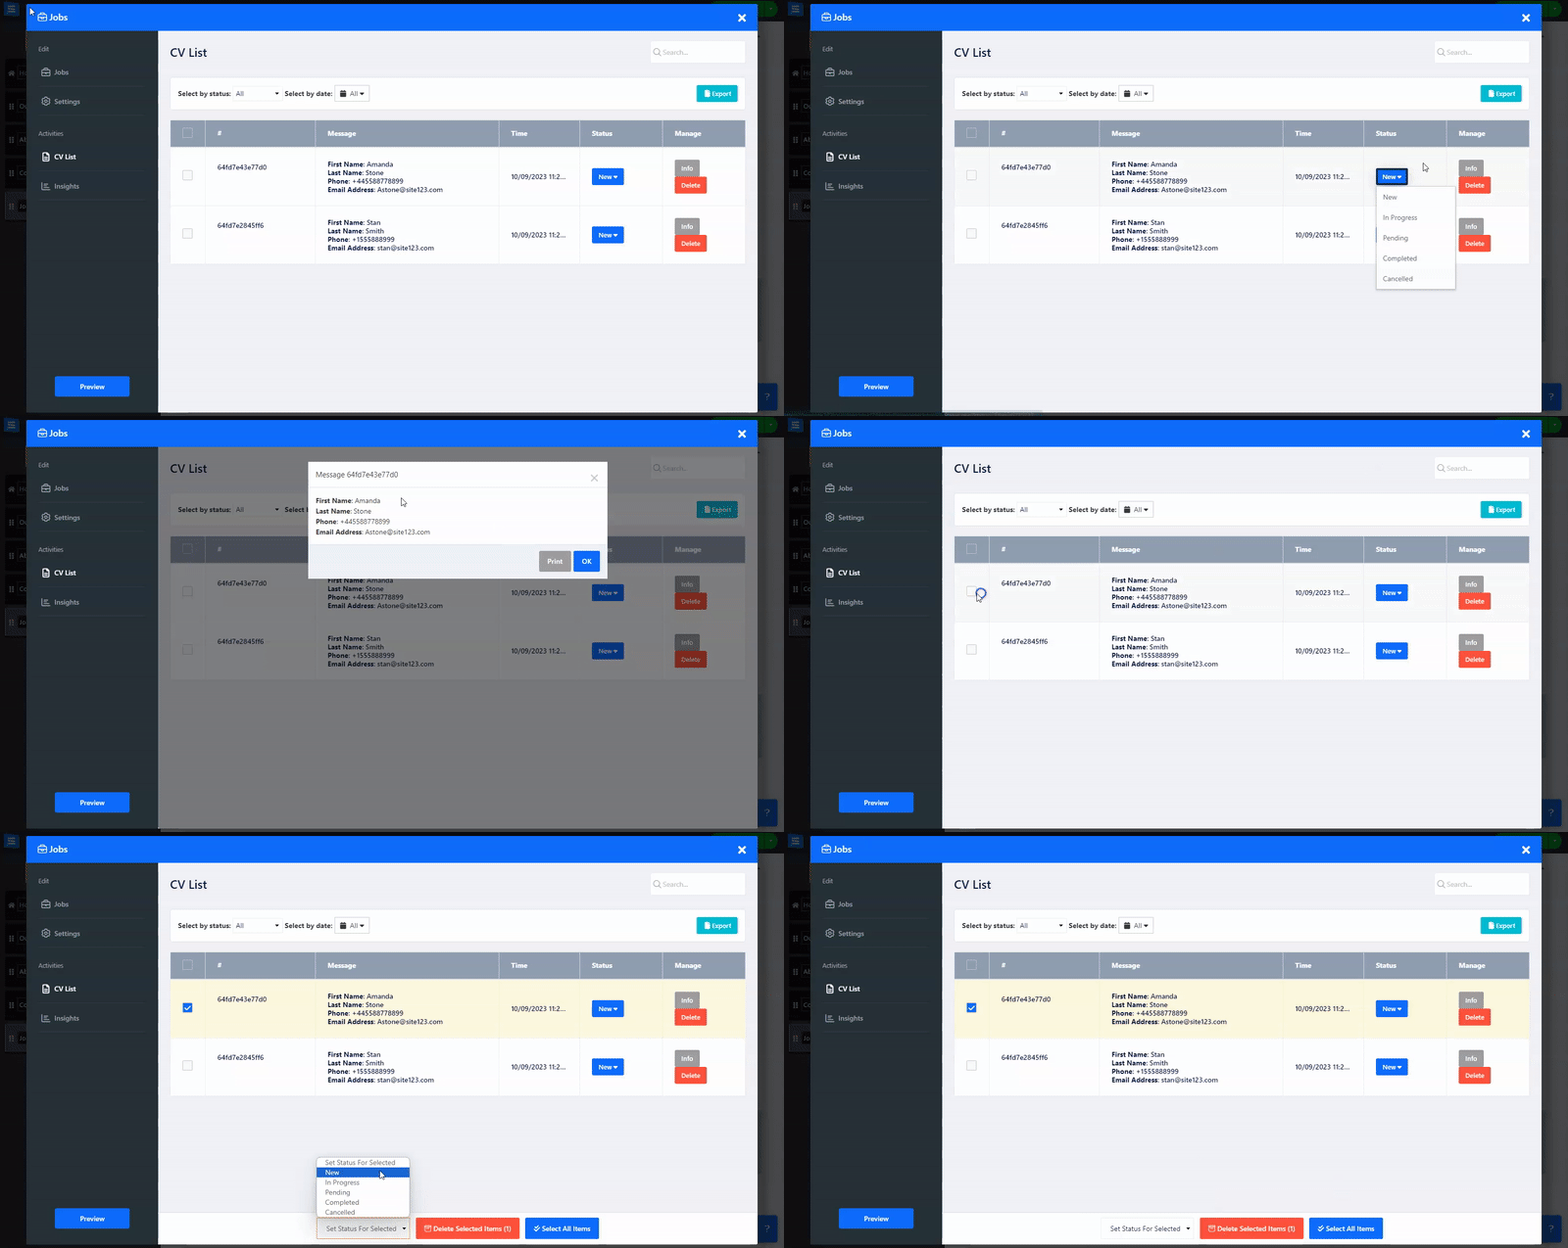
Under the CV List Tab, you will see a centralized view of all the candidates who applied for the positions that were published on your website. You can filter the received applications by Status, Date, and custom Tags, as well as export the list as a CSV file.
Application ID ( Hashtag sign) - When an application is submitted, it is assigned a string of numbers and letters. This is the order ID. You can use this ID to search for specific applications in the page search bar. Placing your mouse cursor over the application ID will prompt the Add tag option.
Add Tag - Place your mouse cursor over the Application ID, and you will be given the option to create a customized tag to accompany your application. This will allow you to further categorize your application by adding information relevant to you and your business, such as the Position Number or name. Use the color options to color code your tags, allowing you to quickly identify tagged applications in your list.
Message - The table will present you with basic information about the application, such as the candidate's name, email, and phone number. If using the default form you will also have the option to view attachments.
Time- Displayed the date and time of the submitted application.
Status - Displays the current status of the application. You can change the status by clicking the status and selecting the relevant status from the list choose from New, In progress, Pending, Completed, and Cancelled.
Manage- Under this column, click Info to view more detailed information about the application, or click Delete to remove the application from the list.
Use the export option at the top of the order screen to export your current Application list in CSV format.
